
The simulator base, floor, and cockpit enclosure provide a stable foundation for all the major components to affix to. It also adds a sense of immersion allowing you to feel you are sitting “in” something rather than out in the open air.
Cockpit Base
Construction
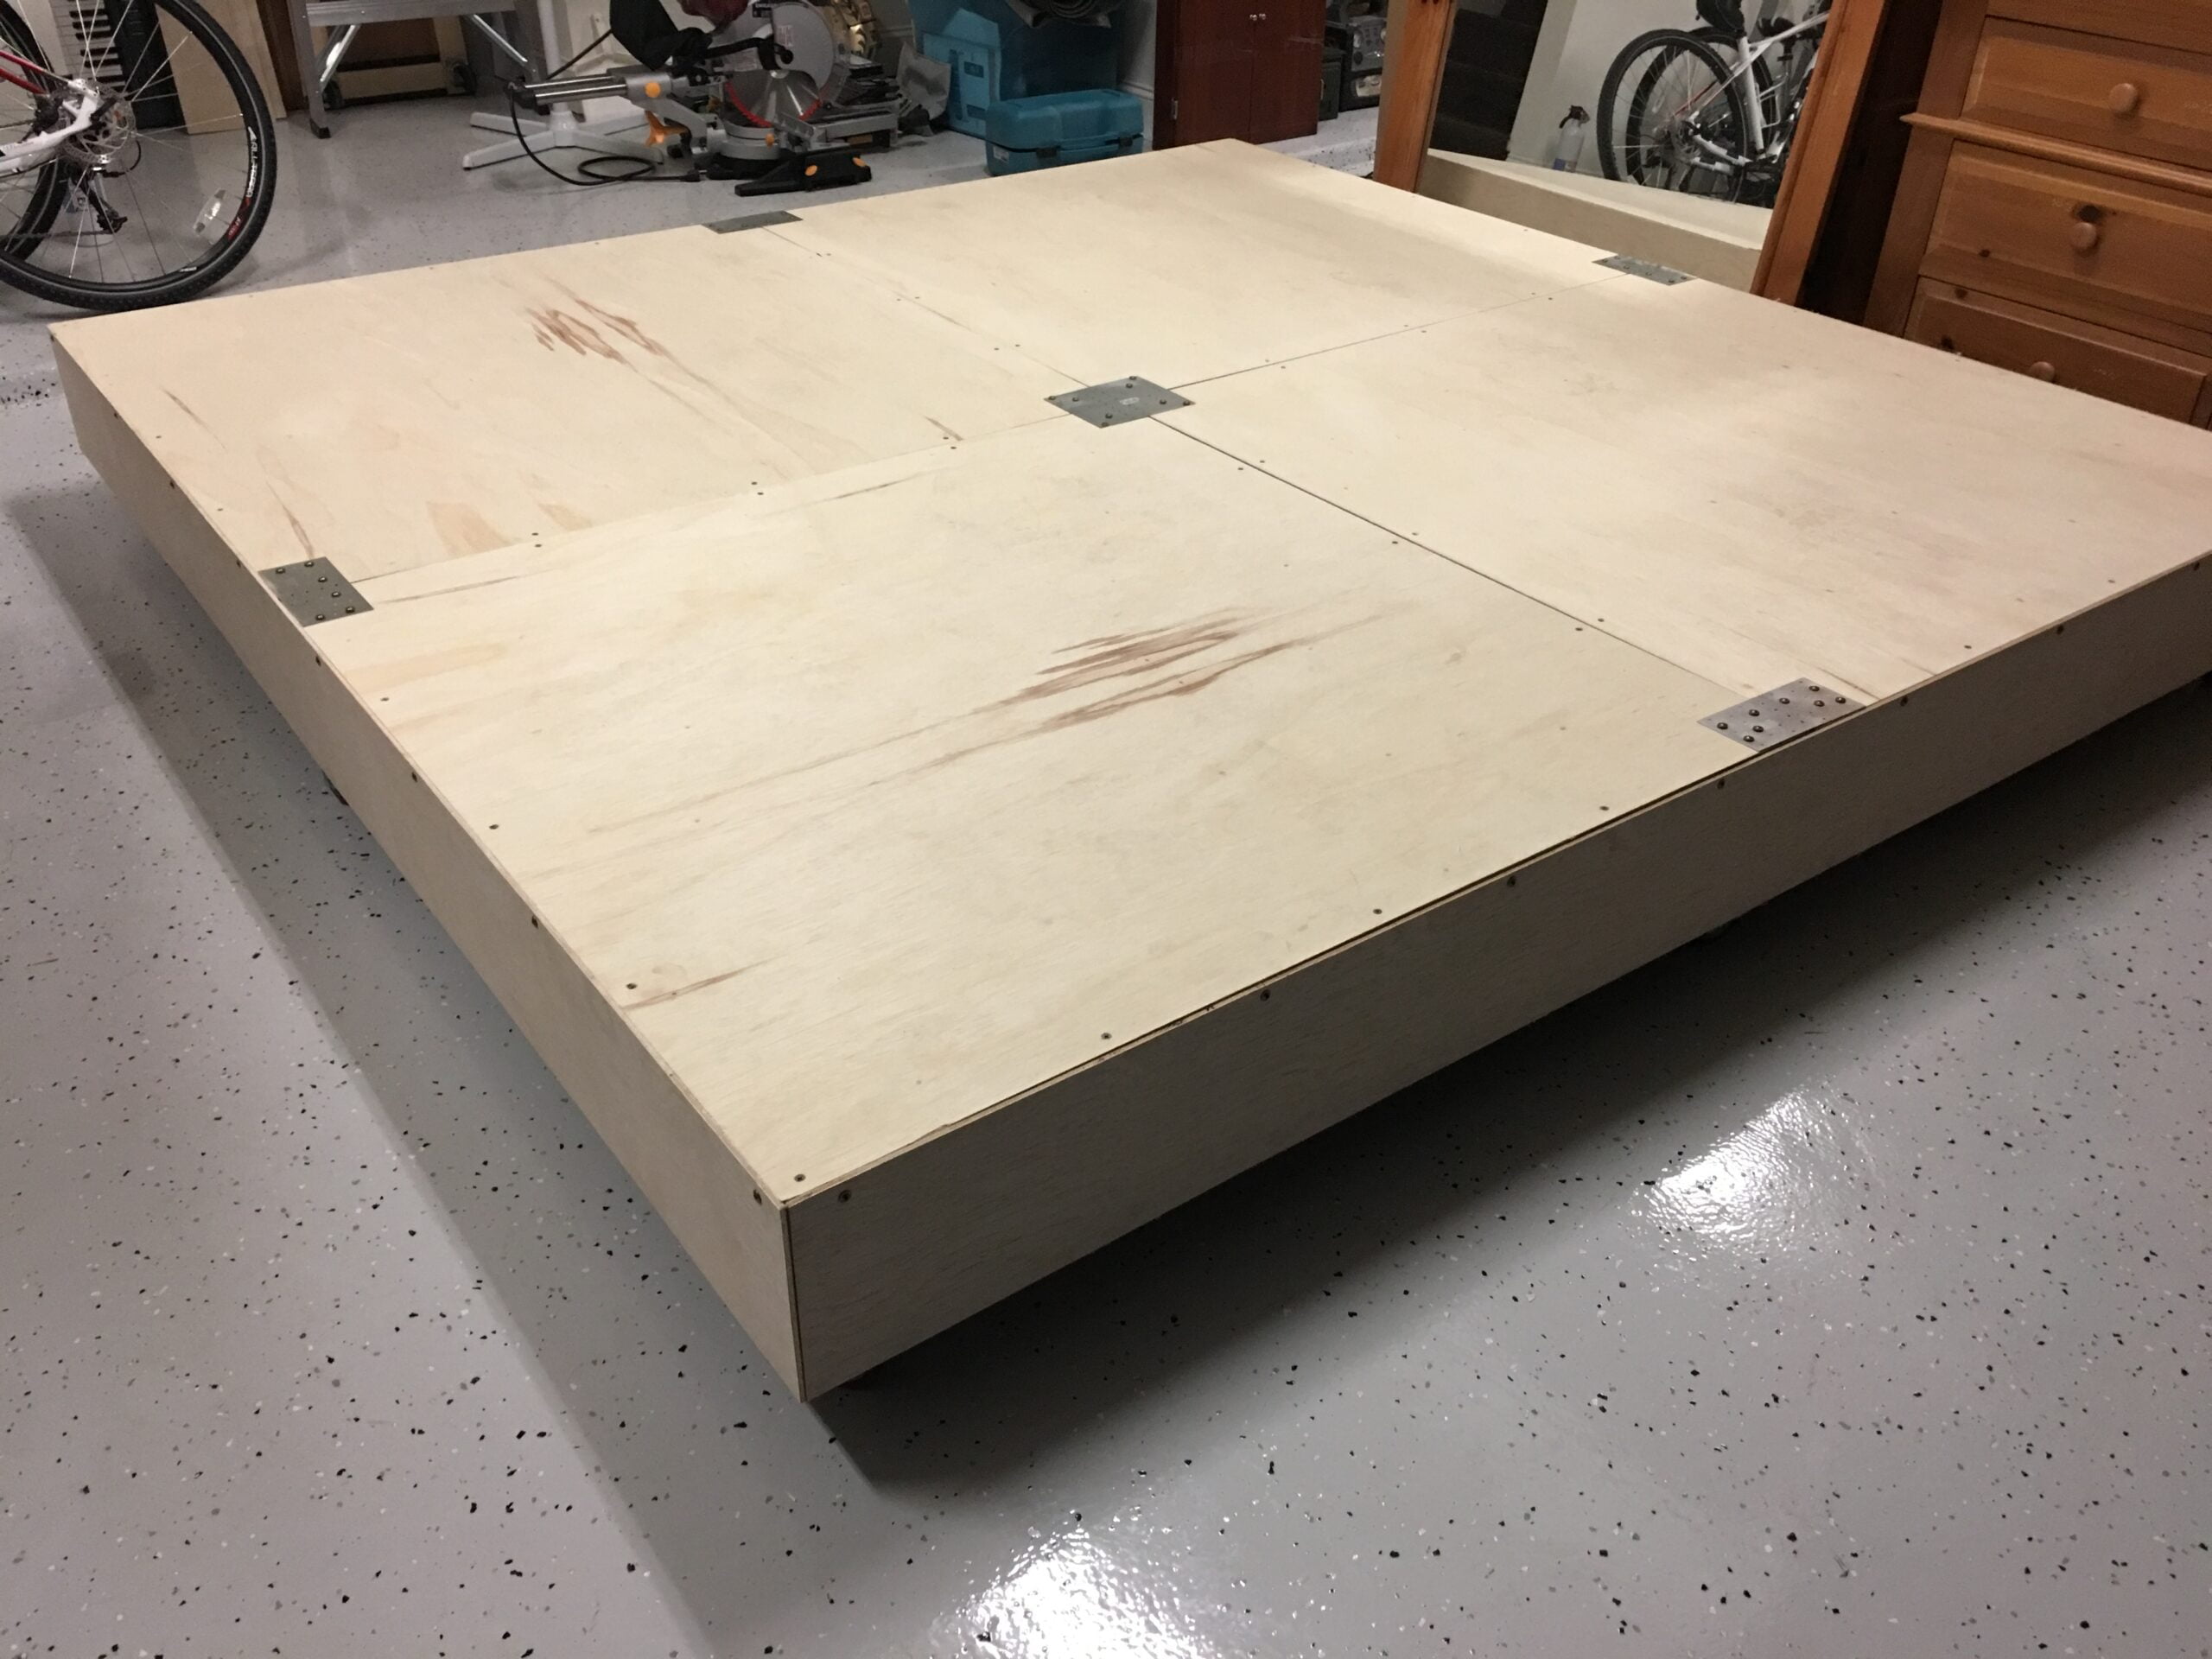
The base was home-built, comprising of four sections, each 4 foot x 4 foot. I did this to get the base in the house in sections. Later that turned out to be unnecessary as it ended up in the garage. In the end, it also turns out an 8 foot wide x 7 foot long base would have been more appropriate to fit the shell perfectly.
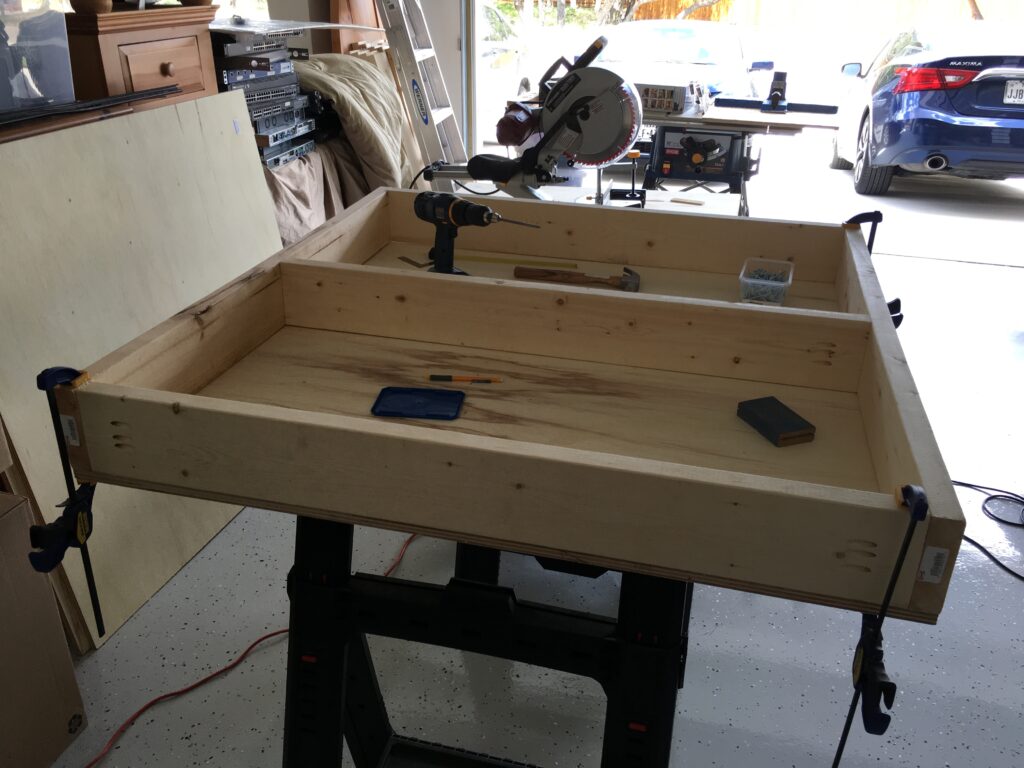
I made each section using 2″ x 6″ wood sides topped with a 1/2 ” pre-sanded plywood floor. It’s more expensive, but trust me, it’s worth it! I used a Kregg pocket jig which makes creating right angle wood joints easy and solid with no glue needed.
One thing VERY important is finding straight wood otherwise you’ll have alignment problems when it all comes together. I was careful to select the best wood I could find at Home Depot. Unfortunately, even the best pieces may warp with humidity and temperature so be prepared. Use lots of clamps to keep things accurate when you join your pieces.
Once I built the first section, I was able to learn from my mistakes and make the remaining sections were much better. So 3 of the 4 sections lined up almost perfectly. The fourth, well, I can live with the minor variances.
Wheels
I’d recommend putting locking castor wheels underneath your base so you can easily roll the entire cockpit base and shell around, which I often have to do for maintenance and cleaning. Don’t lock yourself into one position on the floor if you can avoid it.
To create mounting points for the wheels, I put blocks at the bottom corners of each section to support the 3-inch locking castor wheels. In some areas I extended the blocks out past the edges to create a lip for the other sections to rest on. Thus, two sections had wheels all around, and the other two had wheels only on one side. This created 9 wheels…one on each corner, one at the halfway point along each side, and one in the center.
Each wheel can hold up to 300 pounds so 2700 pounds of weight total. More than enough. Standing on the base, it is quite solid.
I joined the four main sections with screw plates, one at each halfway point along the sides, and one in the floor center to keep all the pieces together. That plate will be under the pedestal so not visible. Along the sides, I screwed in “skirt” pieces of thin plywood to make the sides look cleaner and more finished.
What I’d do different
If I were to re-do the base in wood, I’d just build it as one piece versus four sections and I’d ensure I had a good place for under-floor yokes at a later point. I’d also put larger castor wheels to make it easier to roll around, even though it’s honestly not that bad now.
What’s next?
I am planning to build a new one-piece base designed to accommodate an under-floor yoke mechanism with control loading for force feedback.
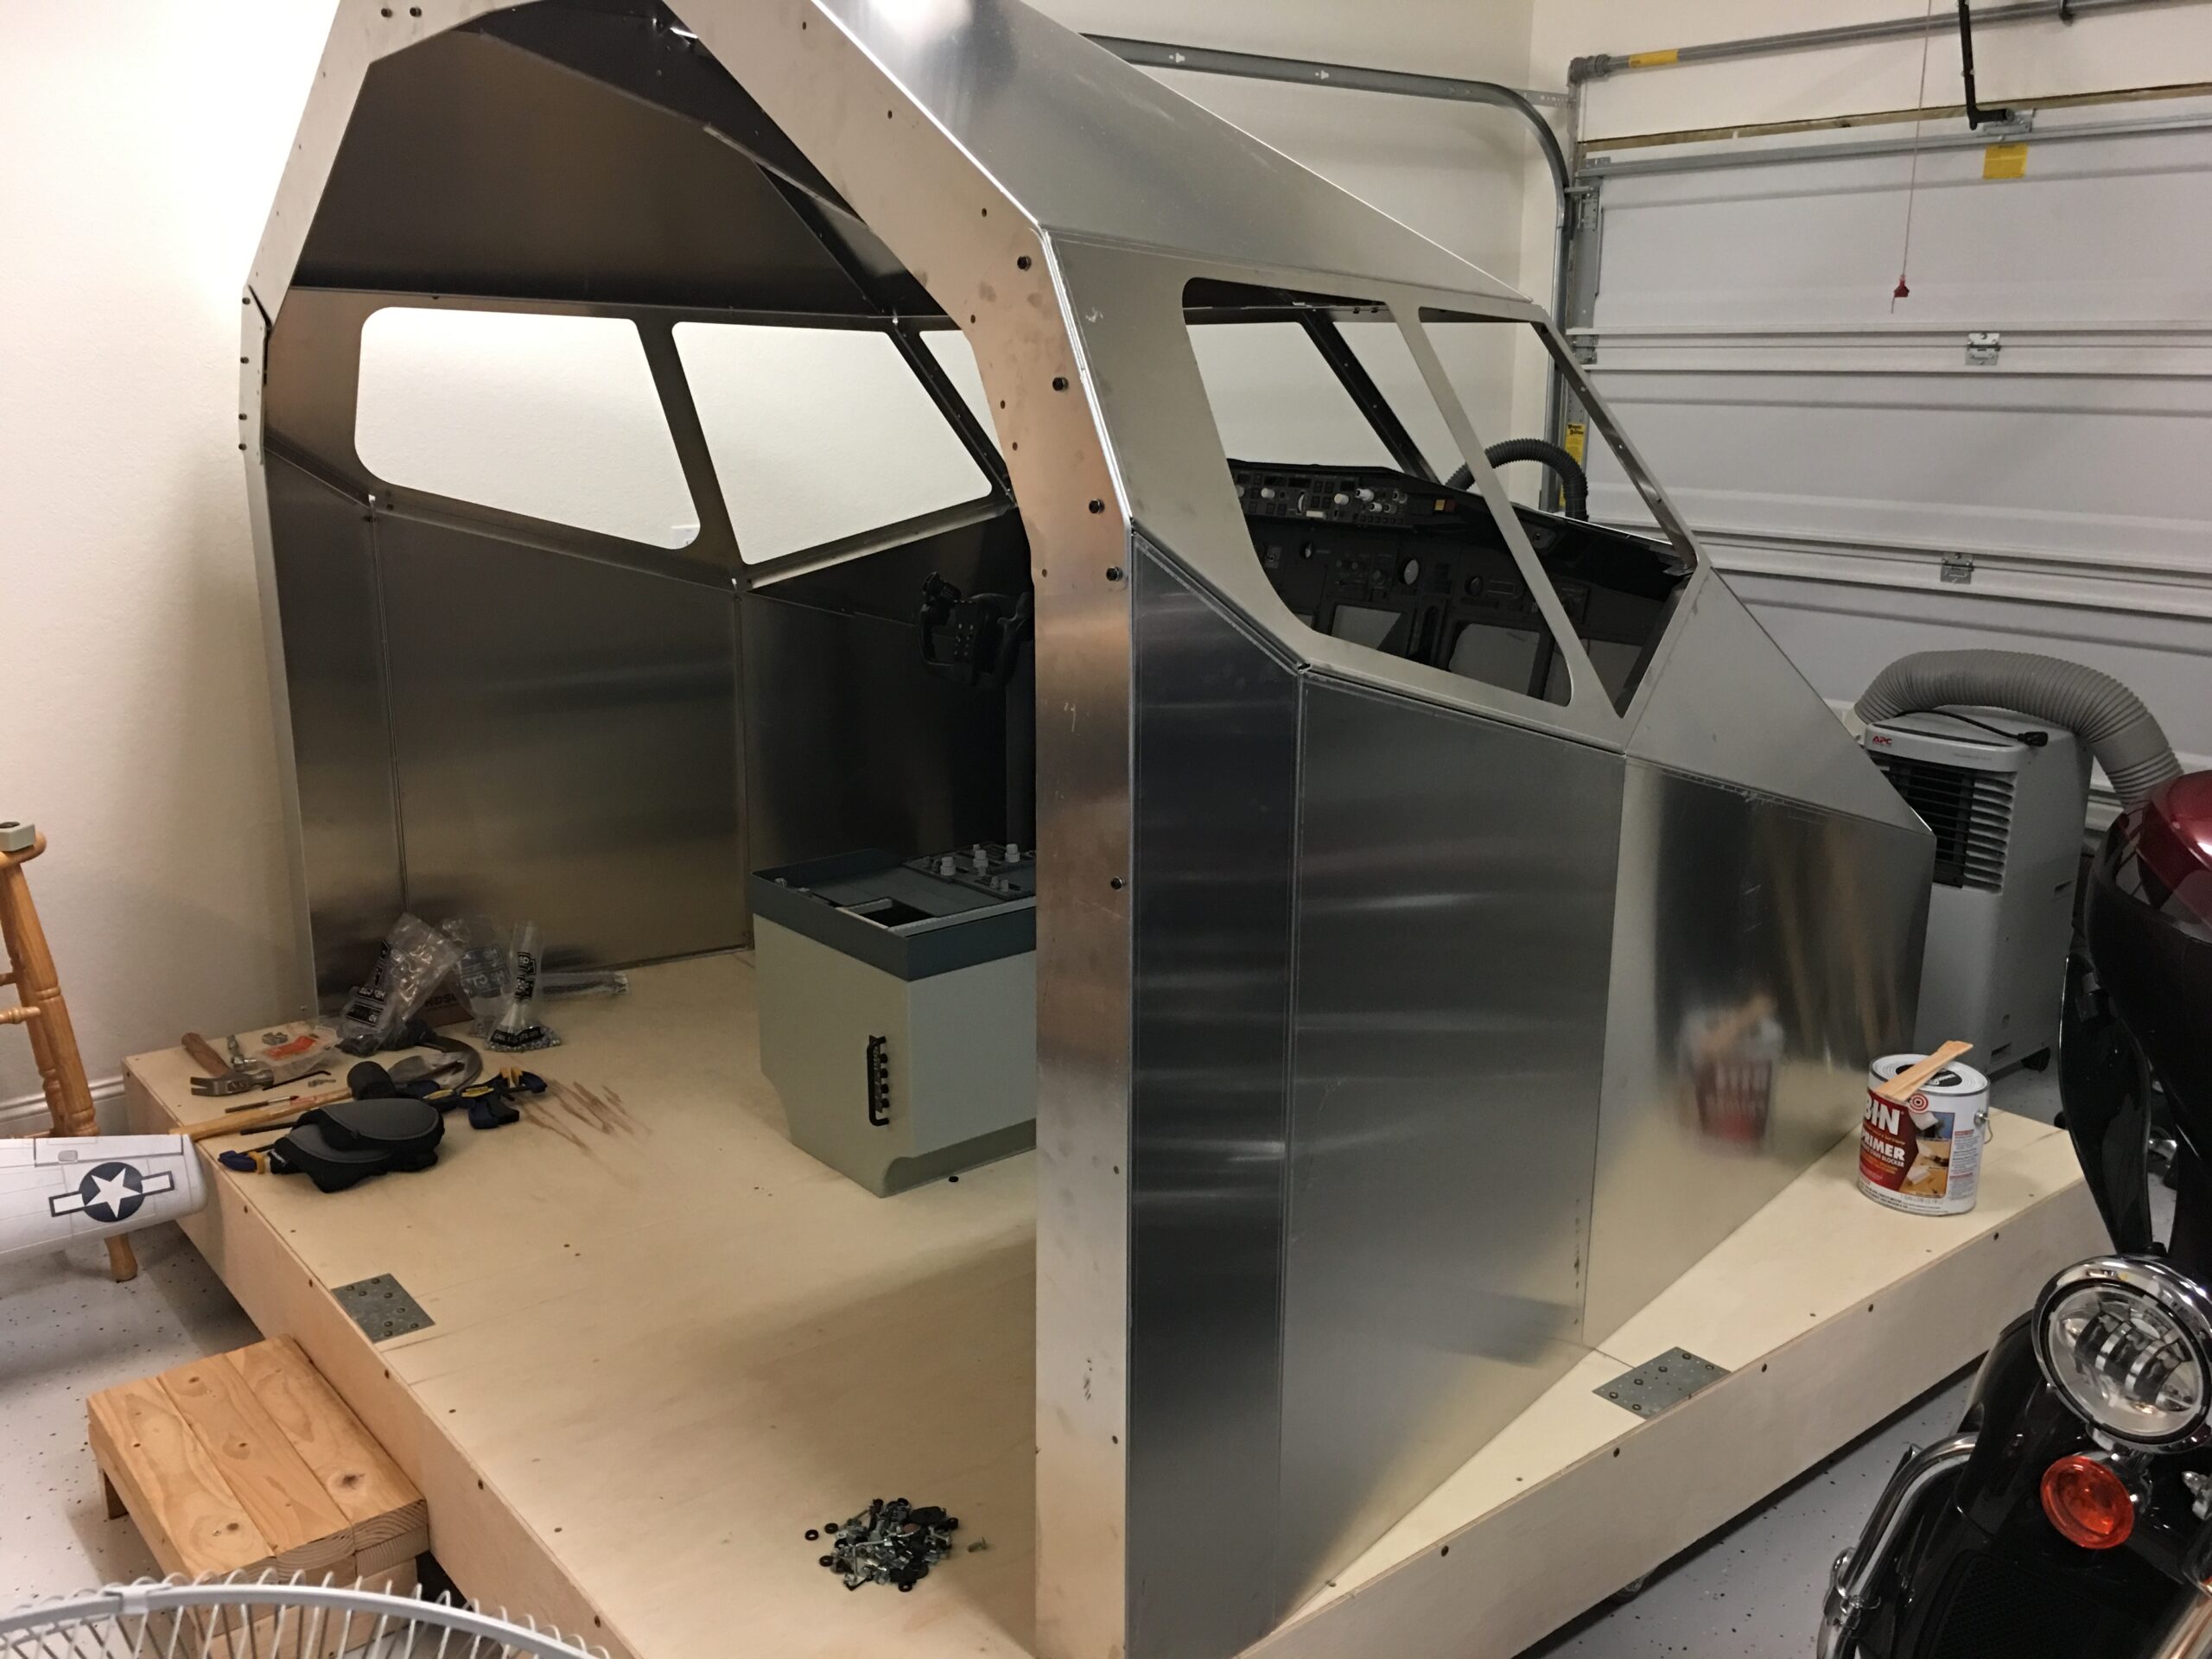
Cockpit Shell Enclosure
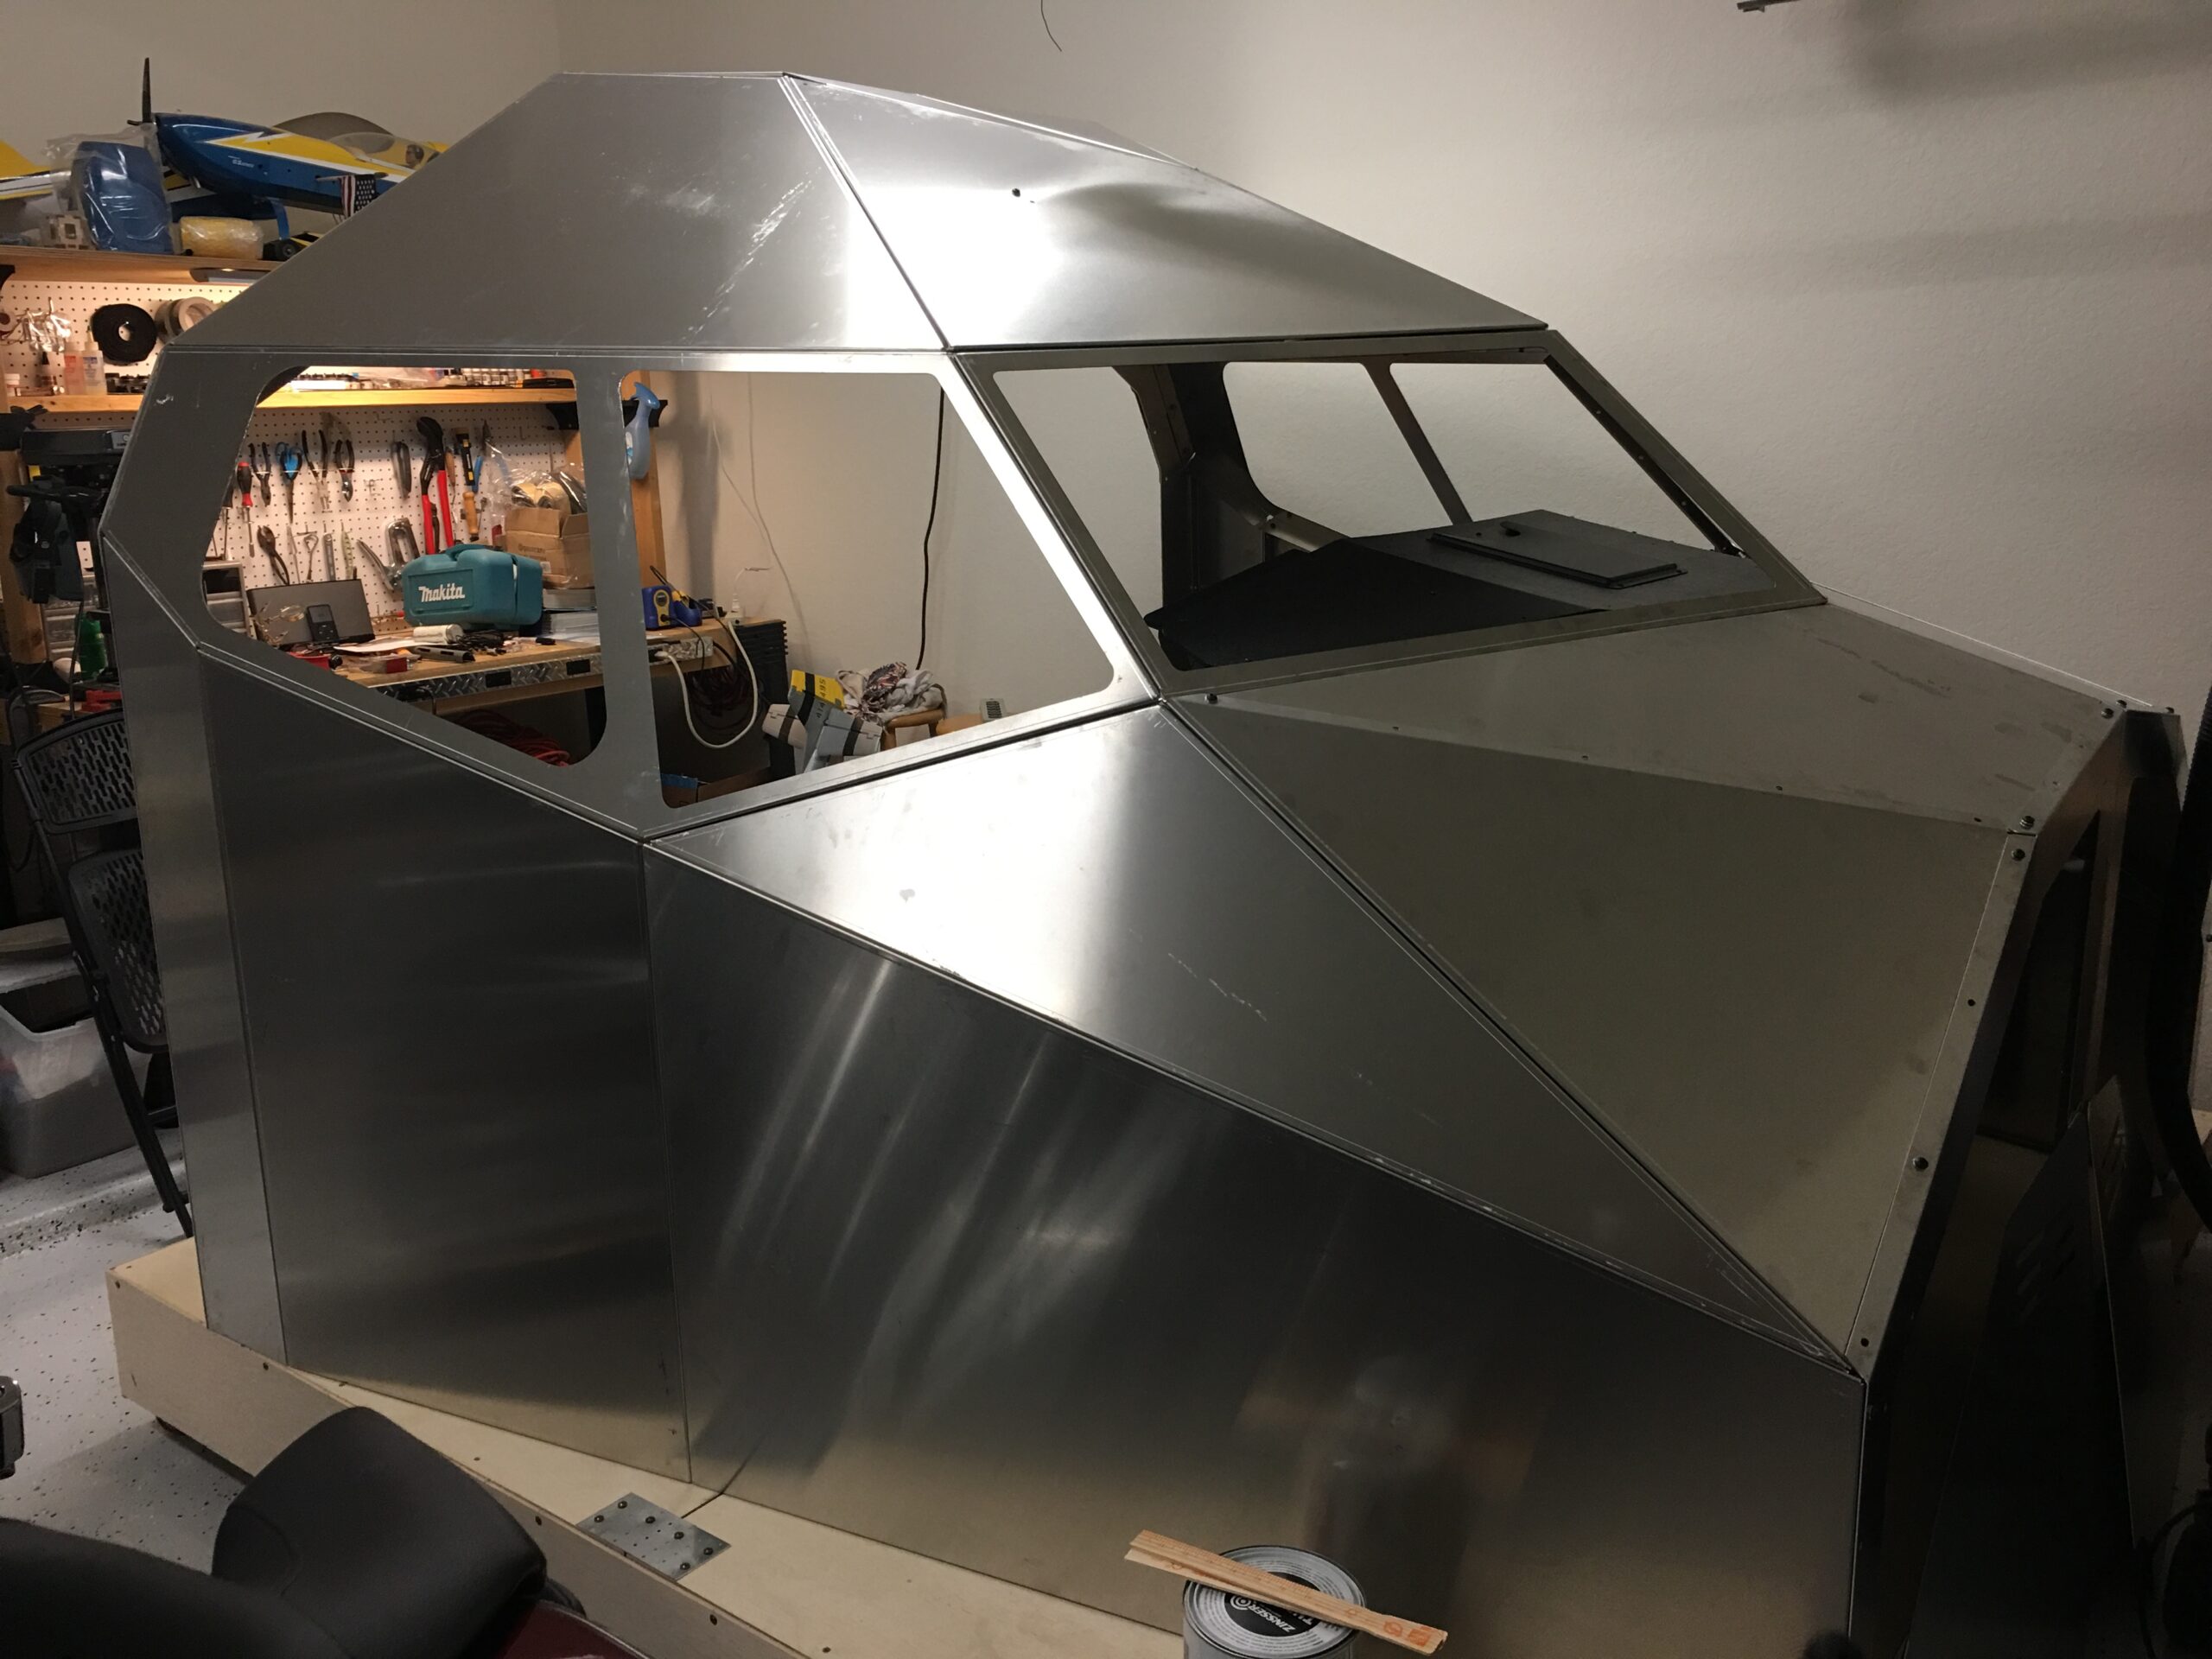
I purchased the cockpit shell from FlightDeck Solutions (FDS) in Canada. It consists of around 50 angular shaped flat pieces of aluminum that bolt together to form a “Darth Vader” looking shell. While it doesn’t look exactly like a 737 nose section that is not the point. The shell is designed to support the placement of the important interior parts, and that’s all I cared about since I wouldn’t be flying the sim from the outside. Still, I have to admit, it’s a cool looking shell that does add a sense of wow factor to the sim.
The cockpit shell ships in a large rectangular box on a single shipping pallet to keep shipping costs down. I found it fairly easy to assemble and disassemble with simple tools. There is certainly a lot of solid engineering that has gone into this shell.
Personally, I highly recommend this shell if you’re planning a true 737 build. It makes a huge difference in how the sim feels from the inside. As my friend put it, it makes your project suddenly become “real”. It’s now not just a collection of parts, but something you can sit in and become a part of.
Quick tip: Make sure to buy the powder coated shell. Don’t make the mistake I did and purchase the bare aluminum version. You may end up regretting it later, trust me!
Final thoughts when building your home cockpit base and shell
There are a lot of enthusiasts sites that have done their cockpit base in different ways. Some have used aluminum or steel tubing and welded a frame together. Others, like me, have used wood. One of the most difficult challenges for me was figuring out where my flight controls should be positioned on the base. This is important if you plan on mounting your control columns under the floor like the real aircraft. It may not be until you have everything mounted that you’ll be able to determine that. If you ask around, I’m sure you can find an approximate answer, but sometimes that’s not good enough. Bottom line, try to plan it out as best you can before you build. It’s very difficult and time-consuming to tear everything down if you want to re-do it later.
When it comes to a cockpit shell, I recommend FlightDeck Solutions’ shell because it’s easy to work with and can be broken down pretty easily should you ever need to move or sell it. Other sim parts vendors sell cockpit shells made of fiberglass, or similarly out of aluminum. Keep in mind if you plan to use real aircraft interiors there’s likely no perfect solution other than the real aircraft shell. So make sure whoever you buy the shell from also has matching interior linings to your satisfaction so everything fits the way it should.
Cockpit Base and Shell Photo Gallery


11 comments
Skip to comment form
I can’t see how you possibly can fit the 737 ceiling as it should be since it is arched in reality, not flat sides and left side is quite different from right side. I hope the height above floor of the rear end of the rear overhead panel and distance from MIP is Boeing specifications. The reason I speculate is I am considering buying one myself for a 737 max project.
Your article is excellent and inspiring, thank you!
Author
Thanks for your kind words!
Honestly I haven’t compared the real dimensions to my shell/interior. I trust FDS has spent the time to make sure it’s close and based on my little bit of experience in the real aircraft cockpit, it feels about right. Now, if I were to break out a ruler and measure every exact dimension against a real aircraft I’m sure I could find things that don’t match exactly one for one. I can live with that. The nice thing is it went together easily, it’s solid, and if I have to tear it down it’ll come apart easy and can be easily transported or sold. Something to be said about that.
The interior is a very simple representation of the real thing and does curve where it’s supposed to. But not every exact curve, cutout and detail is modeled. The ceiling panels are basically flat sheet, bent to curve where it should, with some simple details but none of the complex moldings of the real overhead. Nor do the ceiling halves look different, as you mentioned. But how much time do you really spend looking at those things? Still, it would be nice to have them eventually, so I’m adding additional cockpit details in myself as time goes on (cup holders, map pockets, window handles, etc). That’ll have to do.
Overall, I don’t regret my purchase. Do I wish there was more detail in the interior, yes. Has the lack of them reduced my enjoyment of my sim, hardly.
Thanks again for your comments!
And since it’s my own cockpit I am free to modify the aluminium sheet if I like. I agree with your viewpoints. I guess I won’t need to buy interior moldings from FDS either but build them myself. I’m that of a handyman 🙂
How did you drill the yokes into the platform? Dimensions of the hole size?
Author
Hello, these are surface mount ACE yokes. No holes had to be drilled so I don’t have an answer for you, I’m afraid.
I am in the process of sourcing real yokes, at which point I will have to figure out how to mount them underneath the base and size the holes accordingly. I’m sure I’ll post about that in a later article.
Did you buy or make interior liners? will you post any pictures of those?
Author
Hello Mitch, the liners are from FlightDeck solutions. I bought them new off someone who never used them. They’re not bad. Not nearly 100% accurate, but approximate. You can spruce them up from there with more detail. Unfortunately I don’t have any detailed pictures of them beyond what you see on the cockpit shell page photos section. If you want anything specific, I can try to take some closeups. Just let me know.
Hi was very impressed with your article, can I ask whet the height, length and width of the cockpit is ,so I can determine if it will fit in my garage
Regards
Johnny
Author
Hi, my FDS 737 cockpit shell is 8ft wide by 7ft long by 7ft high. I’d add to that at least an additional 12-16 inches in height to account for a base.
Hope that helps!
What are the dimensions of the shell please
Regards
Johnny
Author
Hi Johnny. The dimensions I gave you are what you’d need to size out a space, per your original request. For further shell dimensions, I’d direct you to FDS. You might also check out Markuspilot.com for real cockpit dimensions, which should help you with proper placement of cockpit components per the real aircraft.