
Here you’ll find information about the Boeing 737-800 overheads and links to my different FWD and AFT overhead builds. I am on now on version 2 of my overheads.
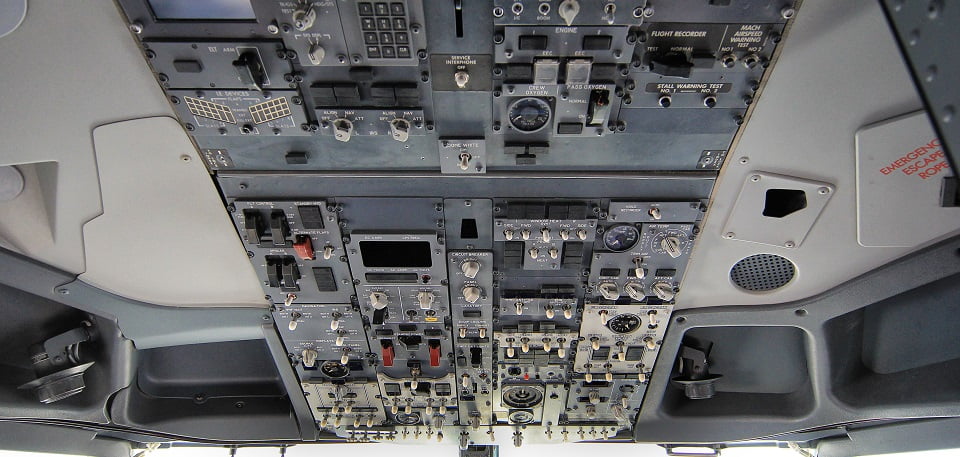
Real Boeing 737 Overhead
What are cockpit Overheads?
The cockpit overhead is located exactly where you’d think…above the pilots heads. Most, if not all, commercial aircraft have an overhead. They serve various purposes depending on the aircraft. Generally, they provide access to aircraft external lighting and critical aircraft operating systems.
An engineer managed these systems on older aircraft from a console behind the pilots. As airlines modernized, aircraft became more automated and cost efficient so the engineer position was no longer necessary. The engineer functions became integrated into the various displays and overhead panels now available to the pilots.
The Boeing 737-800 (and all Boeing 737’s for that matter) have both a Forward (FWD) overhead and Aft (AFT) overhead. These are used to control and manage vital systems of the aircraft. This includes the fuel, hydraulic, pressurization, electrical, air conditioning/heating systems, external lighting, some navigational functions, and others.
The overhead is used primarily during startup, shutdown and emergencies. It is a critical piece of hardware that you’ll eventually want in your cockpit to accurately simulate real-world ops. You’ll also probably agree it’s one of the coolest parts of the 737 cockpit.
Here is a photo from a real 737-800 I took while visiting a maintenance hangar:
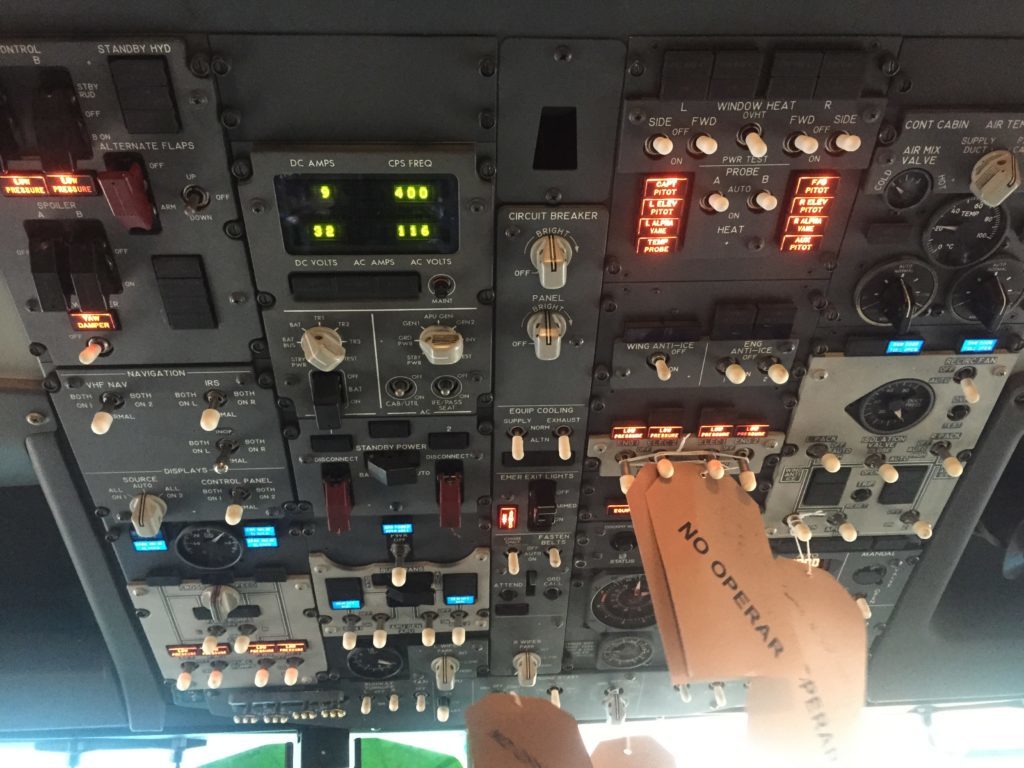
Real Boeing 737NG Overhead Undergoing Maintenance
I liken the overhead to a modern pinball machine with many lights, bells and whistles on the outside. Yet, very complicated inside. That makes it a a pleasure to look at and play with but a nightmare to work on!
So what are the options for building an Overhead?
While the overhead is extremely important, when you’re first building your sim this is probably something you’re going to have to live without for a while because it can be expensive to acquire. But when you’re ready, which route should you go?
You have many options available for overheads in your simulator. Depending on your desire for realism, your skill-level with building things, and your budget these options include:
- Using a virtual overhead, that is a monitor that you hang above the cockpit that displays a “virtual” overhead. Many fixed base airline trainers use virtual panels to cut down on cost but still keep things accurate. For this, you’ll want a large touchscreen to make the switches and knobs functional to the touch. This is probably one of the simplest, if not cheapest methods to recreate the overhead.
- Creating a scale printed/laminated overhead with switches and lights. Adding switches and lights to a board with a printed panel glued to it is the next best option. This is a little more complex because now you need to wire everything together and connect to interface boards. You don’t have to replicate every switch and dial, just the ones you feel are most important to you. Add more later as you get more comfortable.
- Building a full overhead from scratch. This is more expensive and complicated. You’ll have to buy the panels from reputable vendors then interface and wire it all up yourself. Don’t forget you’ll eventually need gauges and back-lighting!
- Buying a plug-and-play overhead. This is the easiest to implement, but the most expensive option. Looking back, I probably should have gone this route but I am a glutton for punishment!
What path did I choose?
I chose the option to build a full overhead from scratch. My requirements were that I wanted a fully functional overhead that looked and operated accurately, at the cheapest cost. Isn’t that what we all want? Plug-and-play options were too expensive, I thought, so I decided to build my own. I didn’t save as much as I thought I would at the end. More on that later.
I knew it would be a challenge, but boy was it ever! Building an overhead is a VERY time-consuming and tedious process. I didn’t know where to start, what parts were best, or how would I put it all together. There is no instruction manual so it required a lot of research.
This is where looking at other builders work was crucial. I watched lots of YouTube videos, looked at other builder web sites, and visited builder forums to get advice from those who have gone down this path. I researched whatever I could. No matter, each build is still unique enough that there were still plenty of headaches and re-dos. However, with patience and experimentation it all eventually came together.
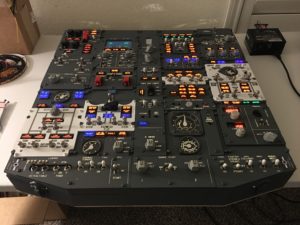
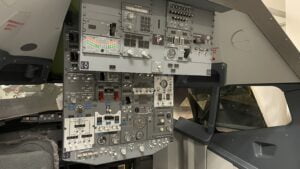
My Overhead Builds
The overhead versions linked below I built from scratch but in very different ways using different components. Both of them should give you some good ideas on ways to build yours.


Hi, if you mean the two rails that run from front to rear and the cross strut, yes those came…