
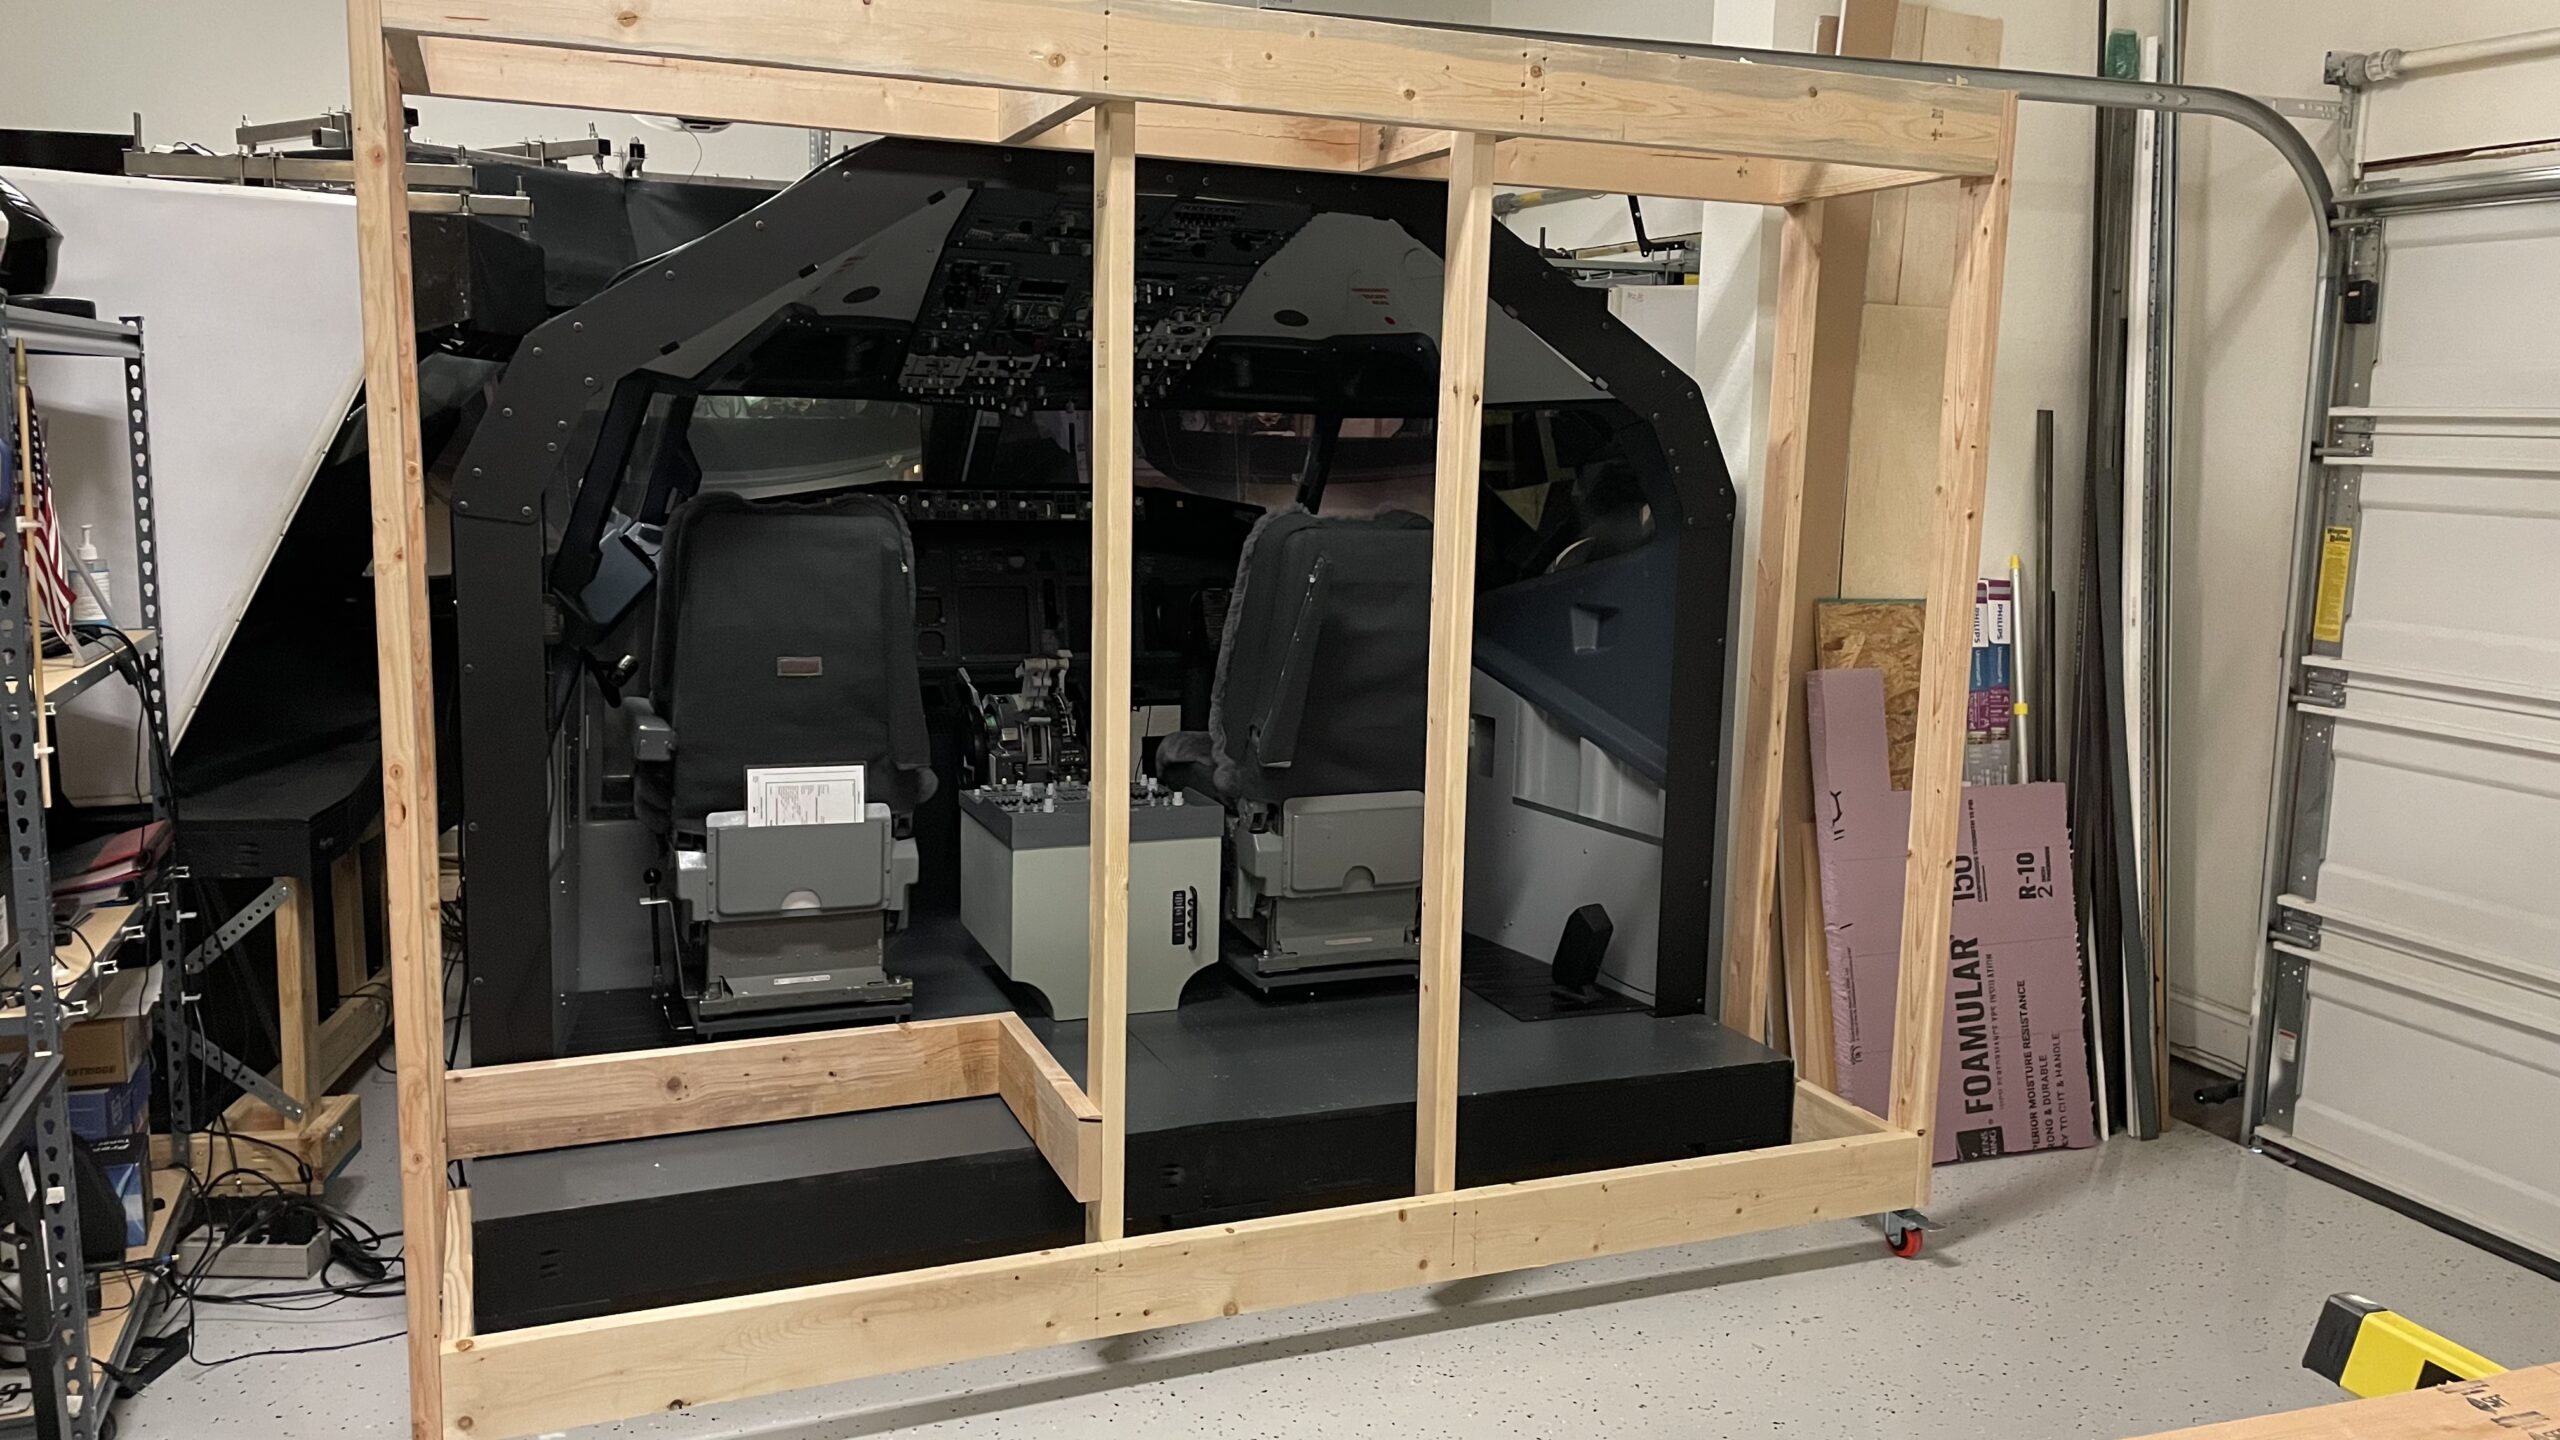
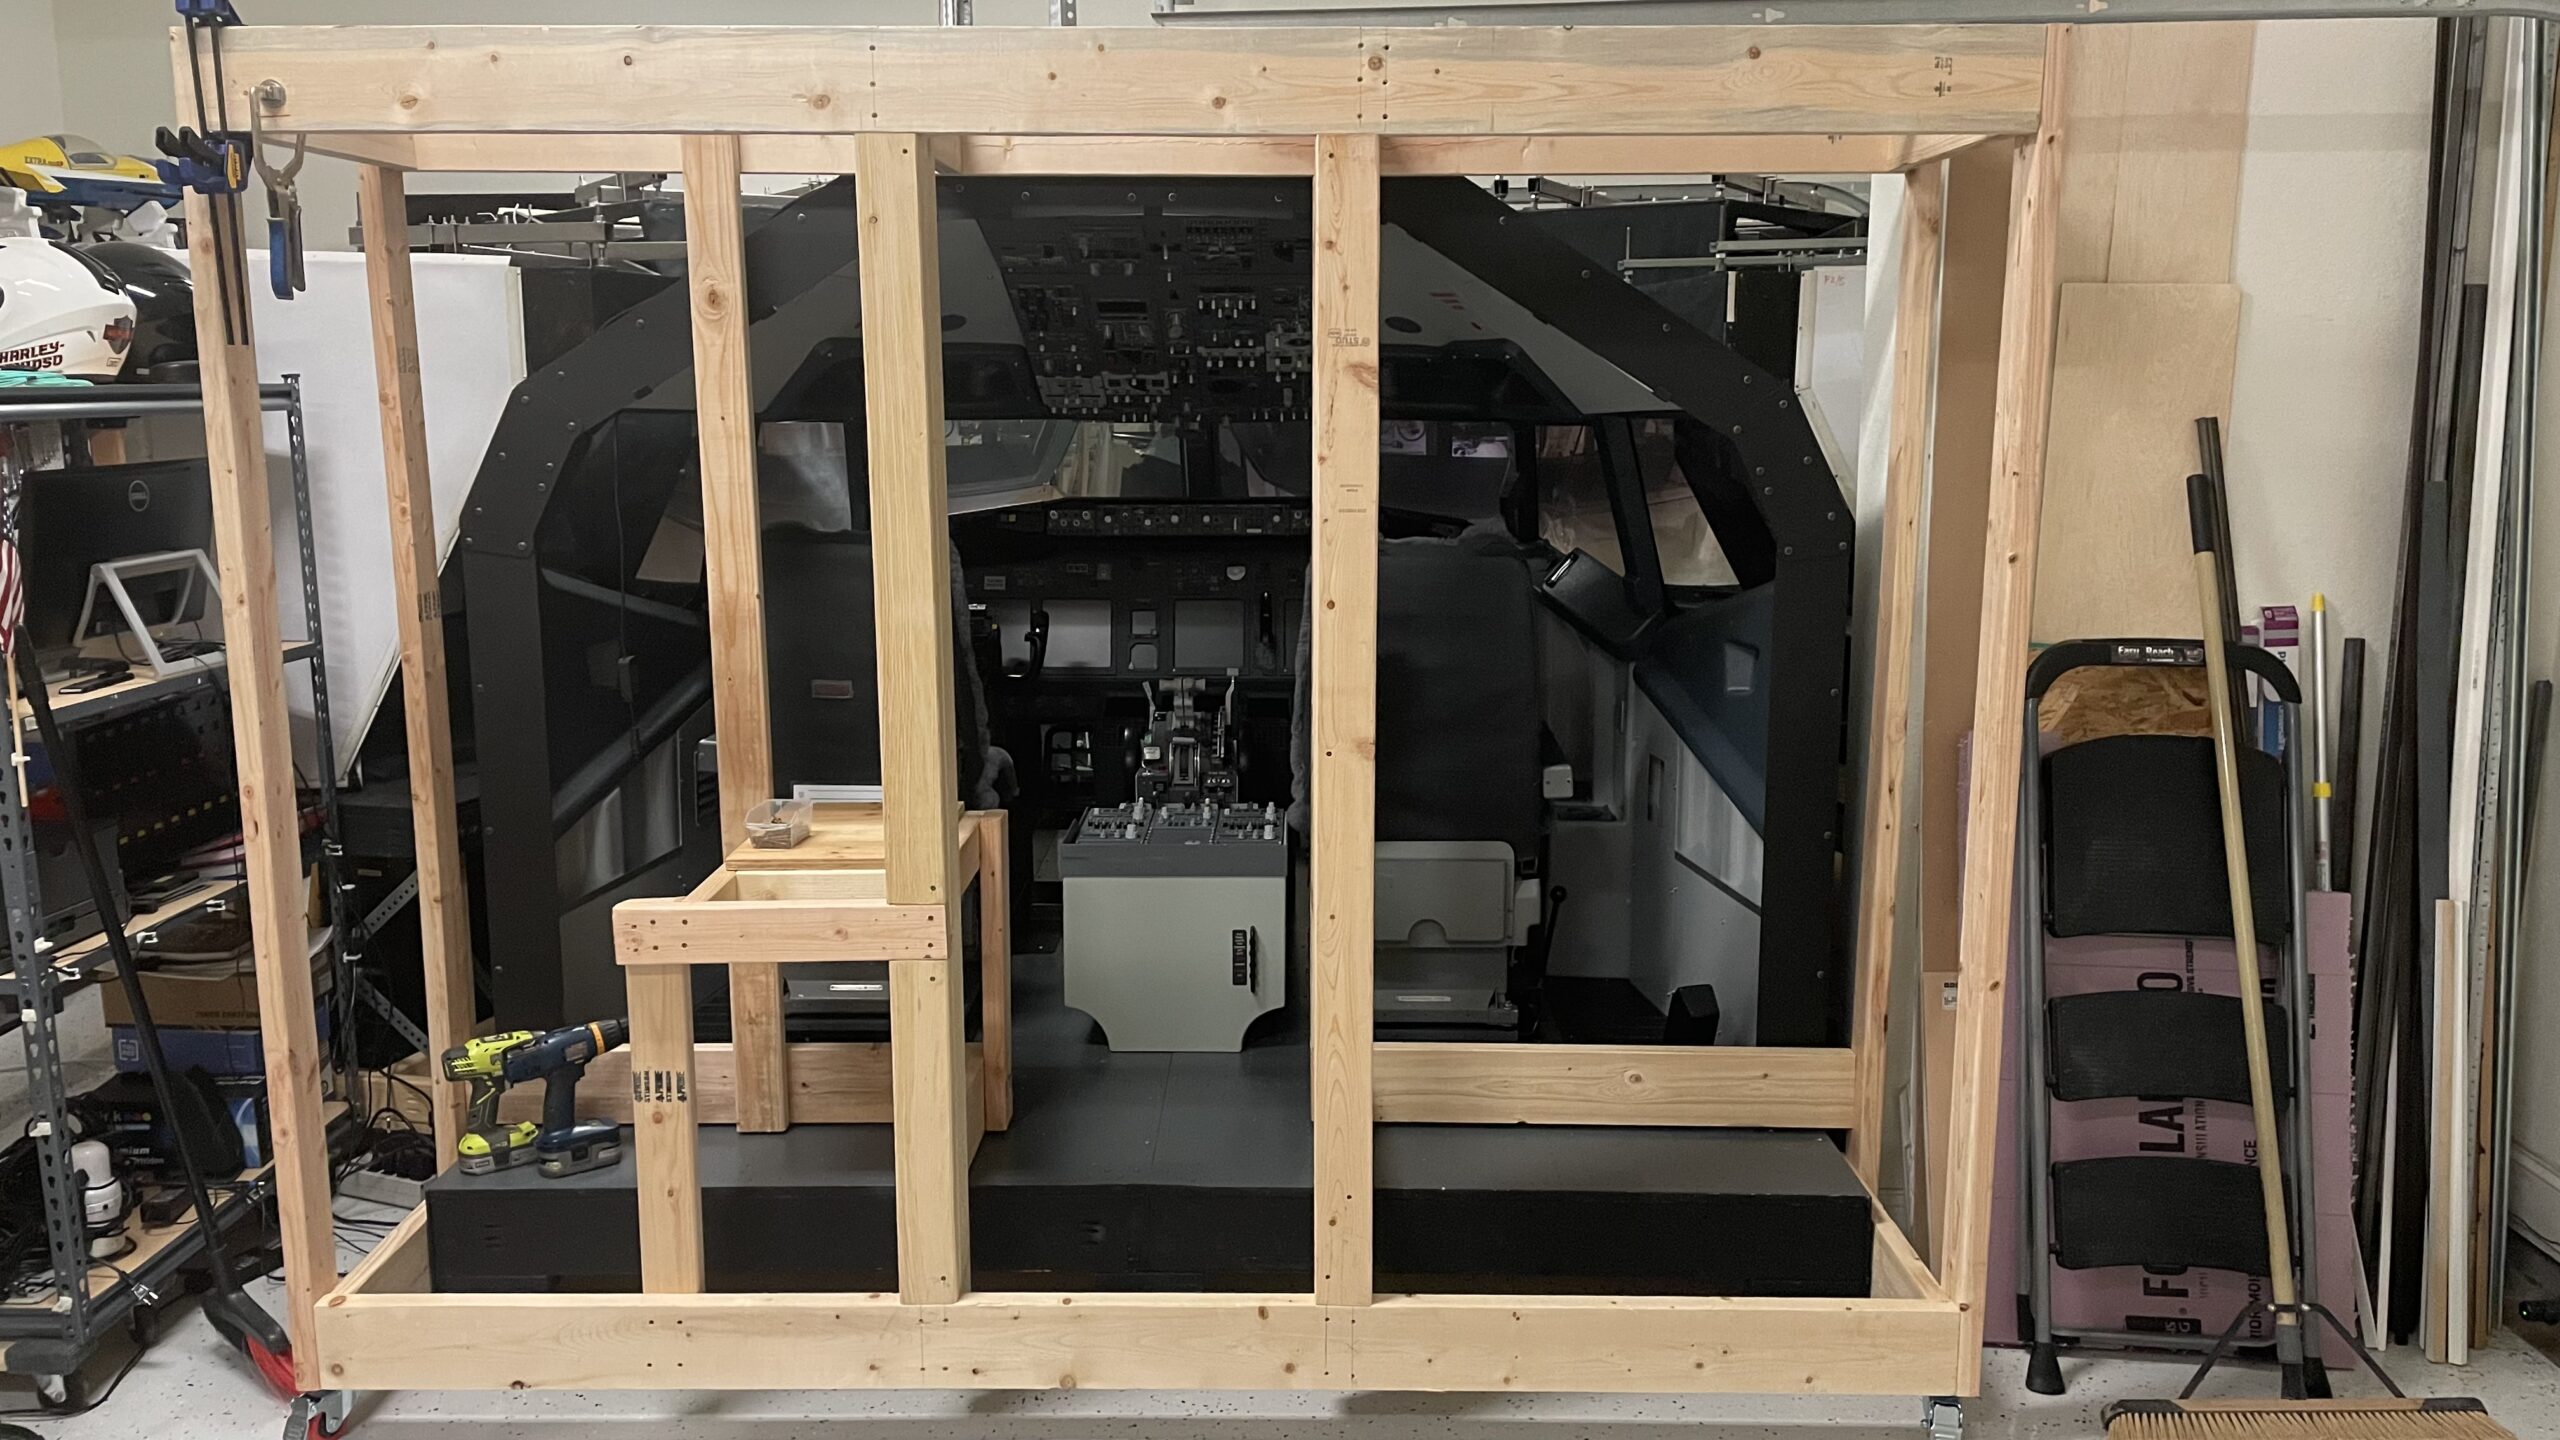
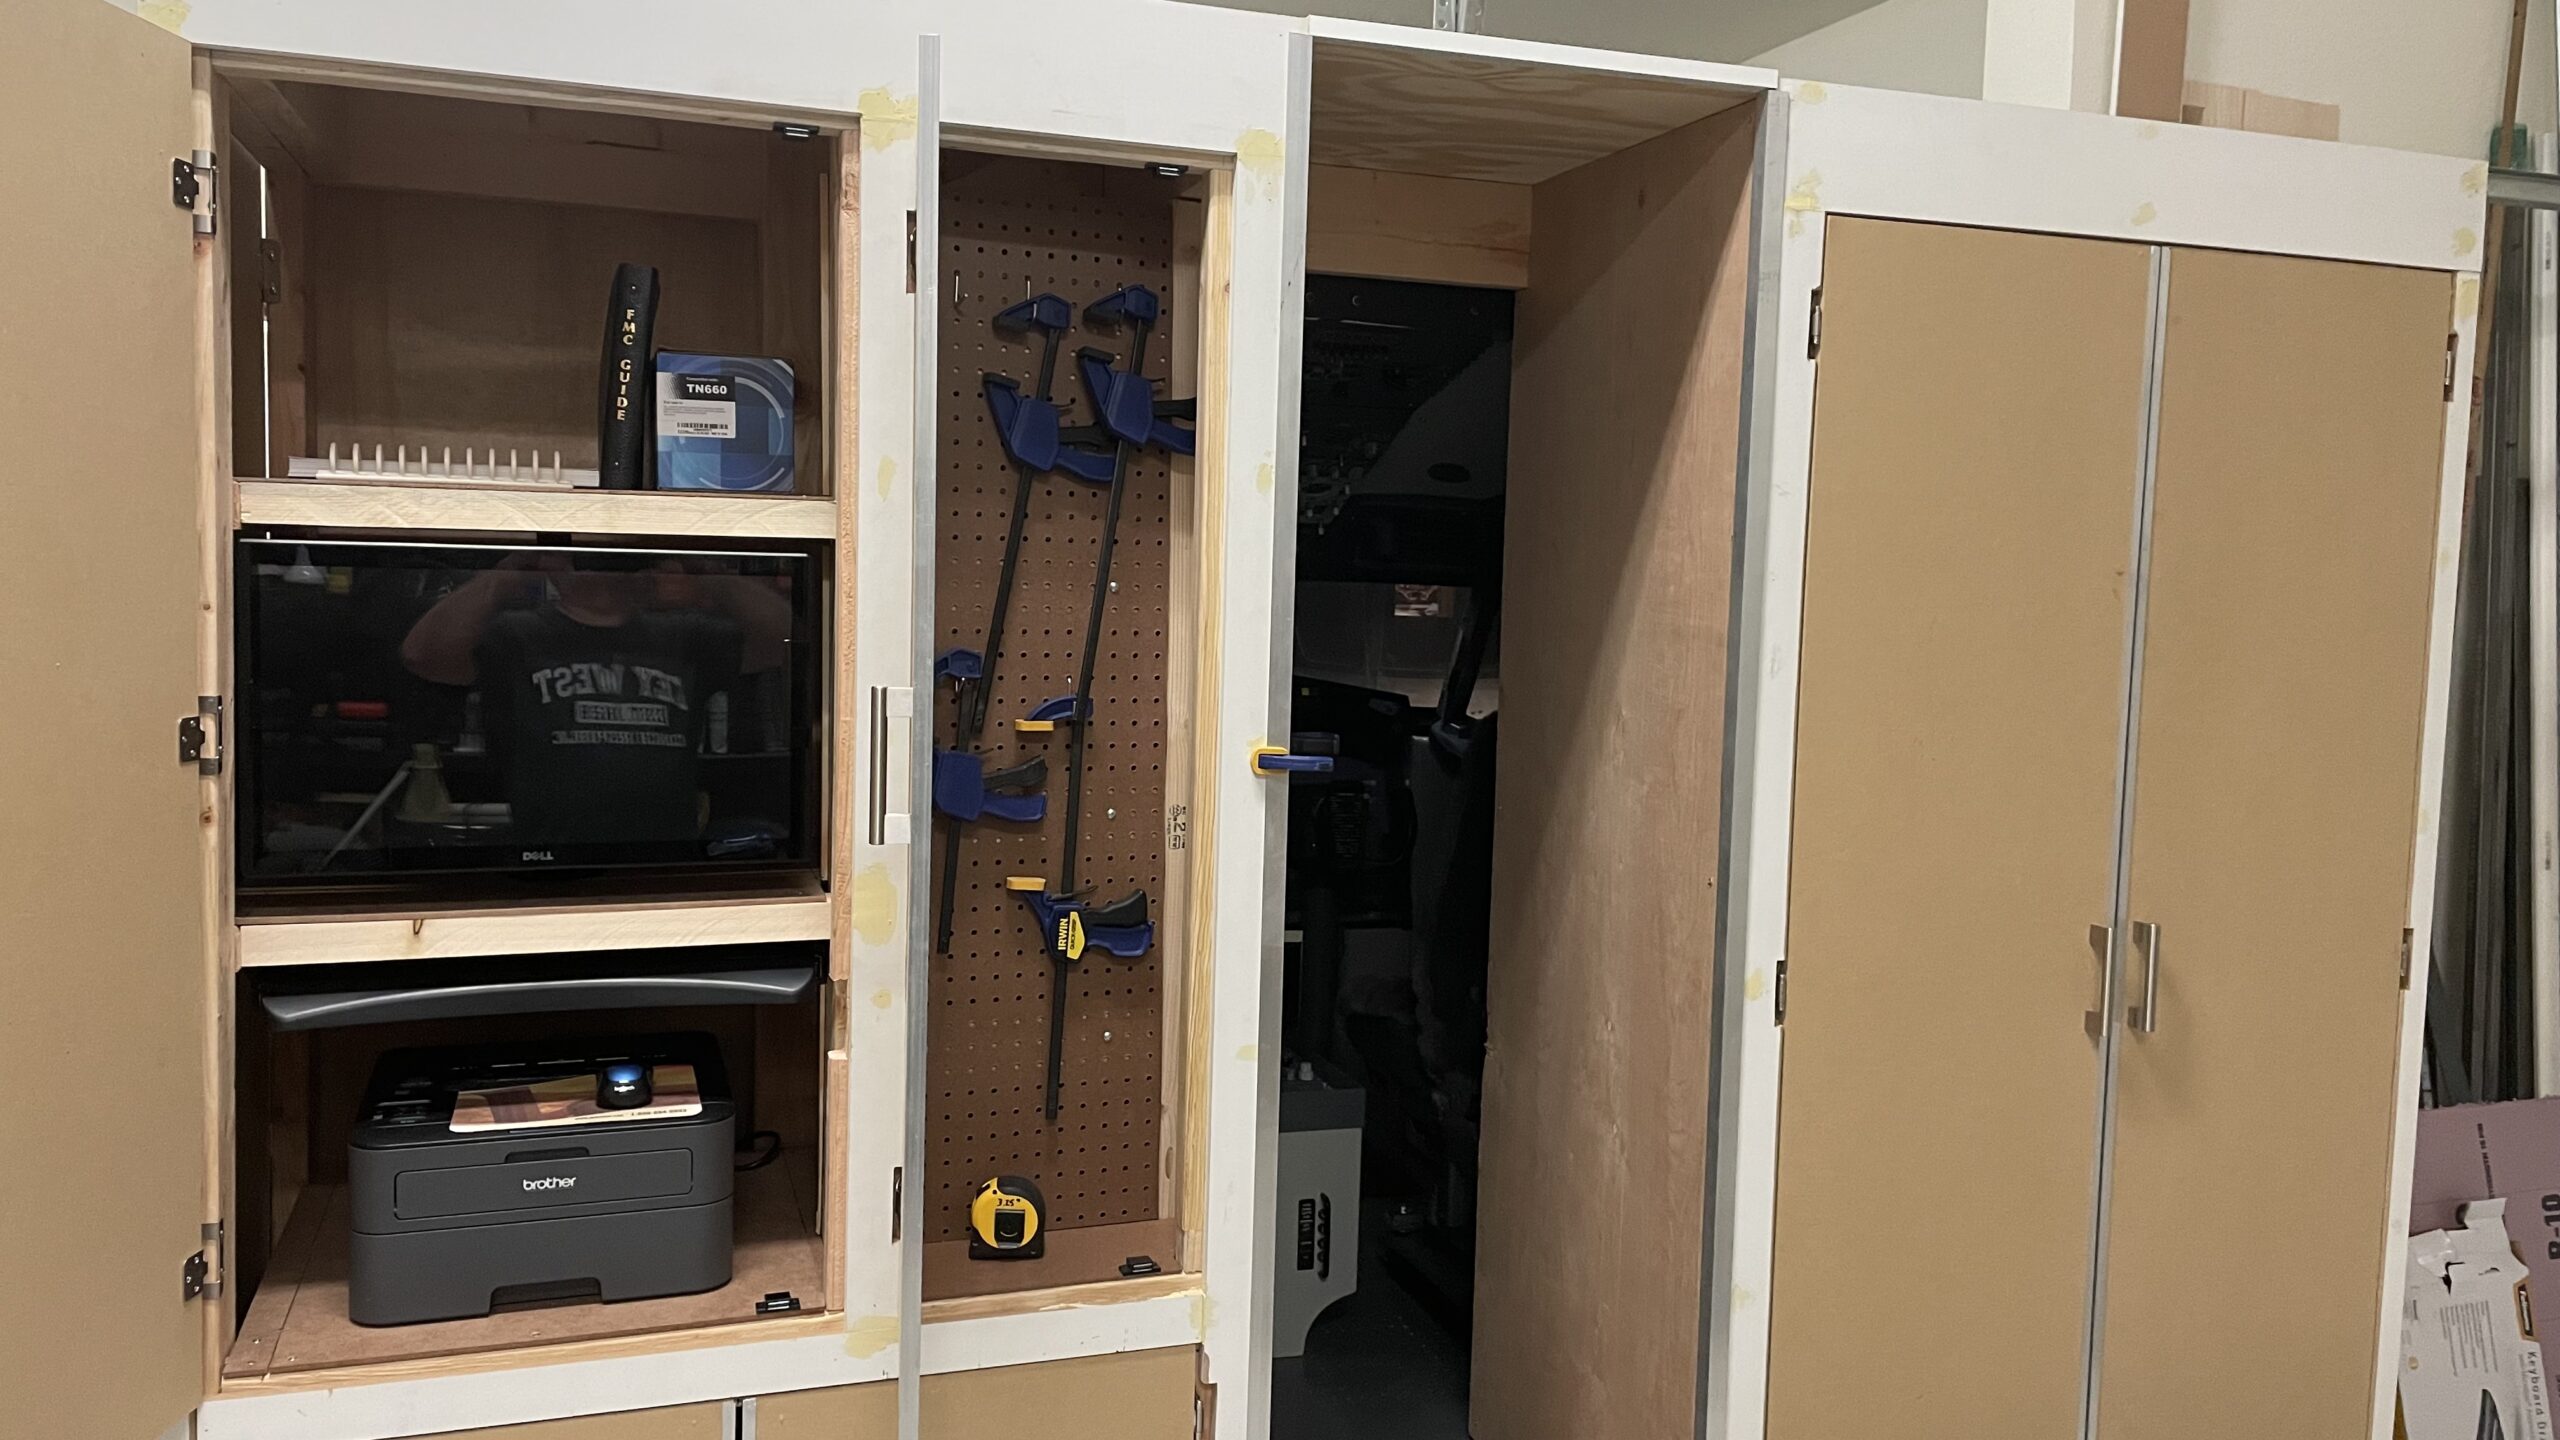
I am now in the process of adding a rear bulkhead to fully enclose the cockpit and add that extra bit of realism with Circuit Breaker (CB) panels, dome lights, jump seat, etc. The rear bulkhead will eventually also contain all the PCs, the instructor station with touchscreen display, a printer, and some storage.
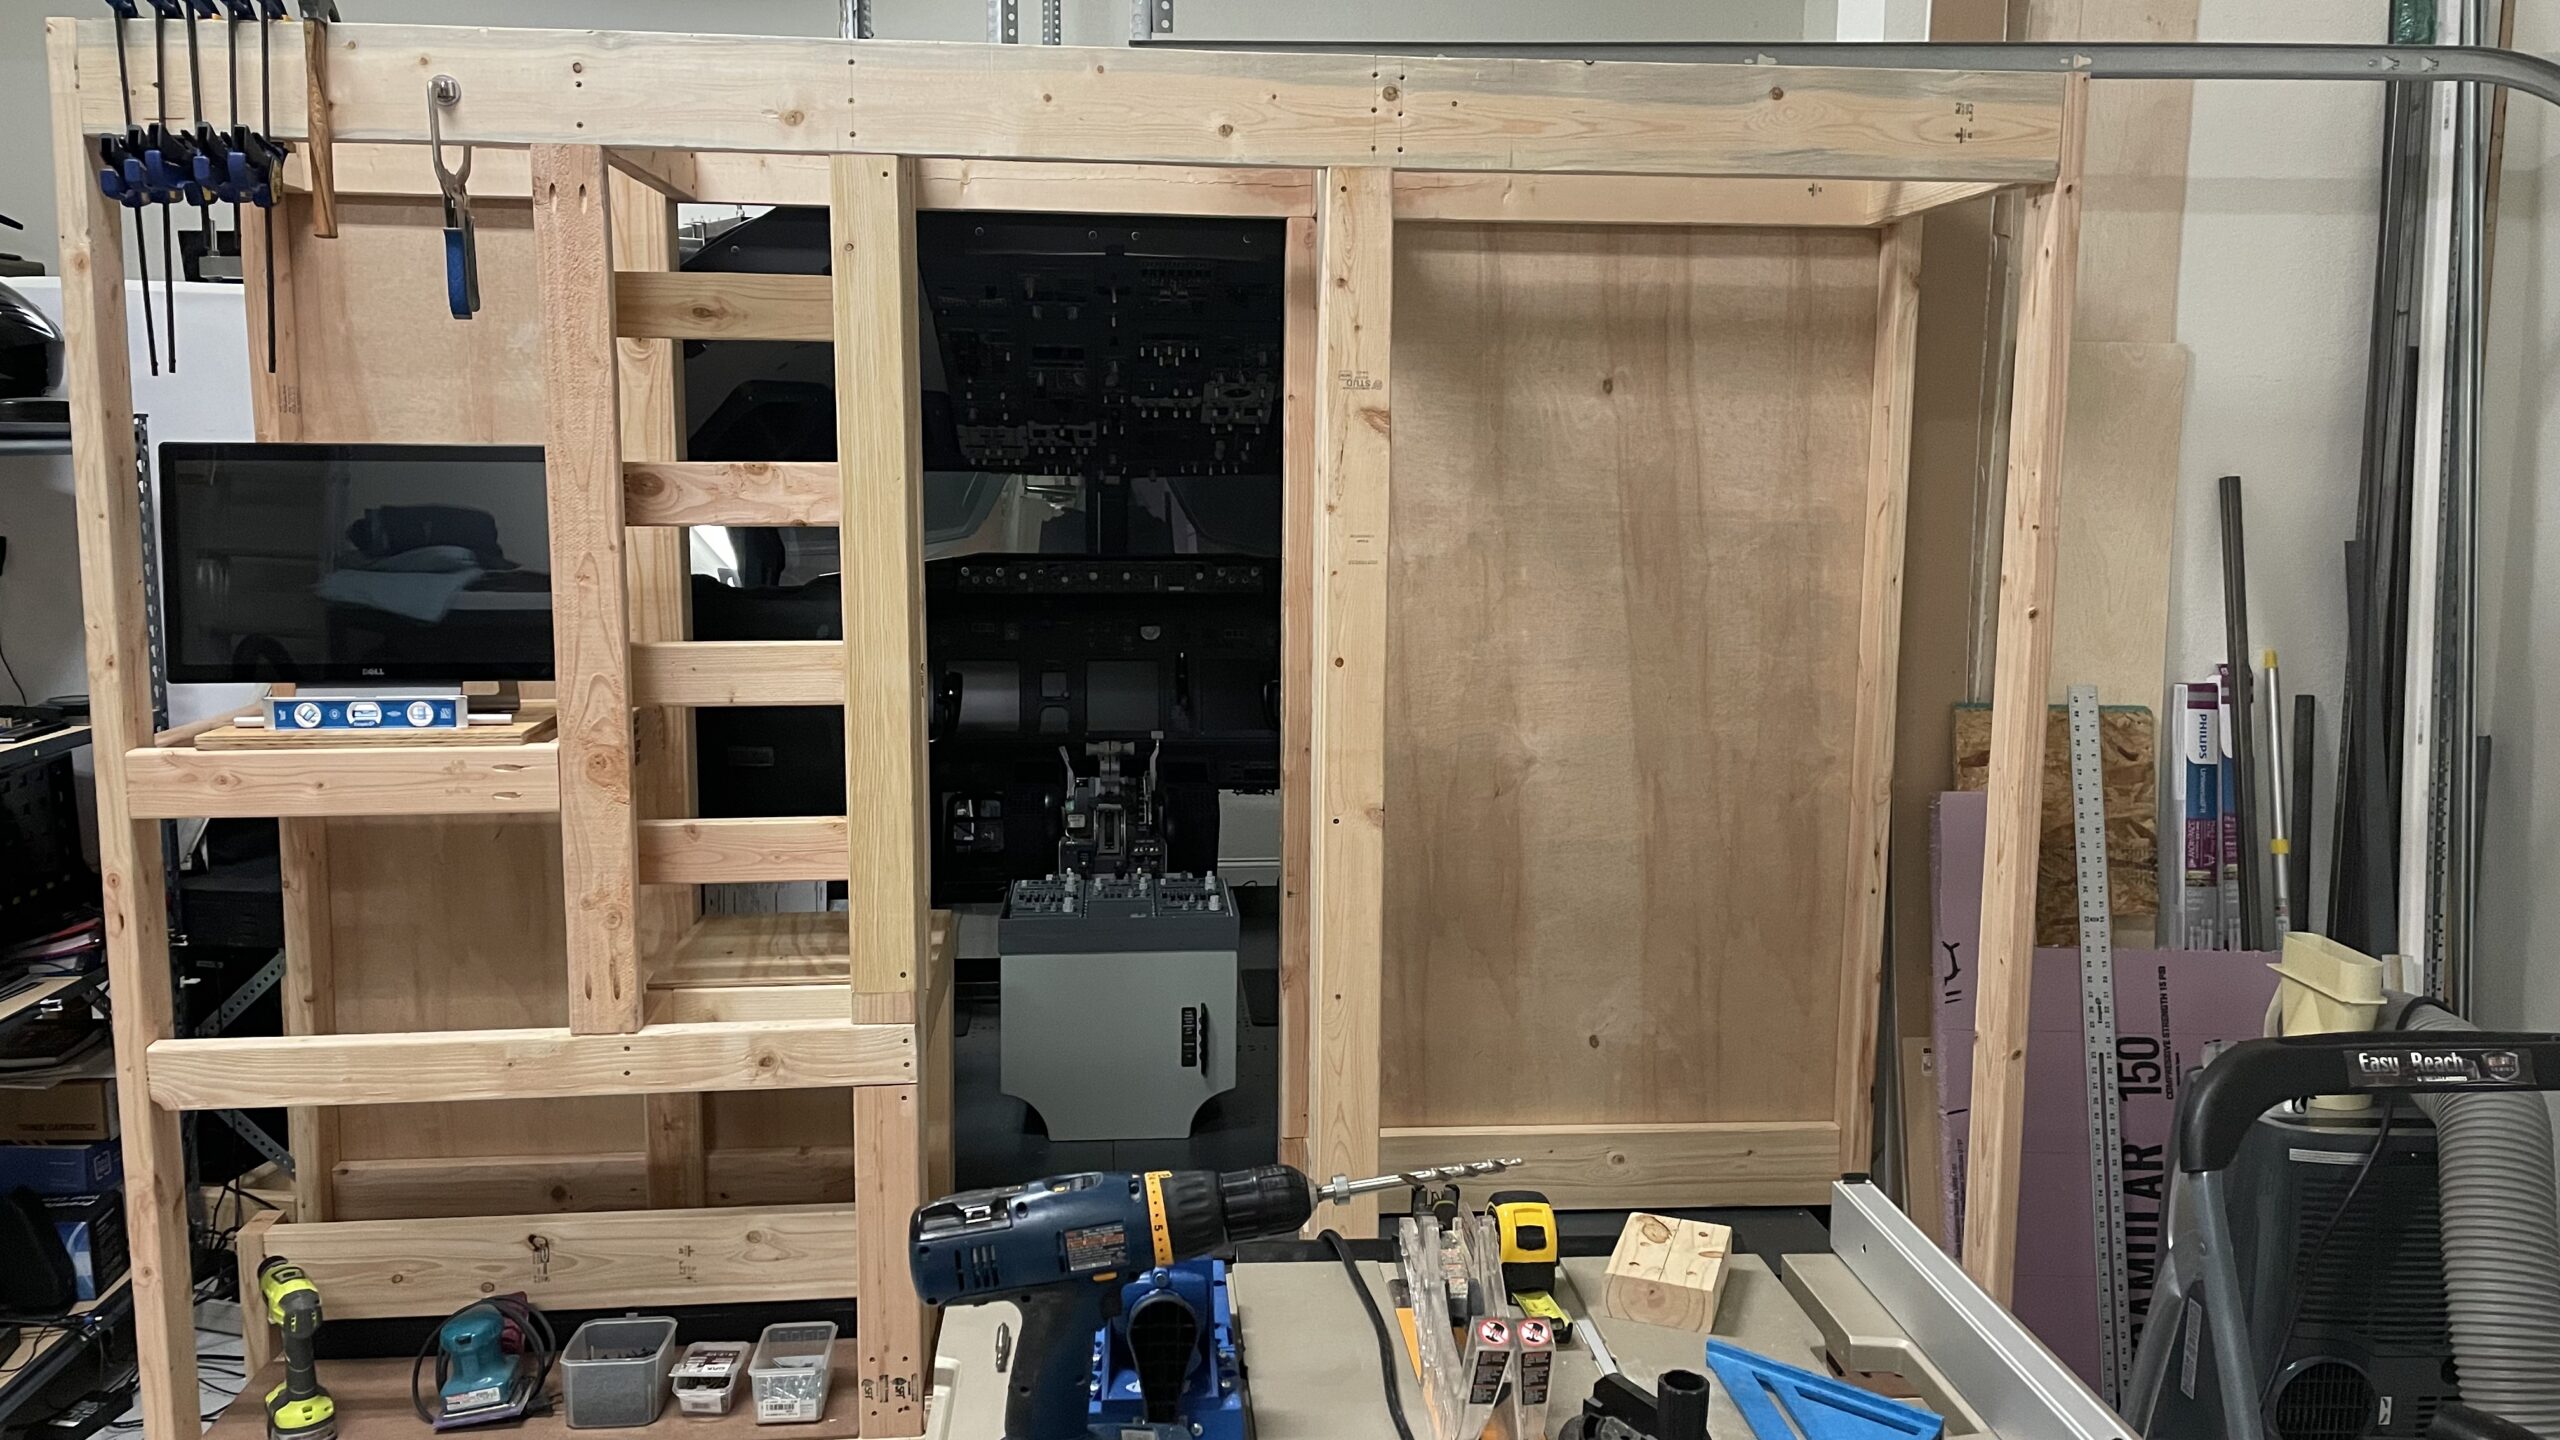
The Cockpit Rear Bulkhead Structure
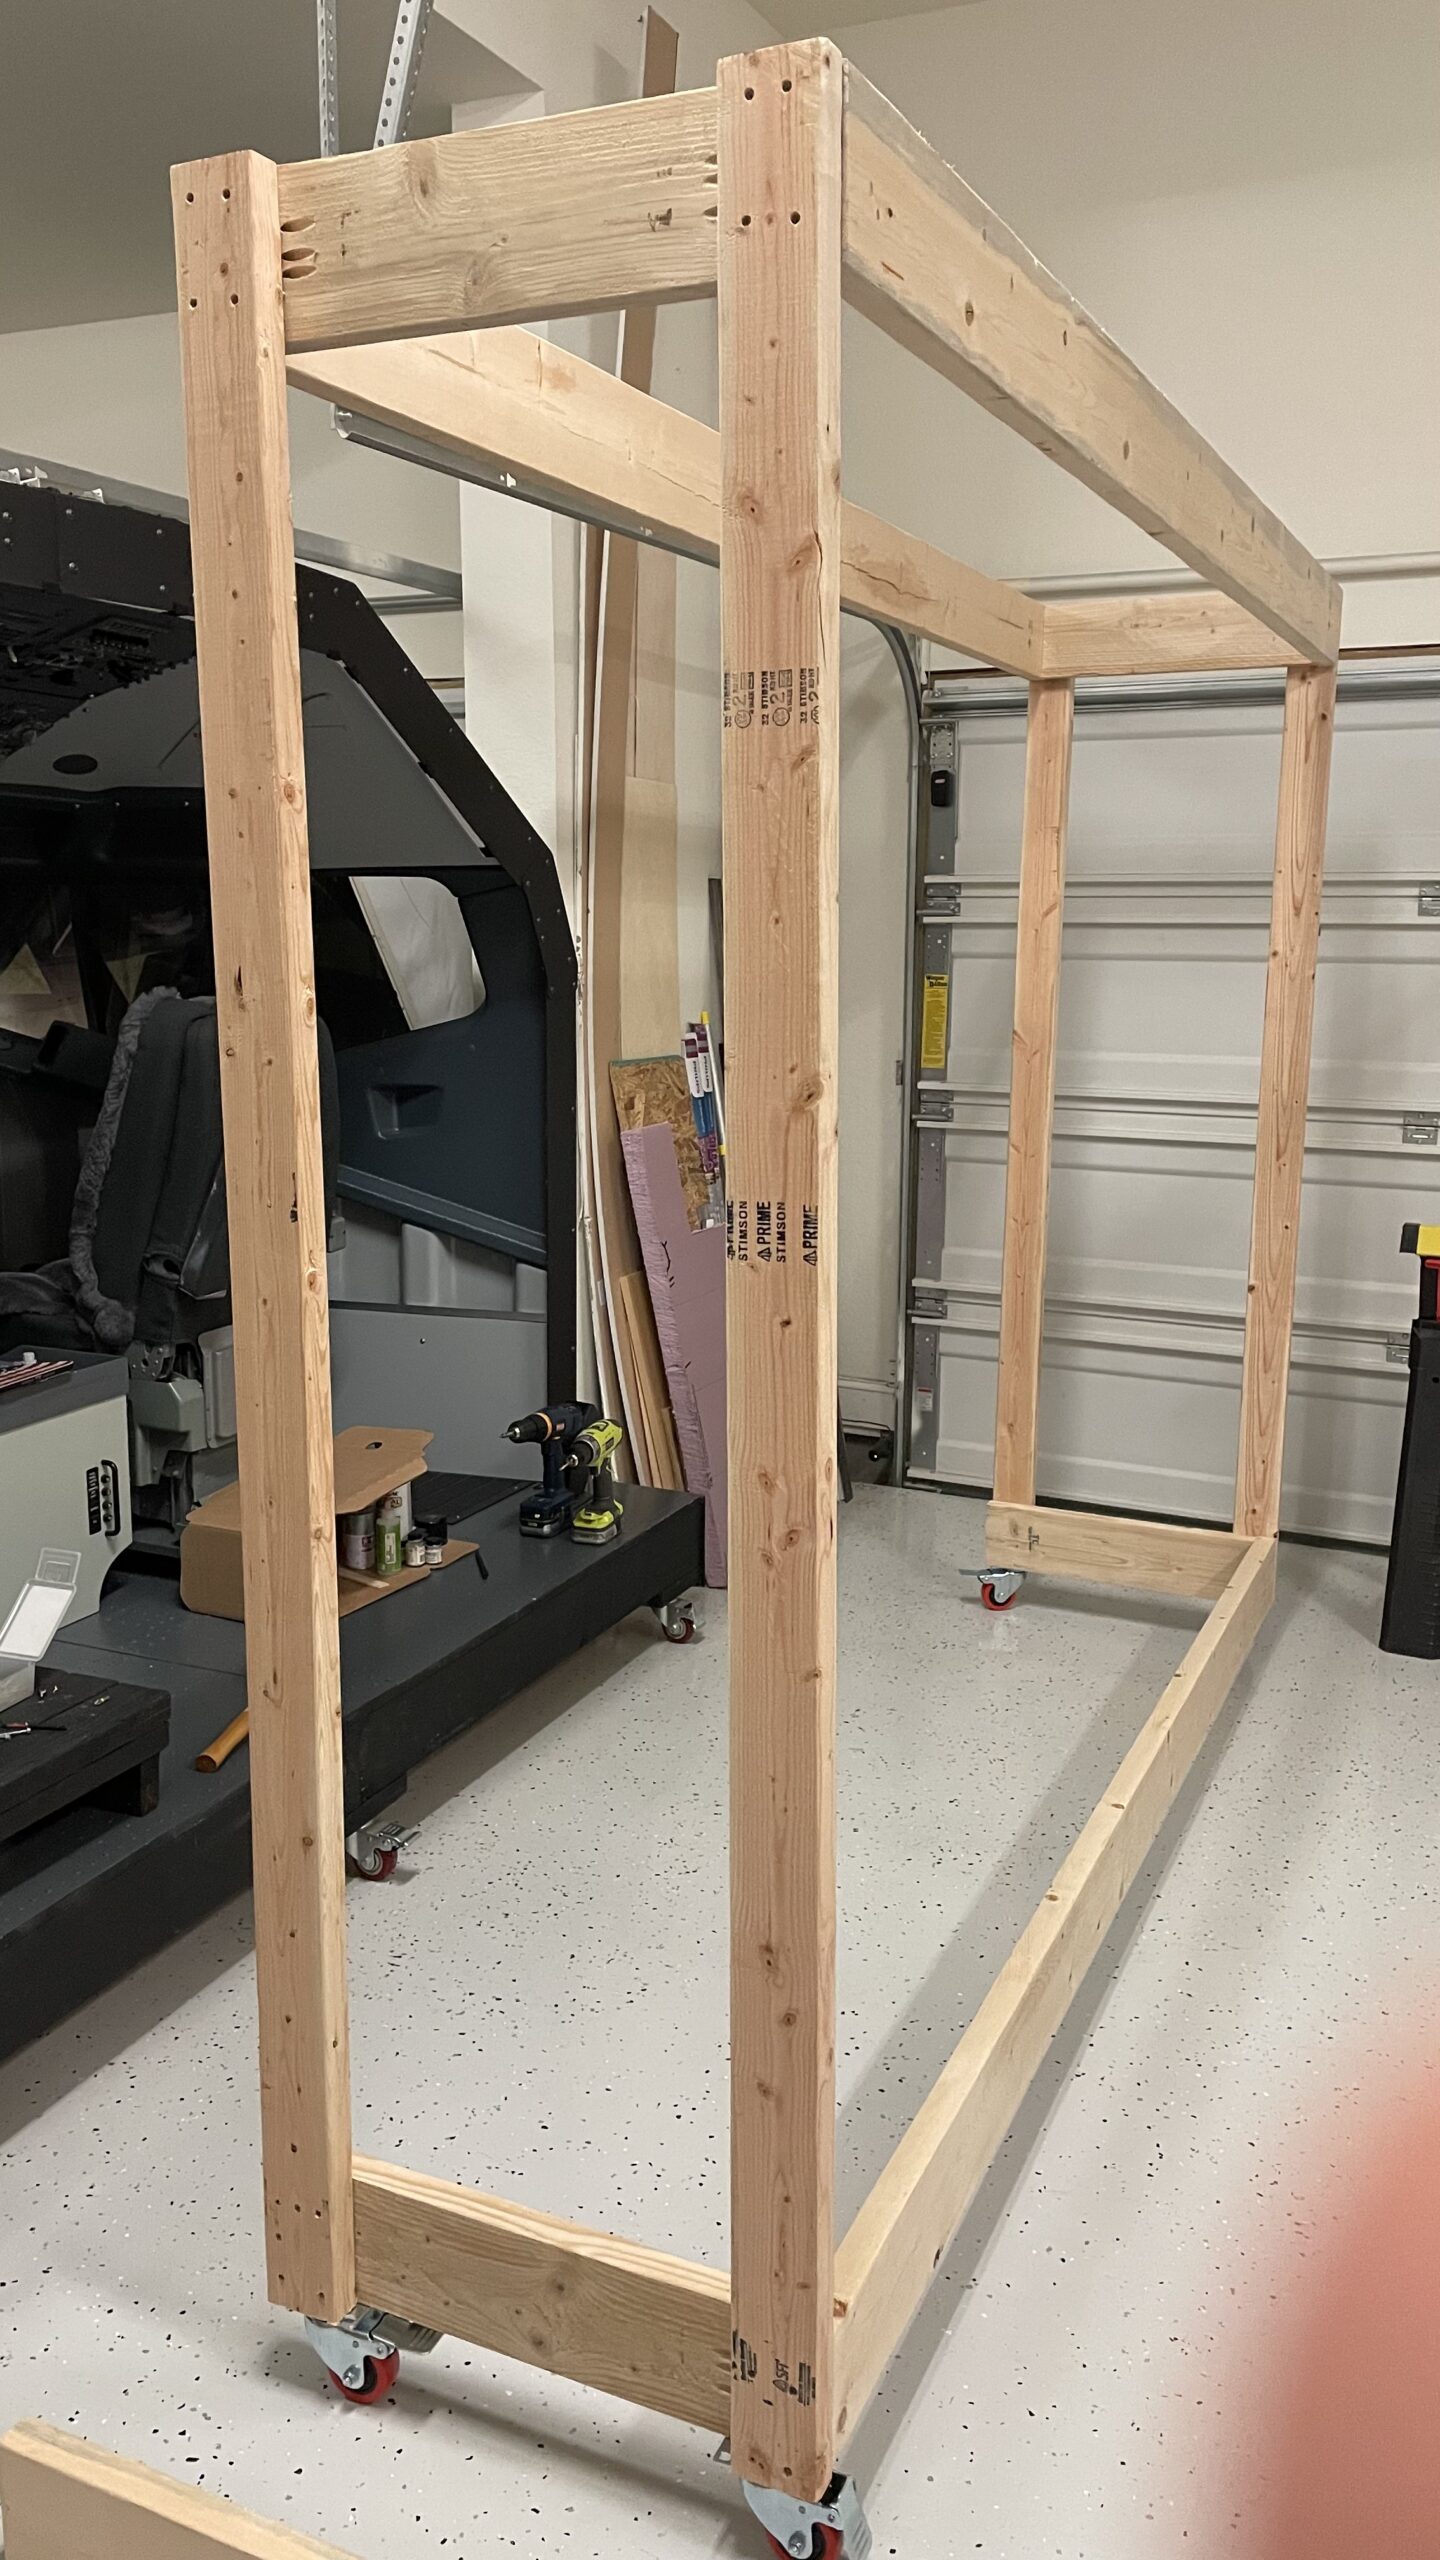
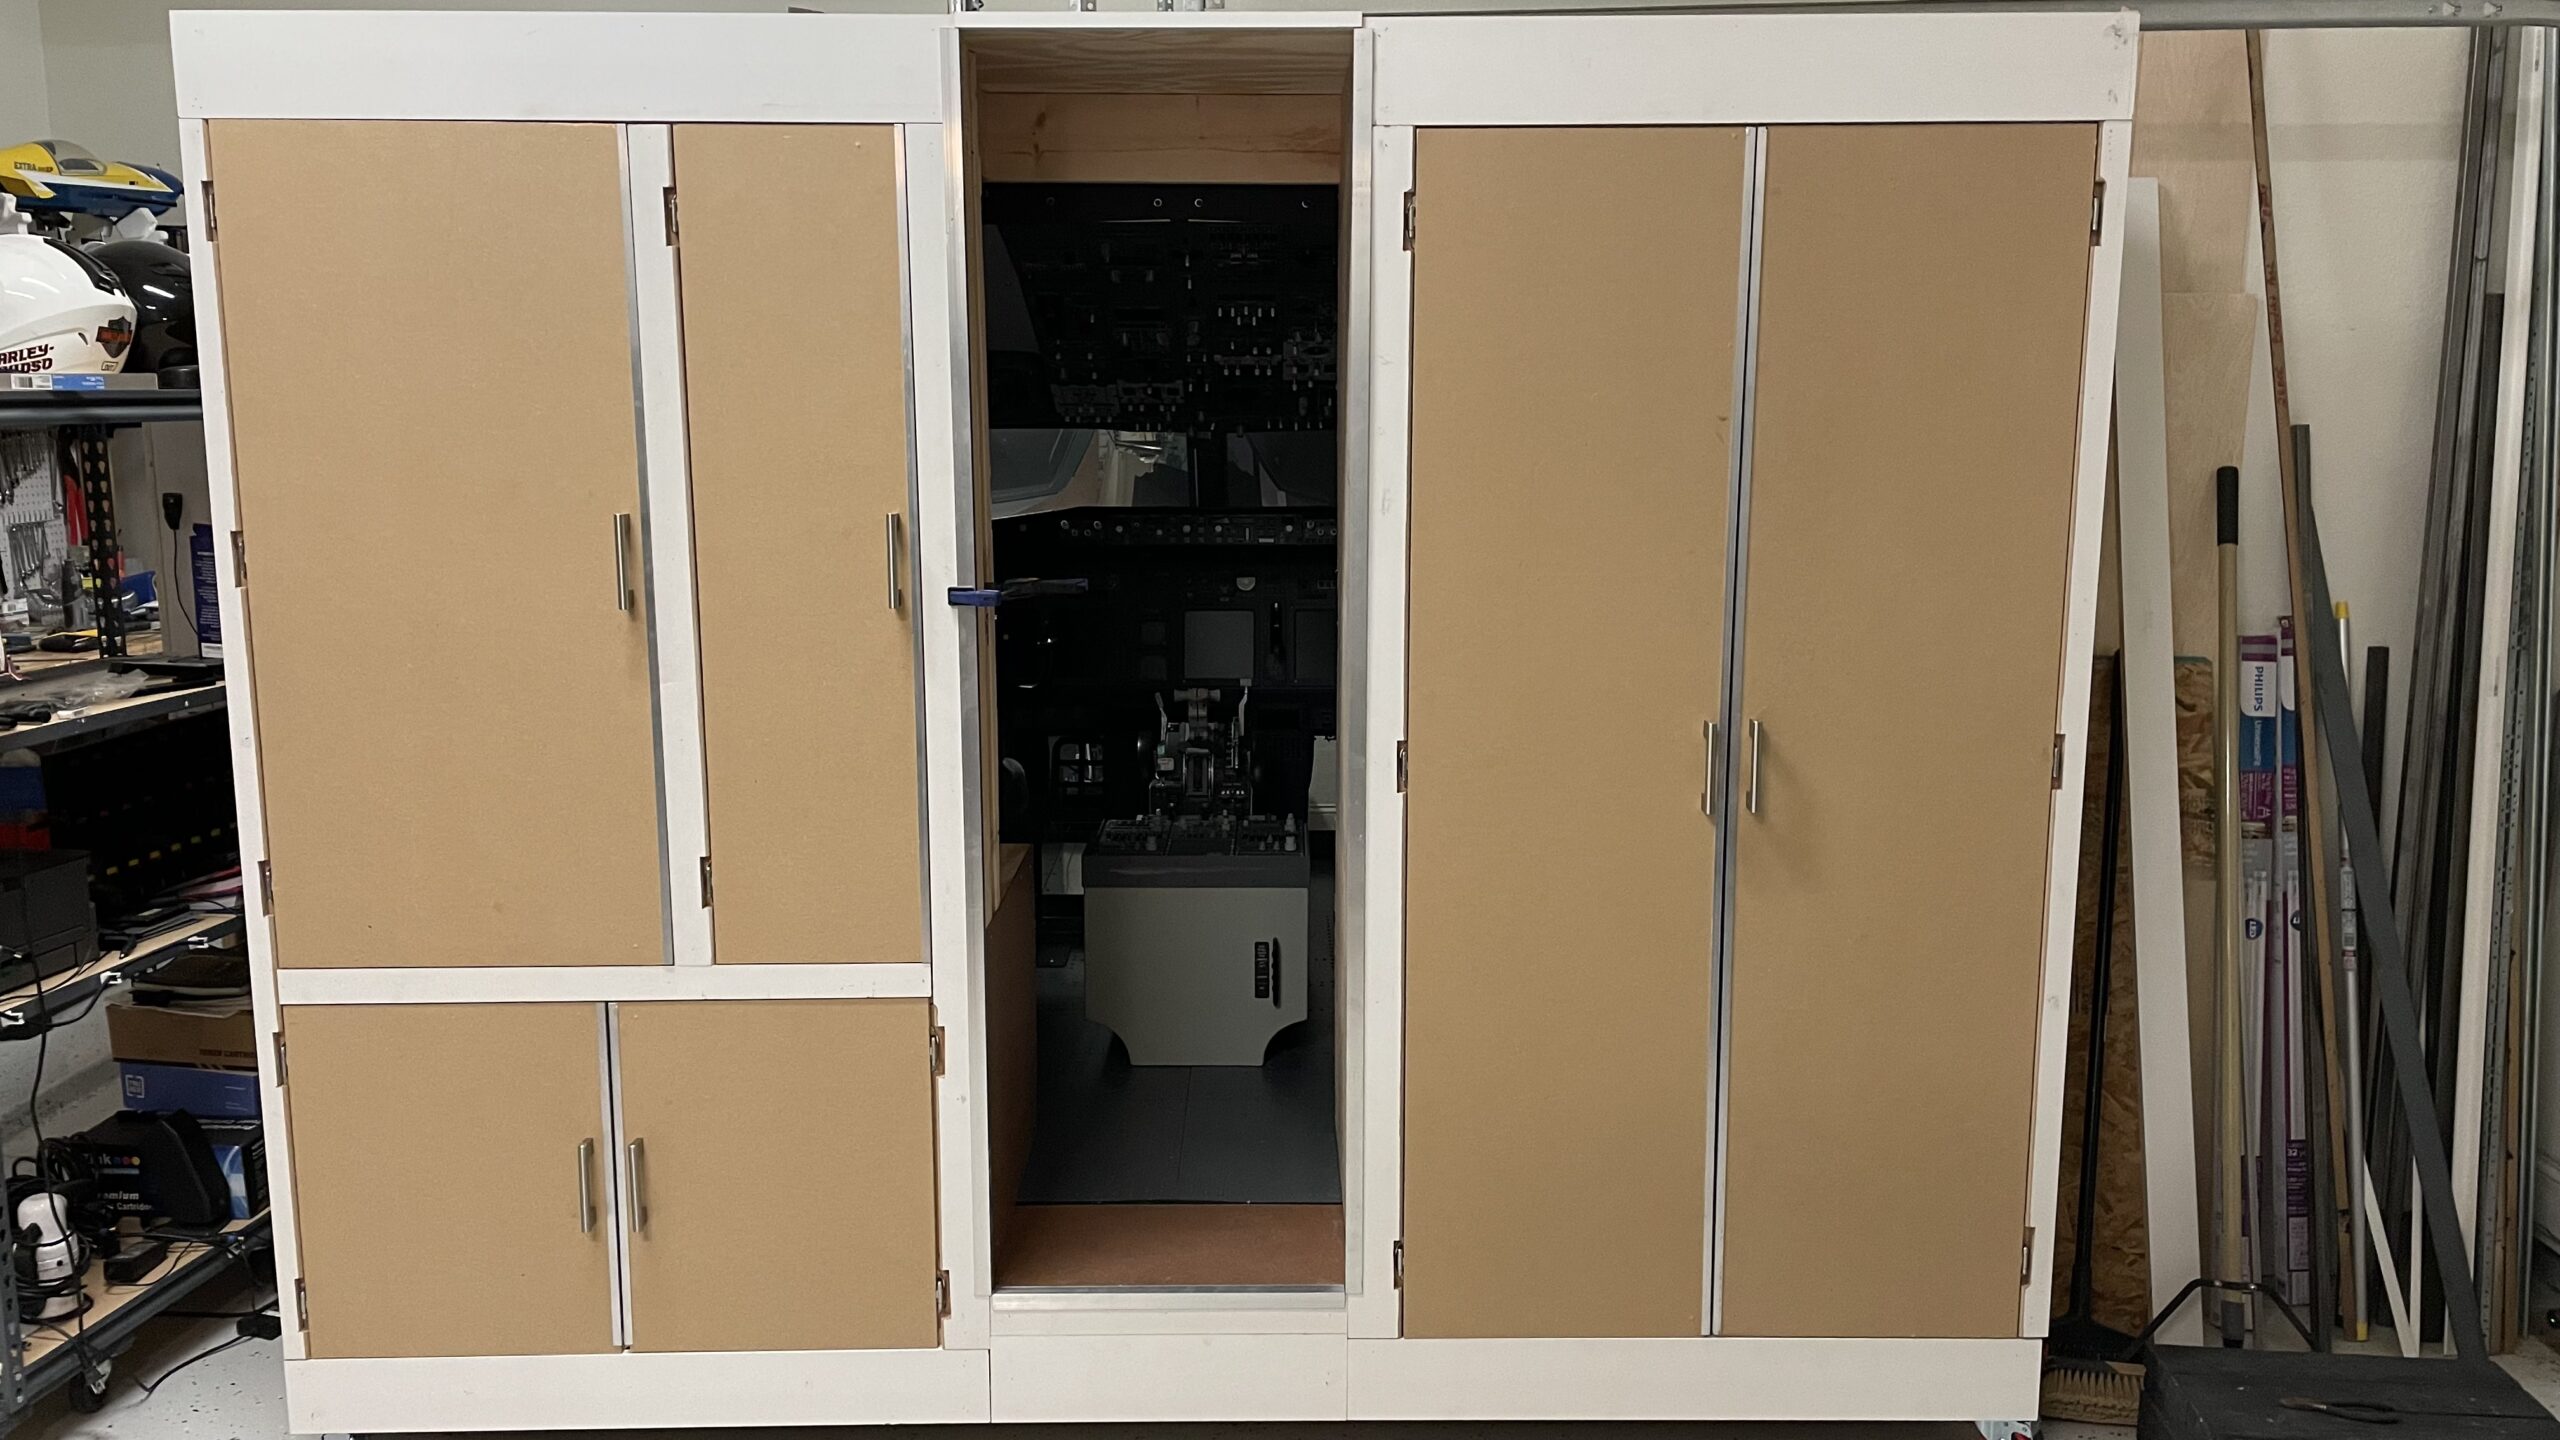
The idea was to build a rear bulkhead section extending approximately 2 feet off the back of the shell, allowing me to close off the cockpit with rear circuit breaker walls and a cockpit door, at least one jump seat for a third person to observe (perhaps an instructor?), and also have a place to nicely store all the PCs and networking gear to run the sim. I also wanted it to be movable so it just rolls right up to the sim during normal flying, but could be rolled away for full access to the main cockpit or rear bulkhead during maintenance. This modular approach to the just sim makes a lot of things easier.
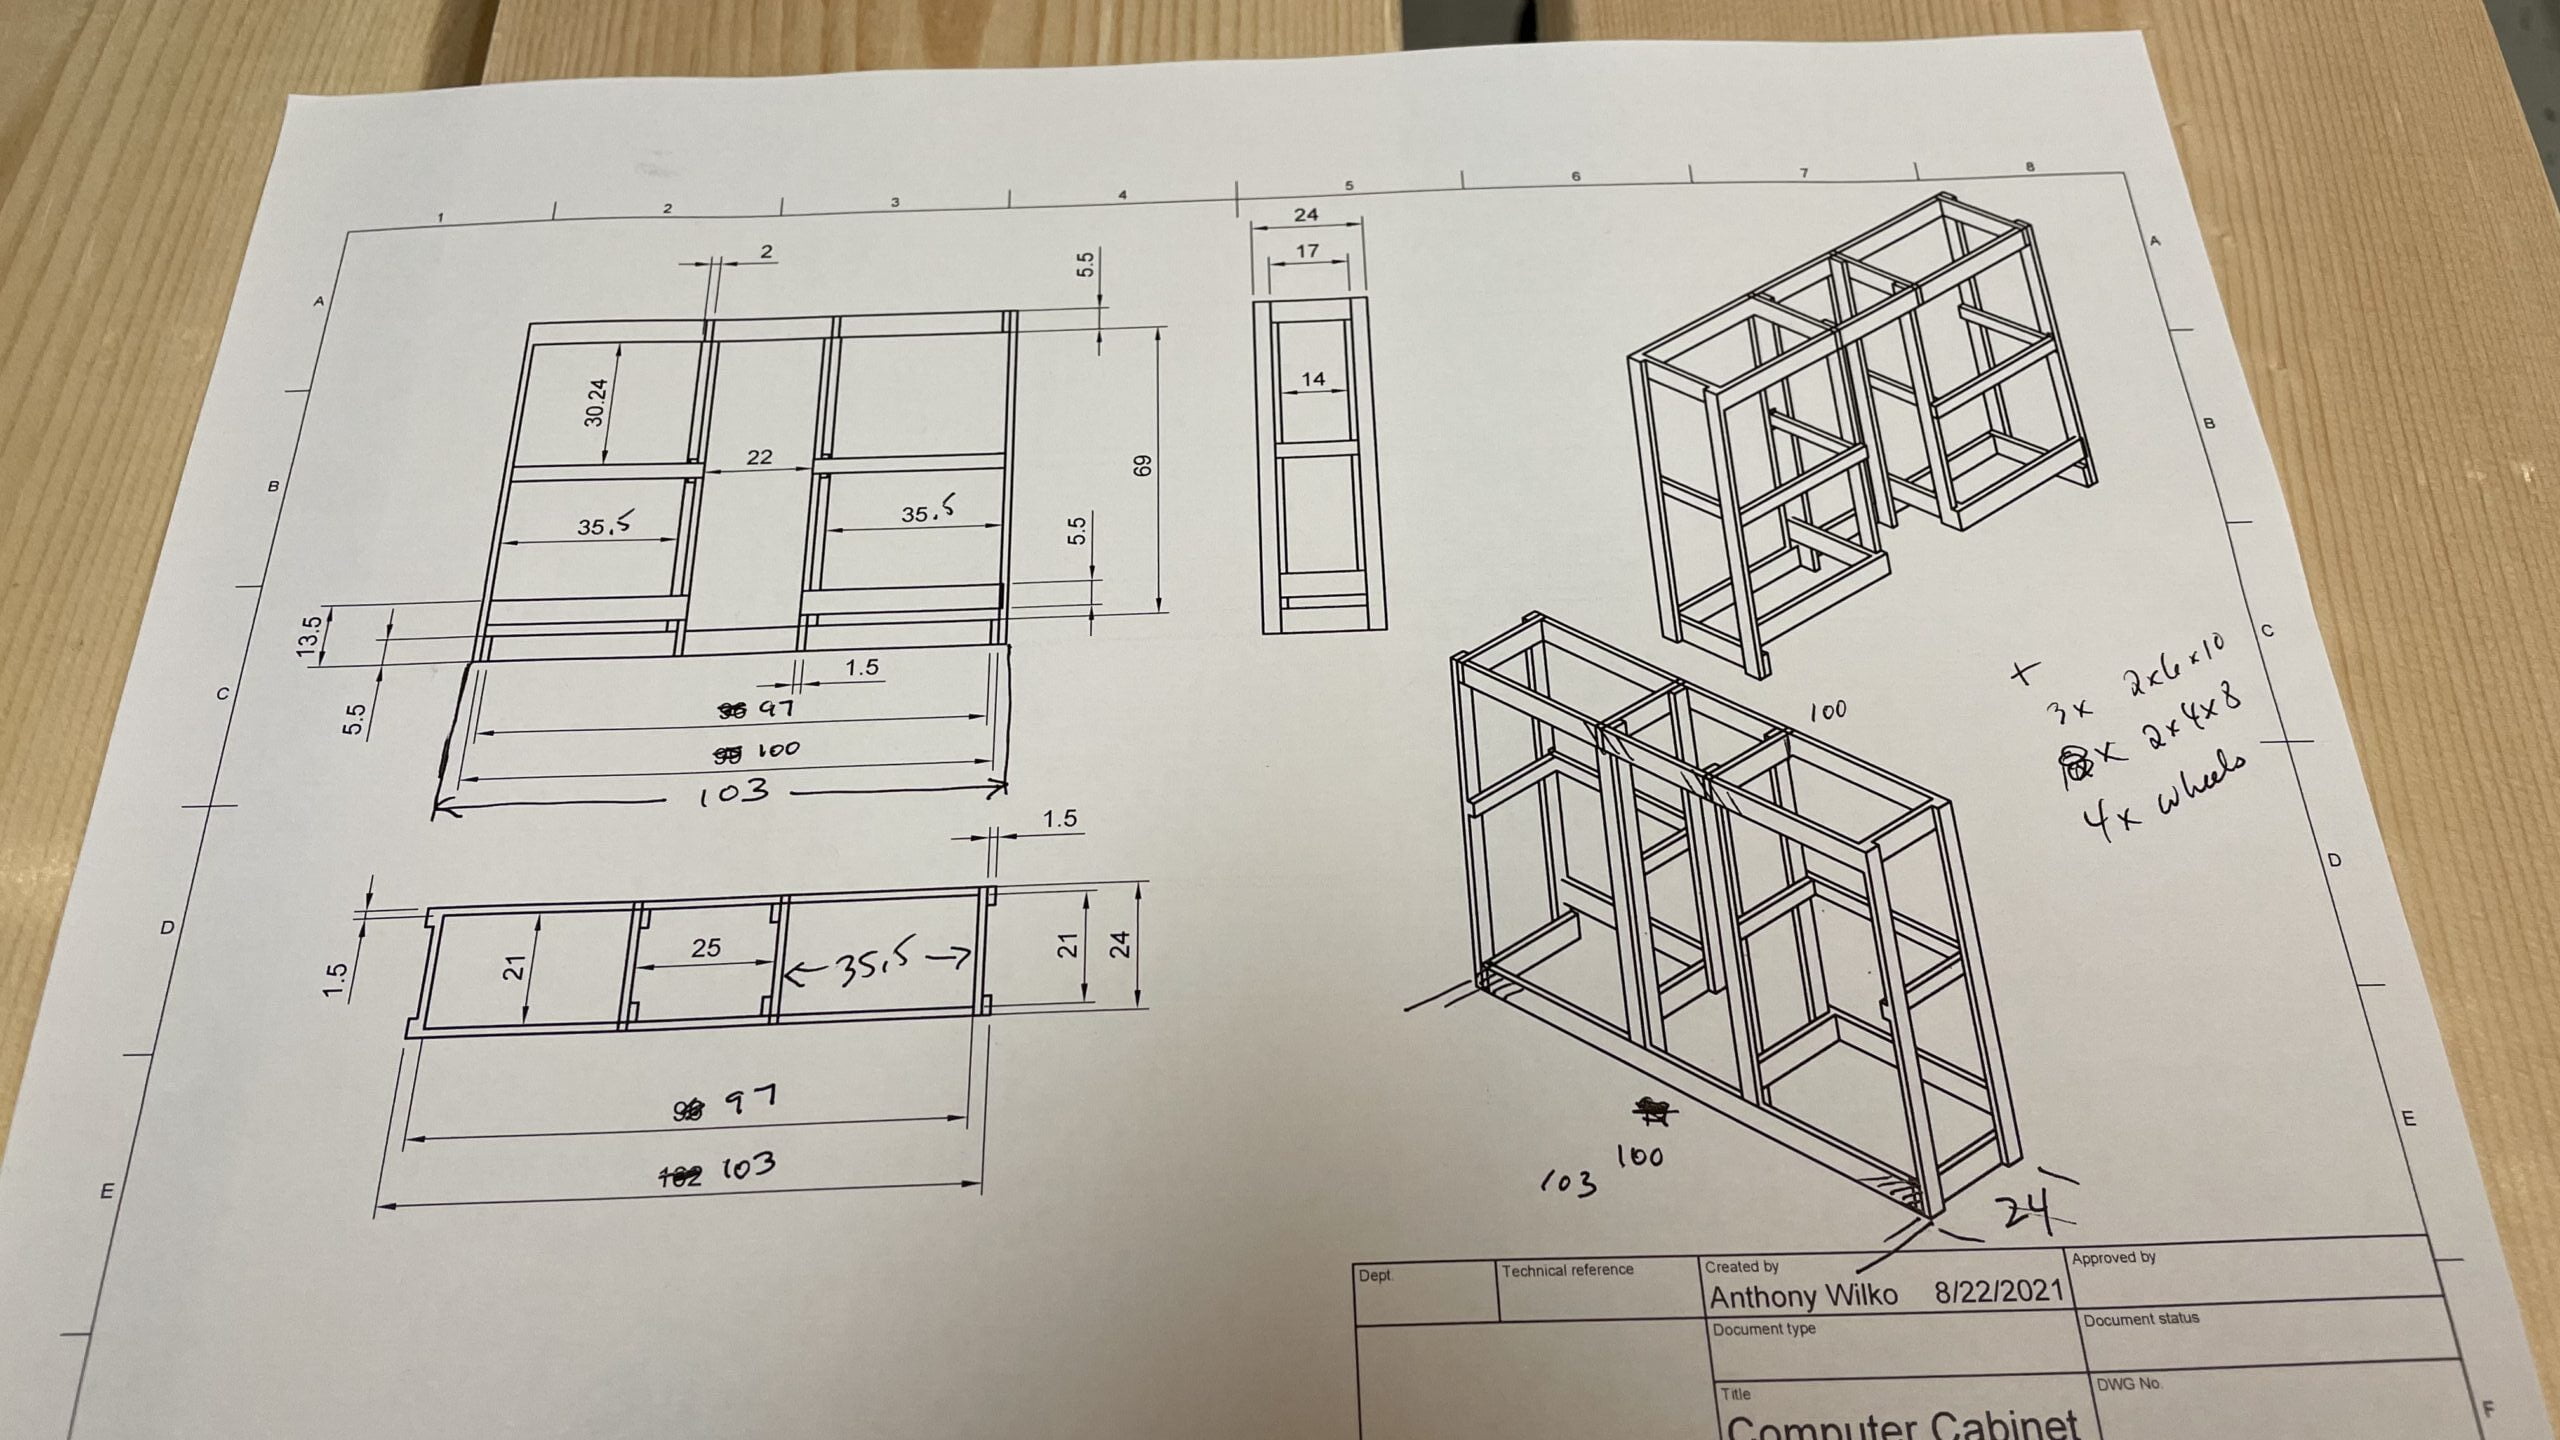
Using whatever reference pictures I could find, and MarkusPilot’s helpful cockpit measurements, I started to rough out some ideas on paper, then pieced it together a little more firmly in my Fusion360 CAD program. It wasn’t perfect and down to the smallest detail, but enough to give me a good roadmap to follow, and even though I had to make some adjustments on the fly the overall concept worked fairly well.
I generally went with 2″x6″ and 2″x4″ lumber, some thin plywood, and MDF doors (if you do doors, make sure you use 0.75″ MDF and not 0.5″ which I used…it’s too thin for doors). It’s probably overkill and heavy, but wood is easy to source and work with and more importantly, I have all the right tools. Despite the size and weight, though, it’s still quite easy to roll around.
Once it’s completely done, it will be painted in all white with Boeing Blue paint and stripes in the bottom half, and likely some Boeing 737 decals of some sort.
Circuit Breakers, Panels and More!
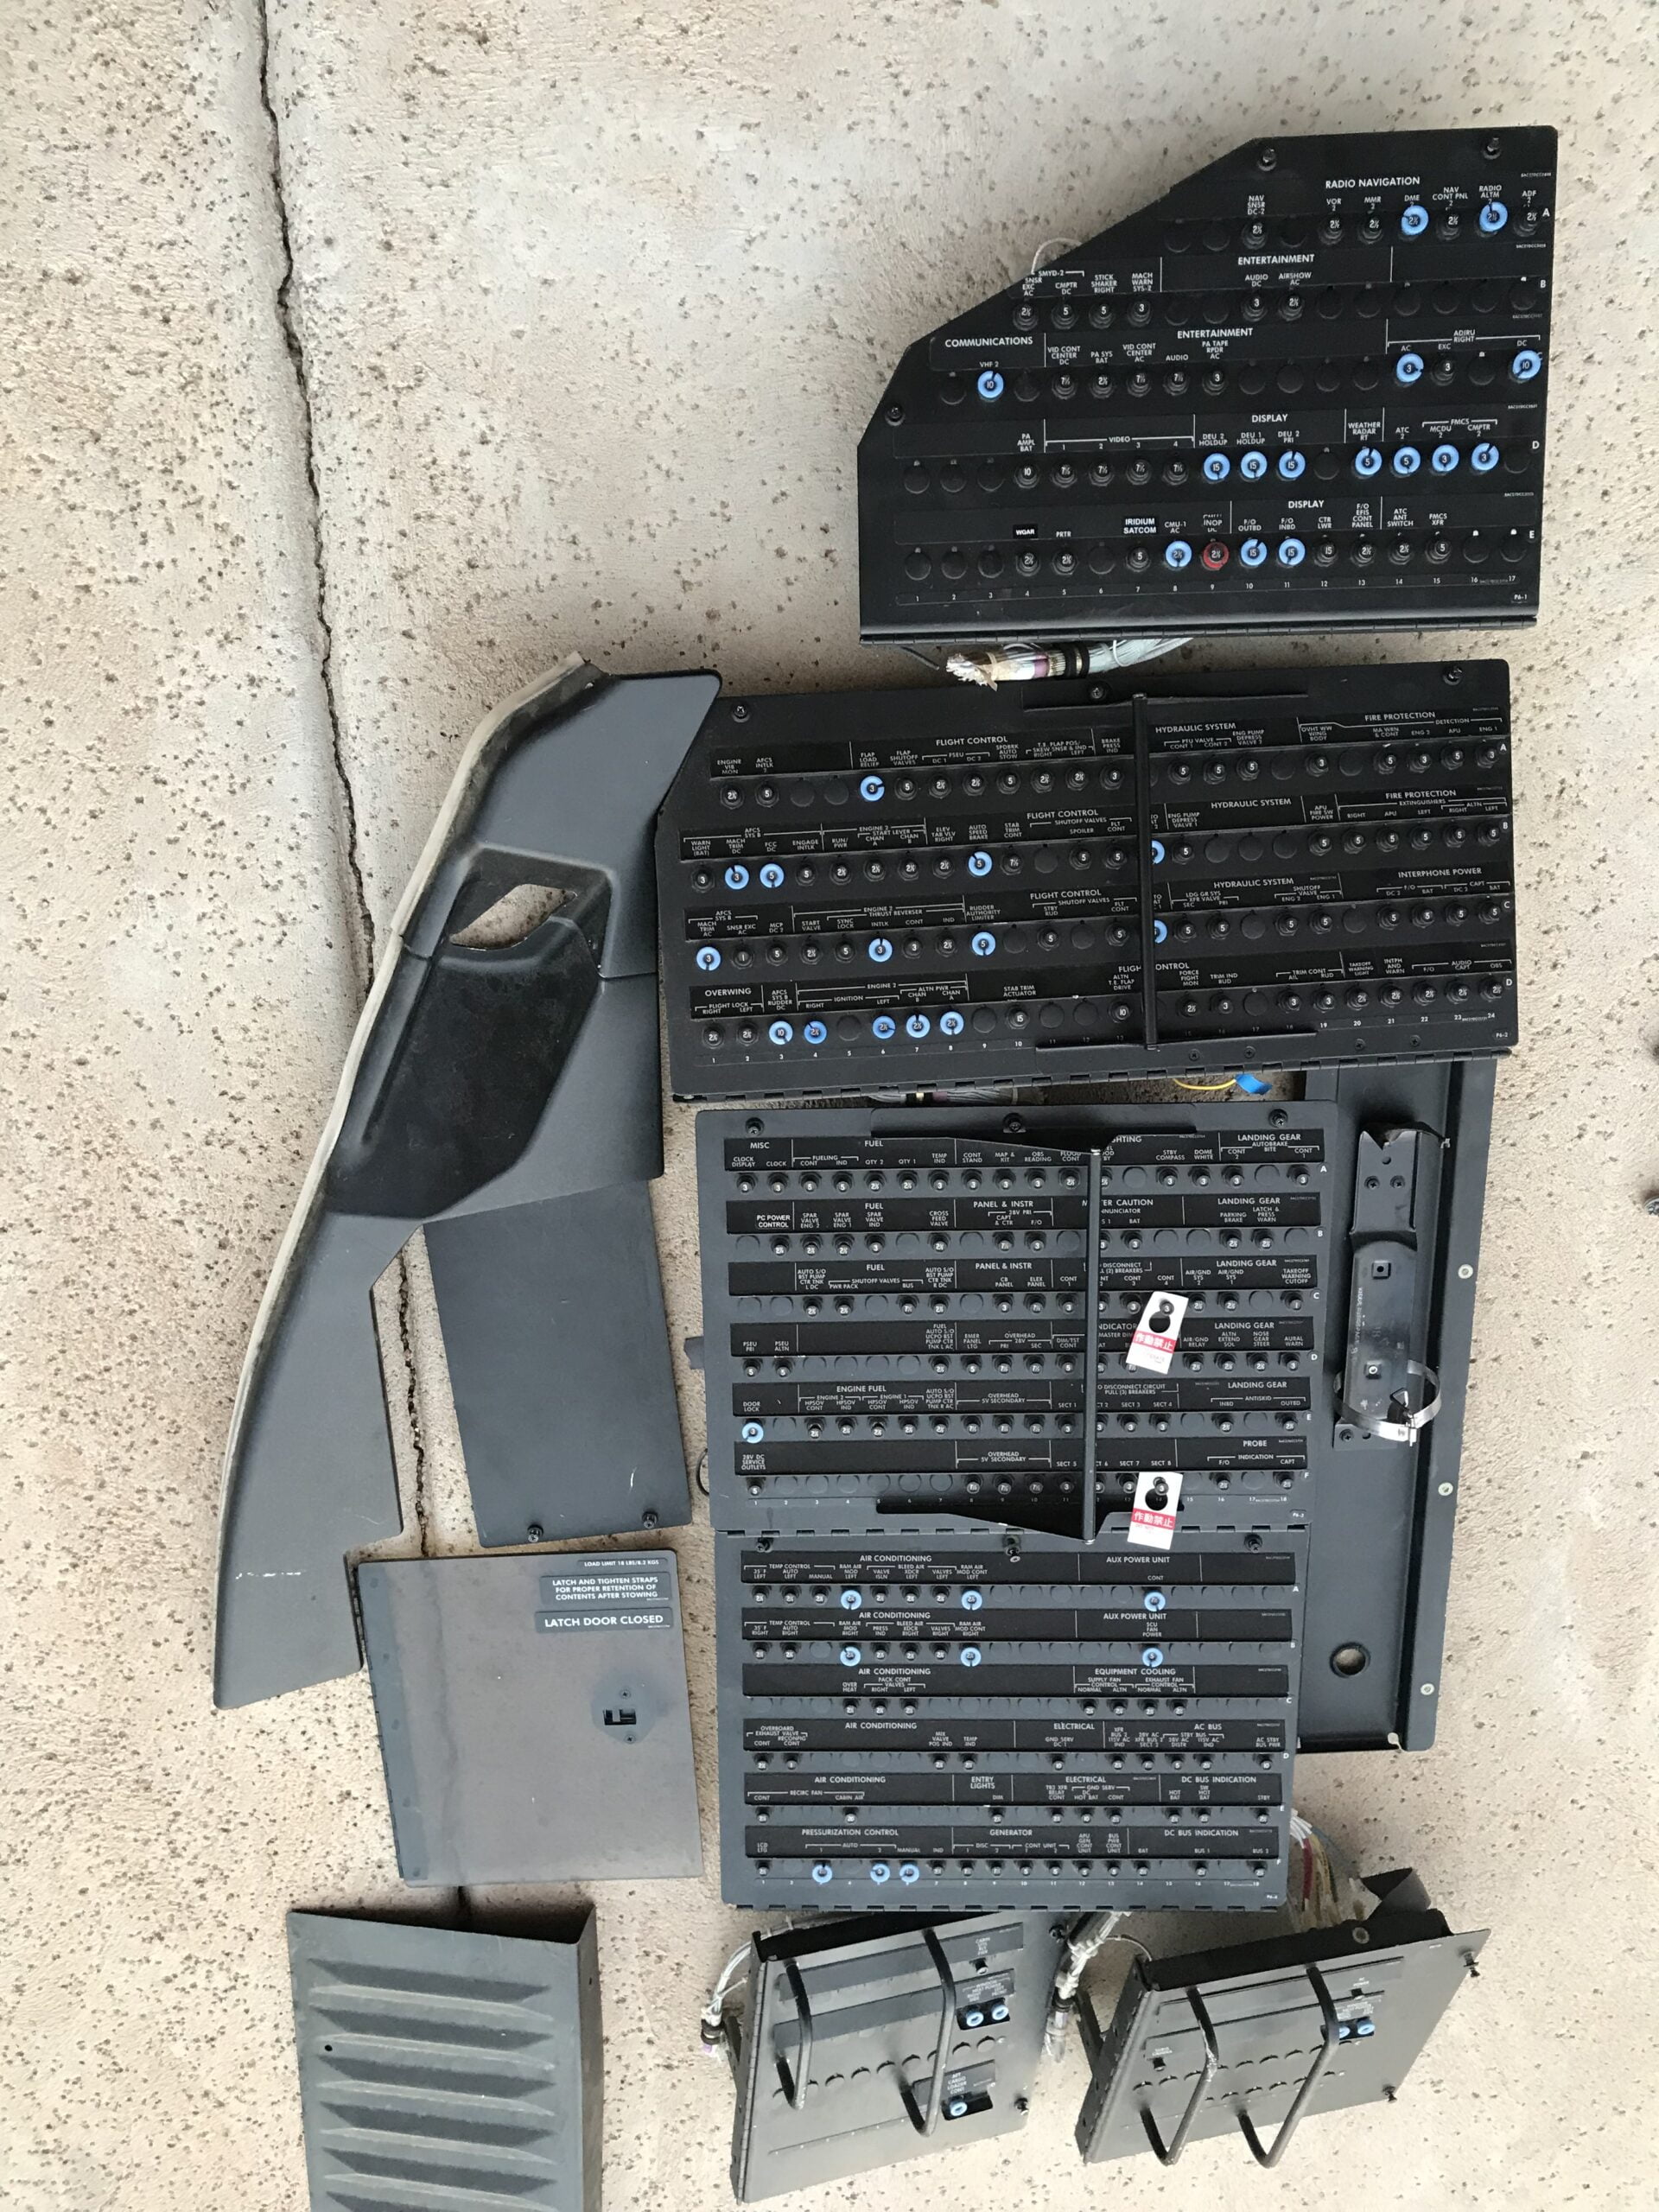
Now the fun part! My plan was not to have the CBs be functional in the rear bulkhead since they’re rarely if ever used by the pilots, but rather be decorative to add to the overall cockpit feel/realism. So I was originally thinking of making the circuit breaker panels from scratch with 3D printed parts, printed labels, etc. Certainly very doable, but very time-consuming and tedious.
So I started searching around to see if I could find real-world panels for a reasonable price, which would save me a lot of time. But as you can imagine, a full set in good condition is very hard to come by. OnceAloft had an incomplete set of 737-500 panels which I was seriously considering, and then just filling in the missing panels with some scratch building.
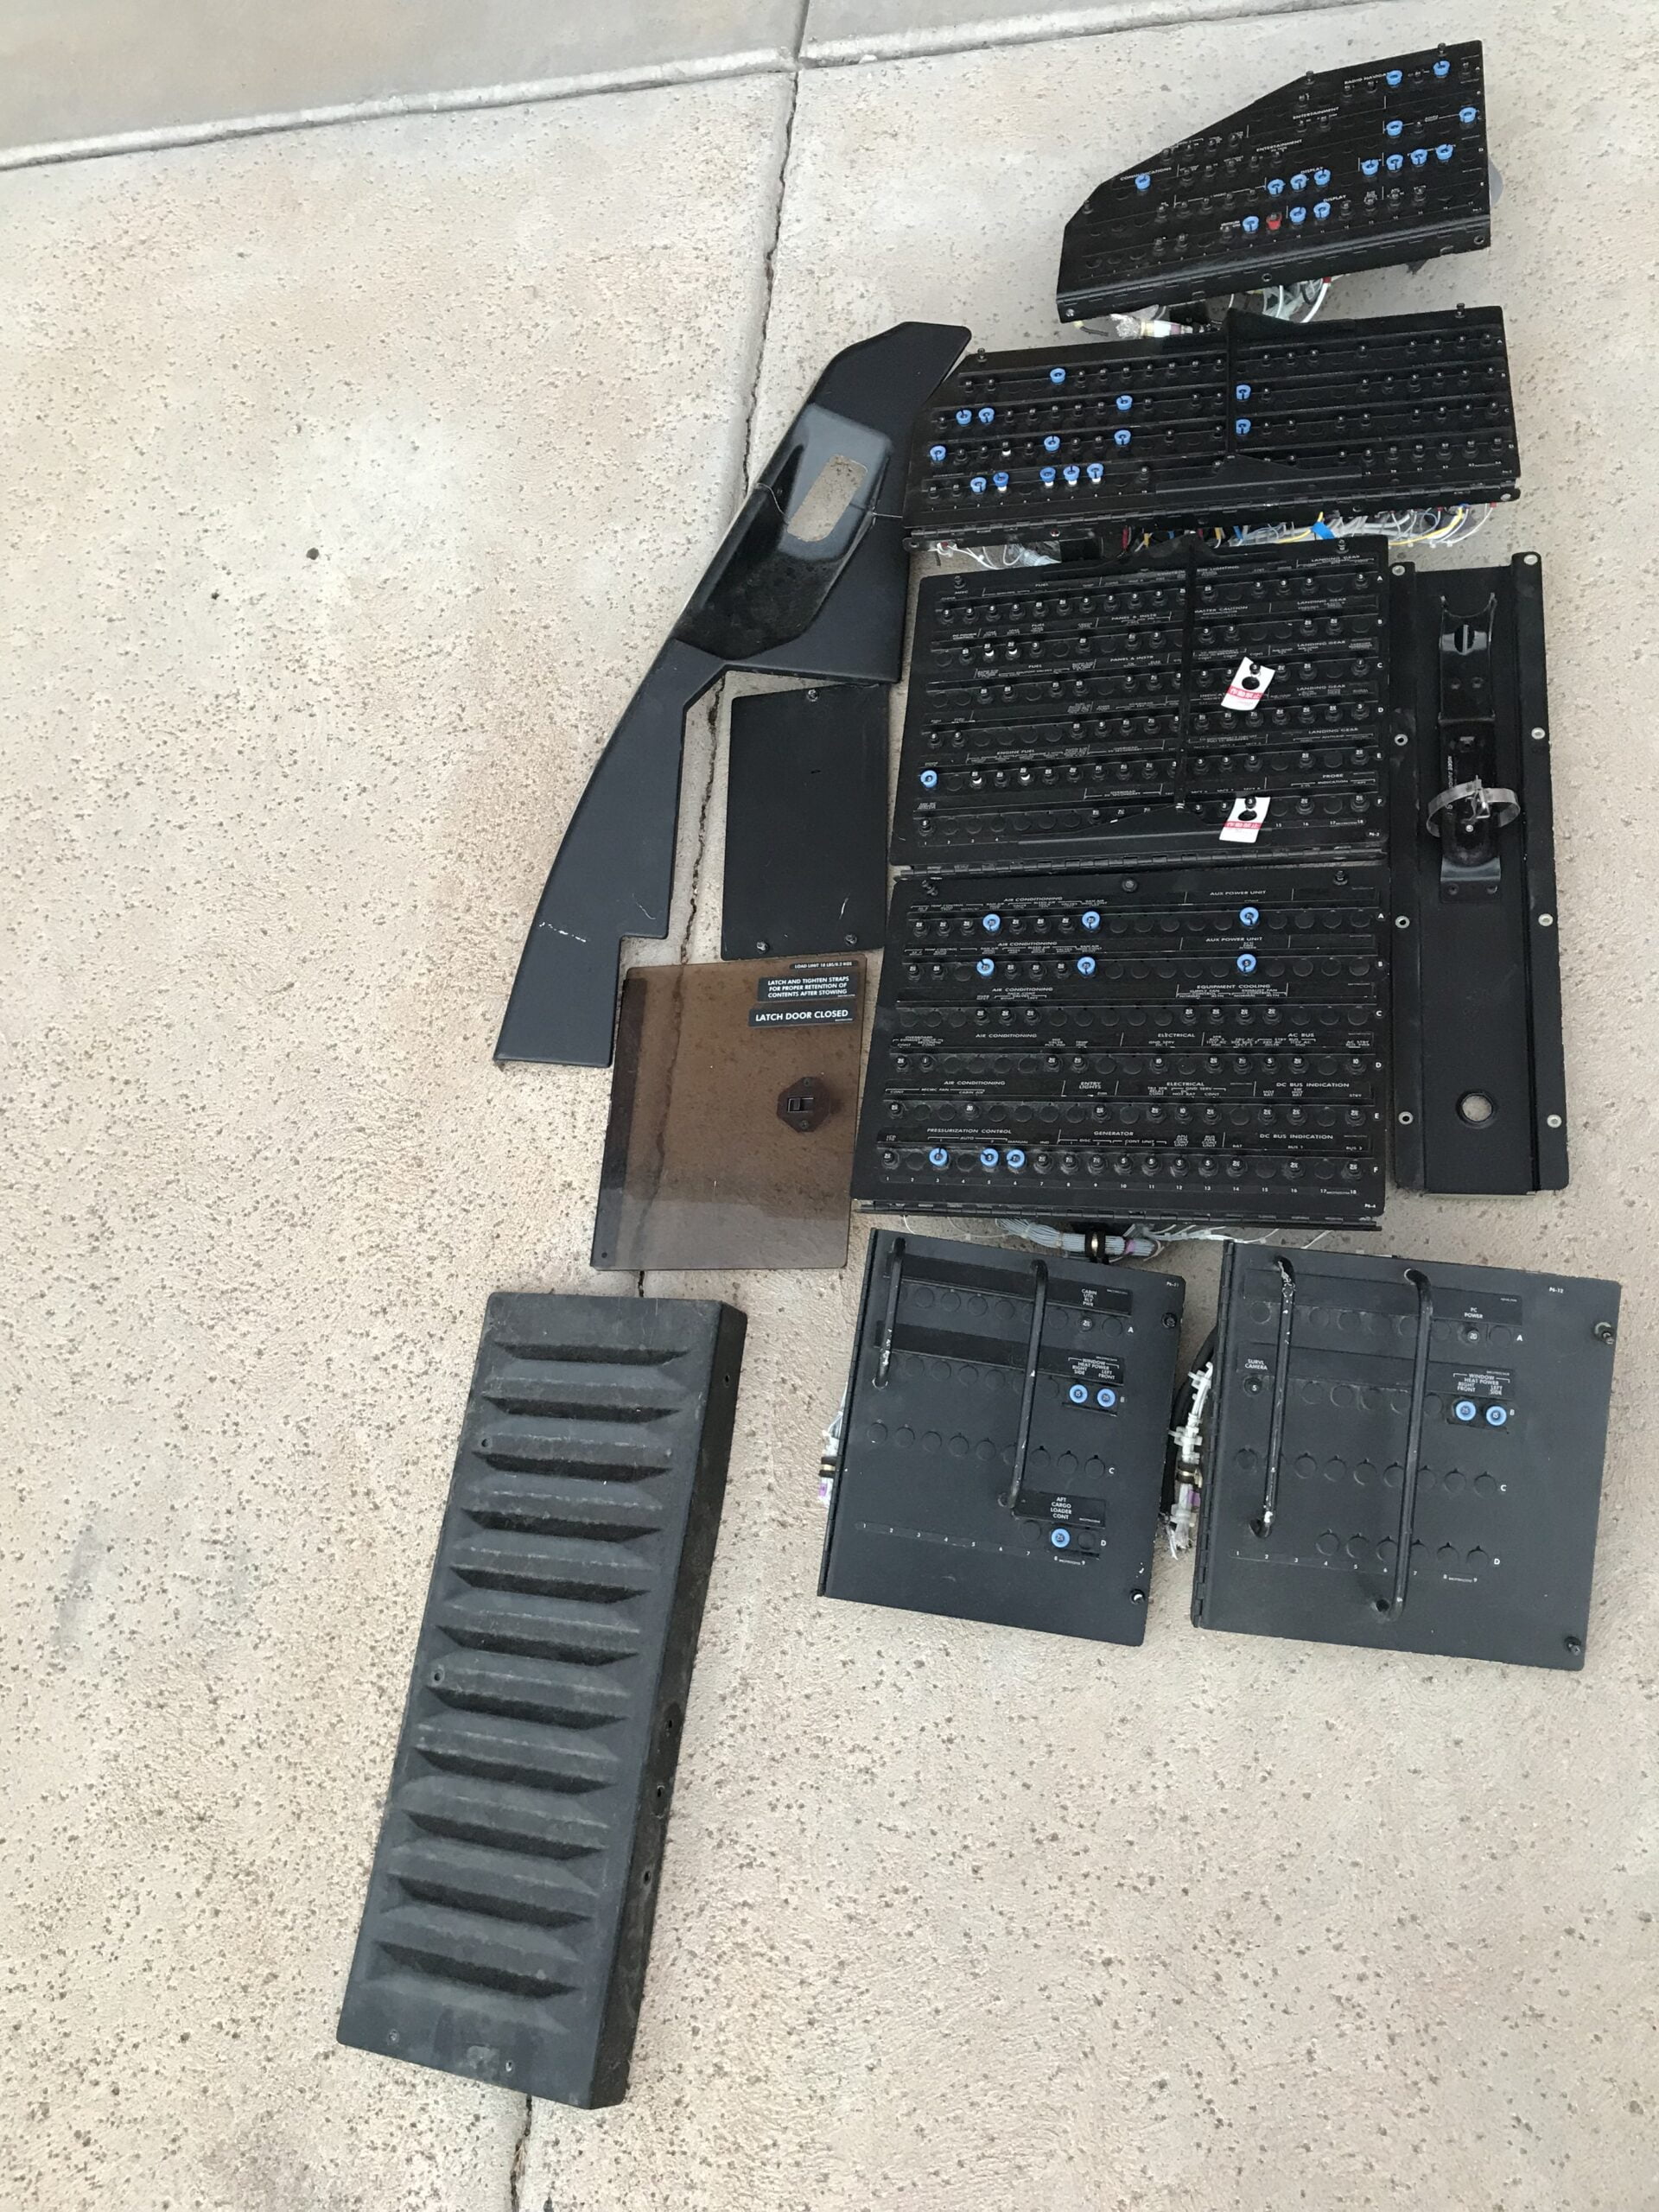
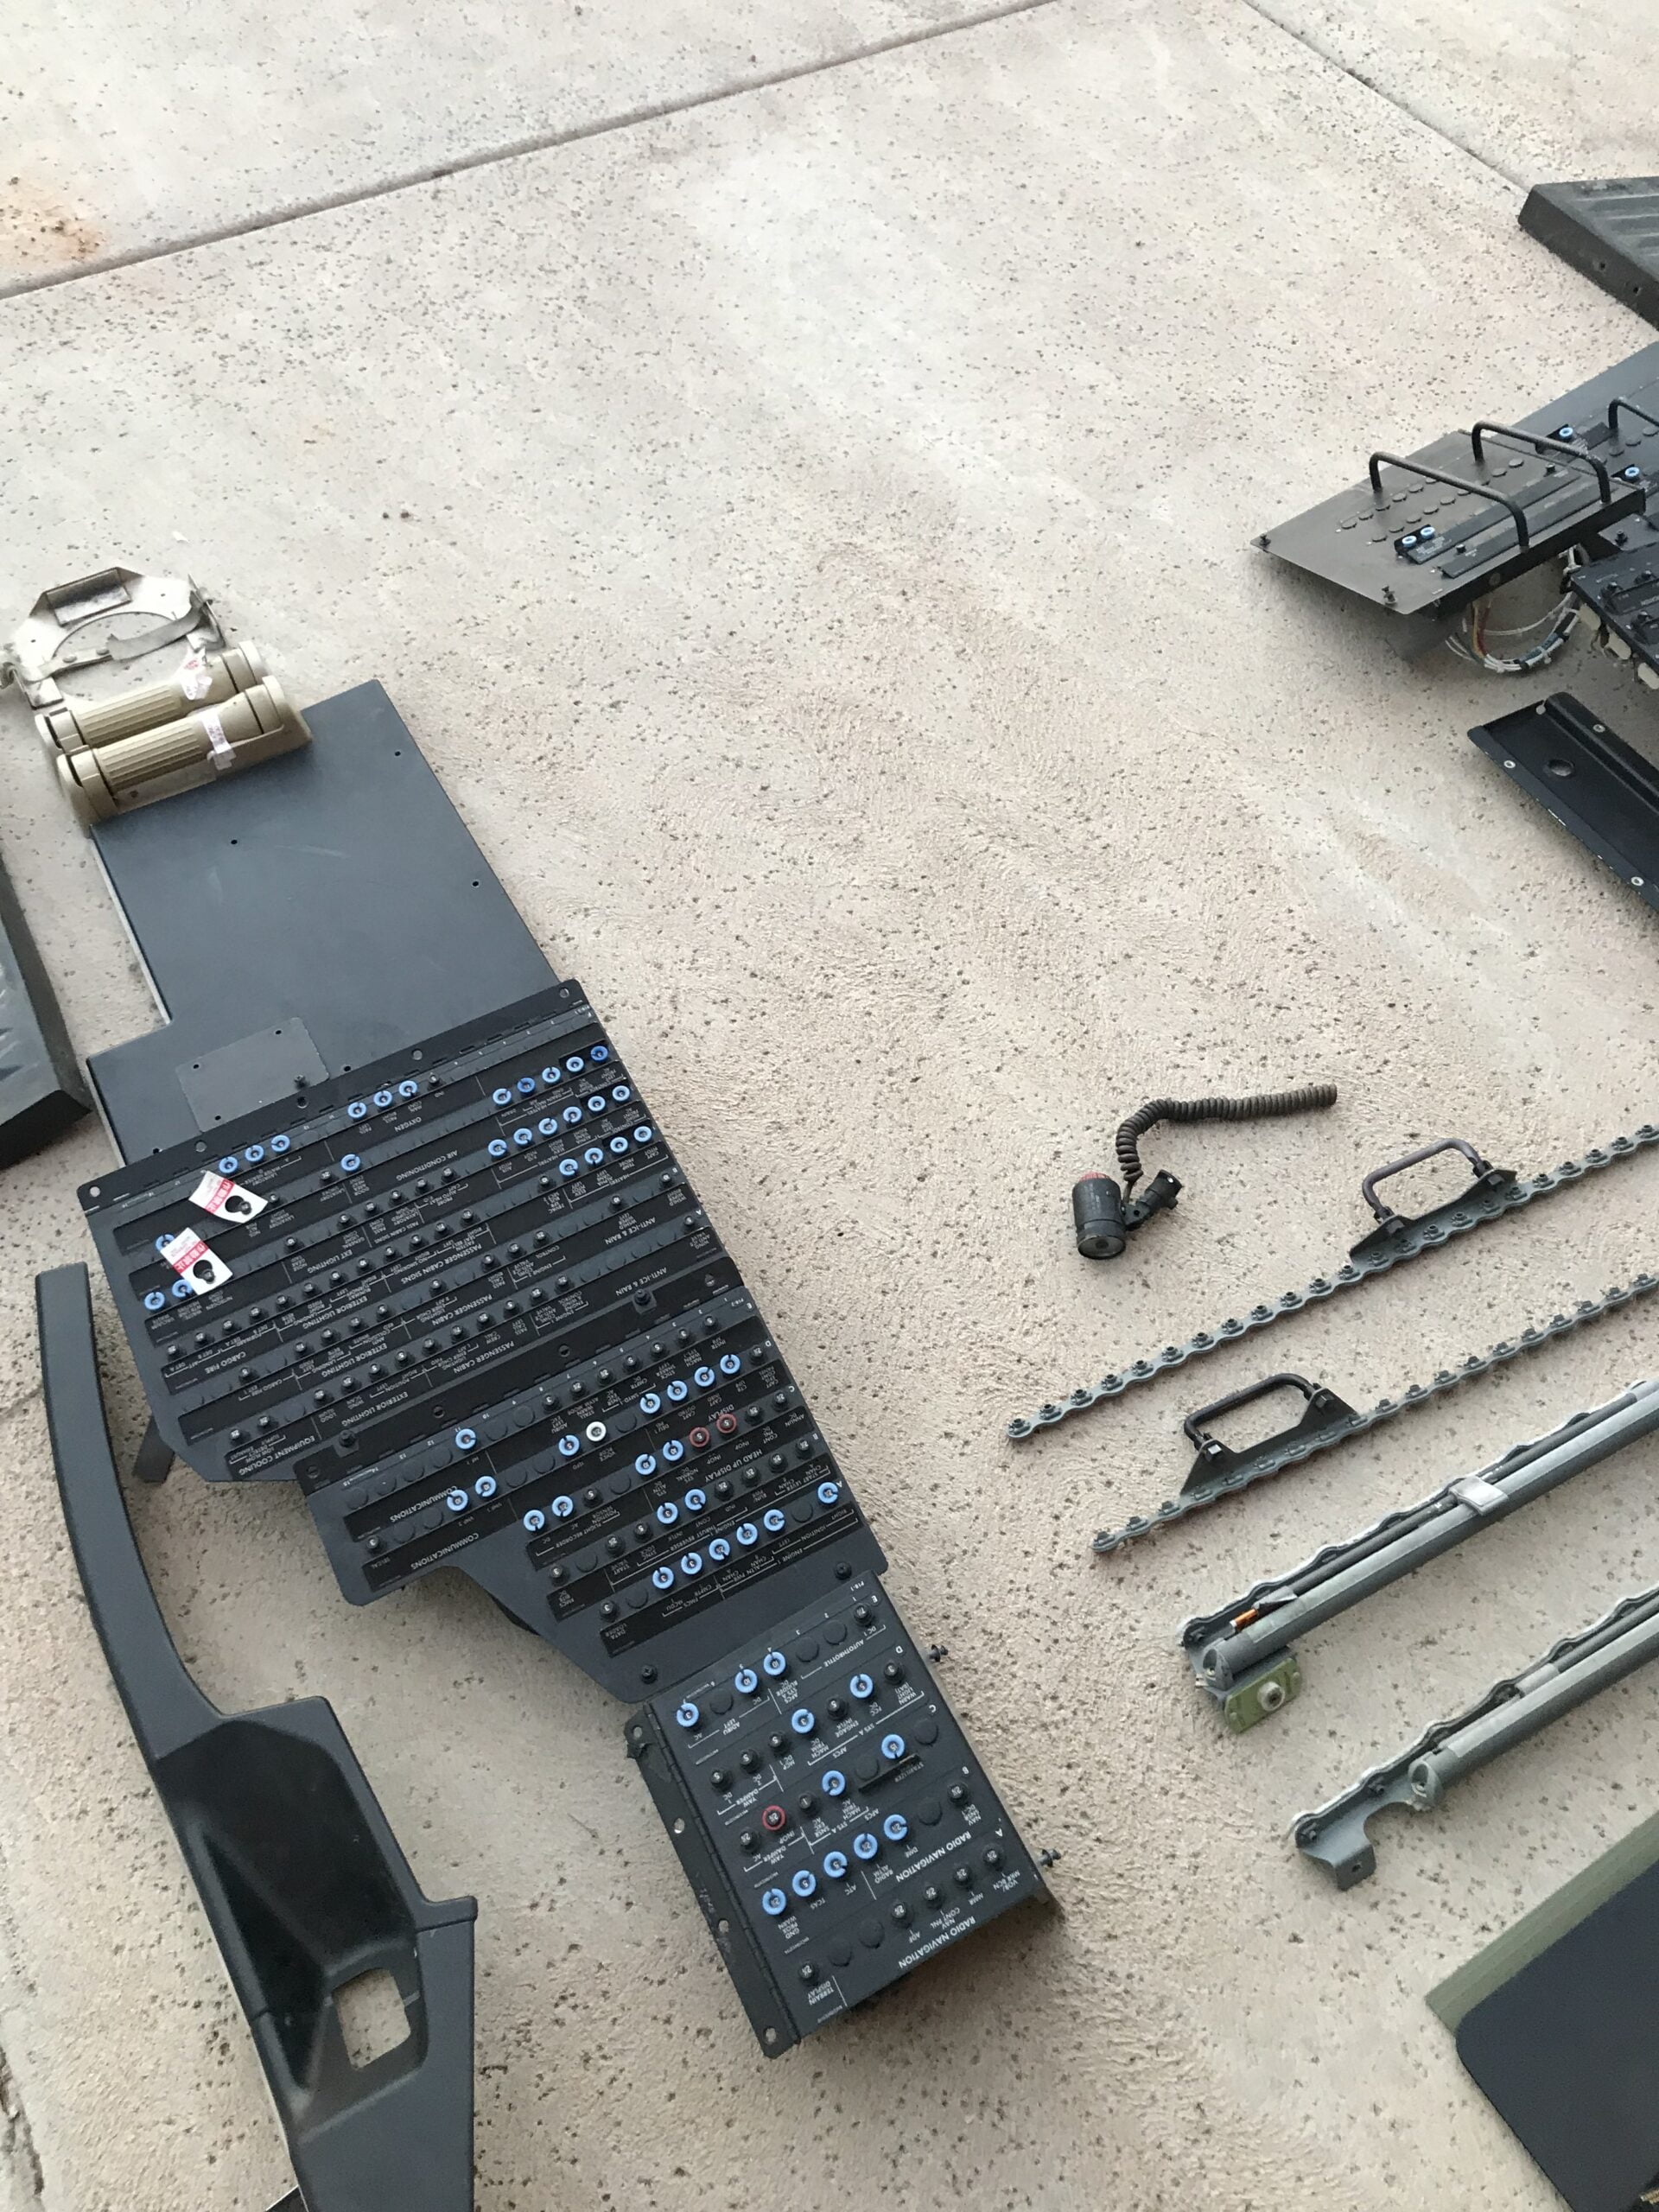
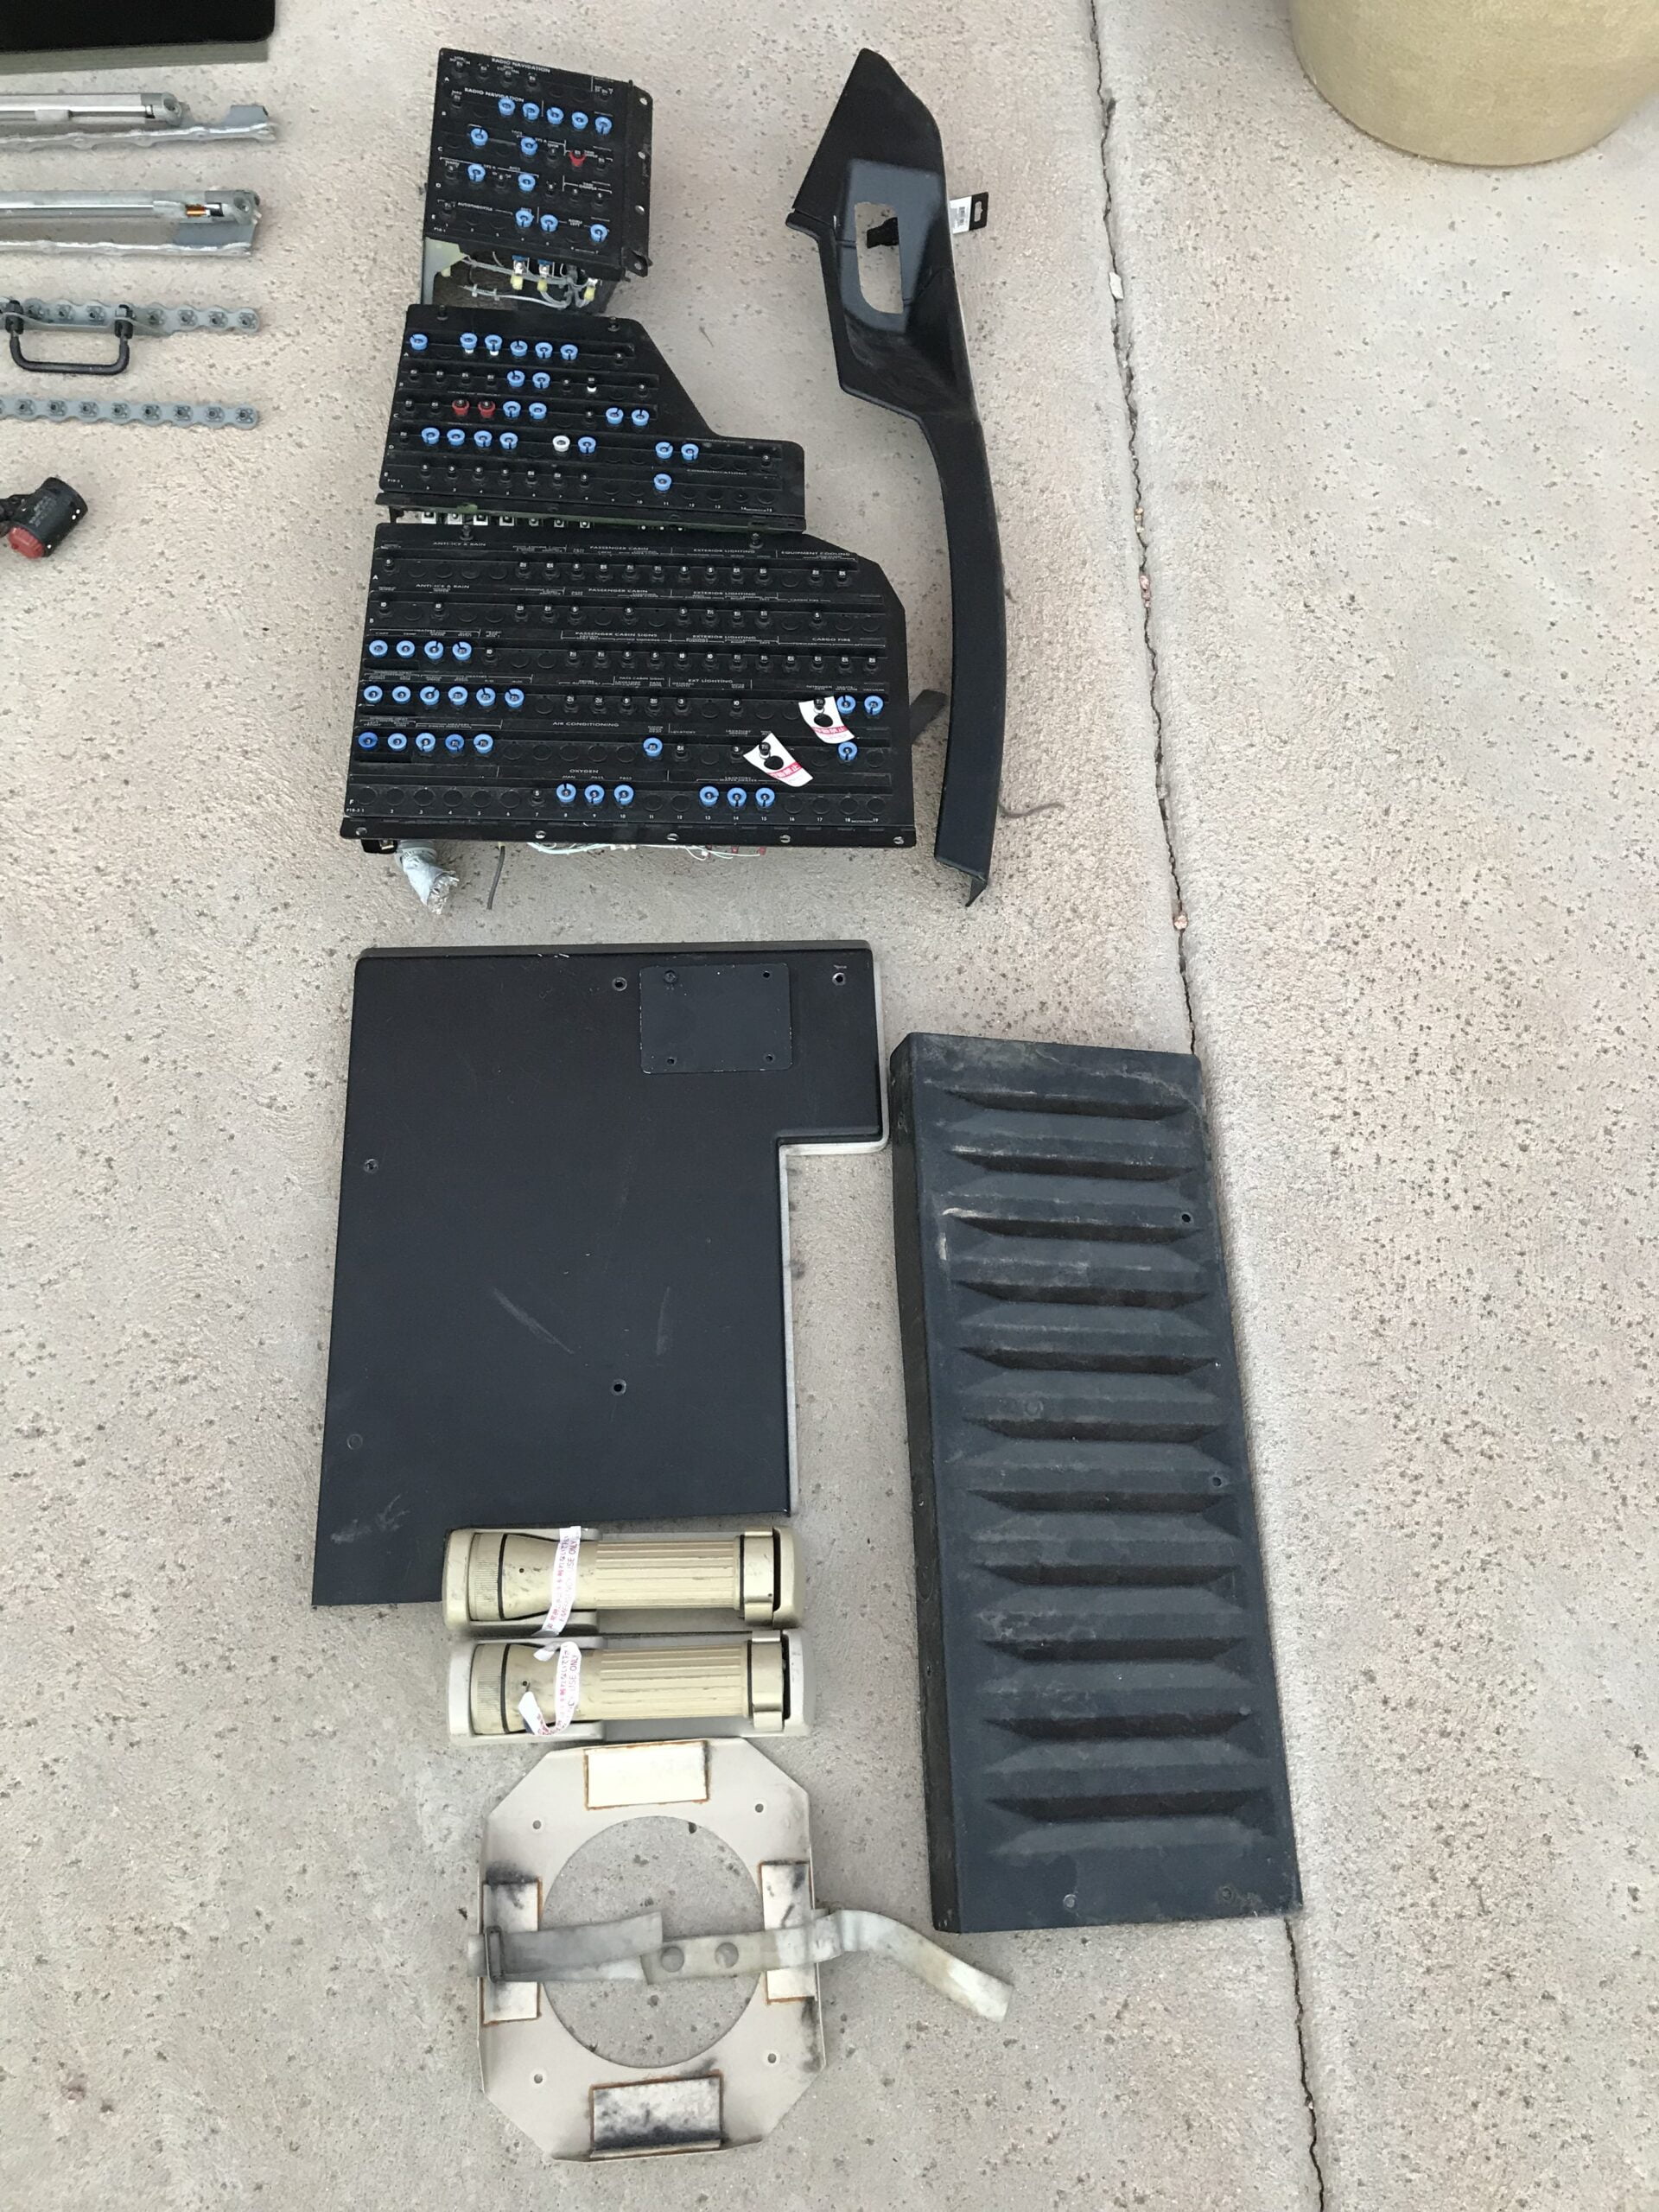
However, I just happened to luck out with some really good fortune and timing. A close friend of mine knew someone who worked in aircraft salvage industry and put me in touch. Turns out he was getting ready to pull some parts from a 737-700 about to be scrapped, and he was able to pull a complete set of circuit breaker panels from the rear bulkhead with ALL the associated breakers and wiring, along with some other goodies you see, and all are in fantastic shape. Talk about a great guy!
Once these arrive I’ll be having a field day! I’ll keep you posted.
Oh, and one last piece of eye-candy…
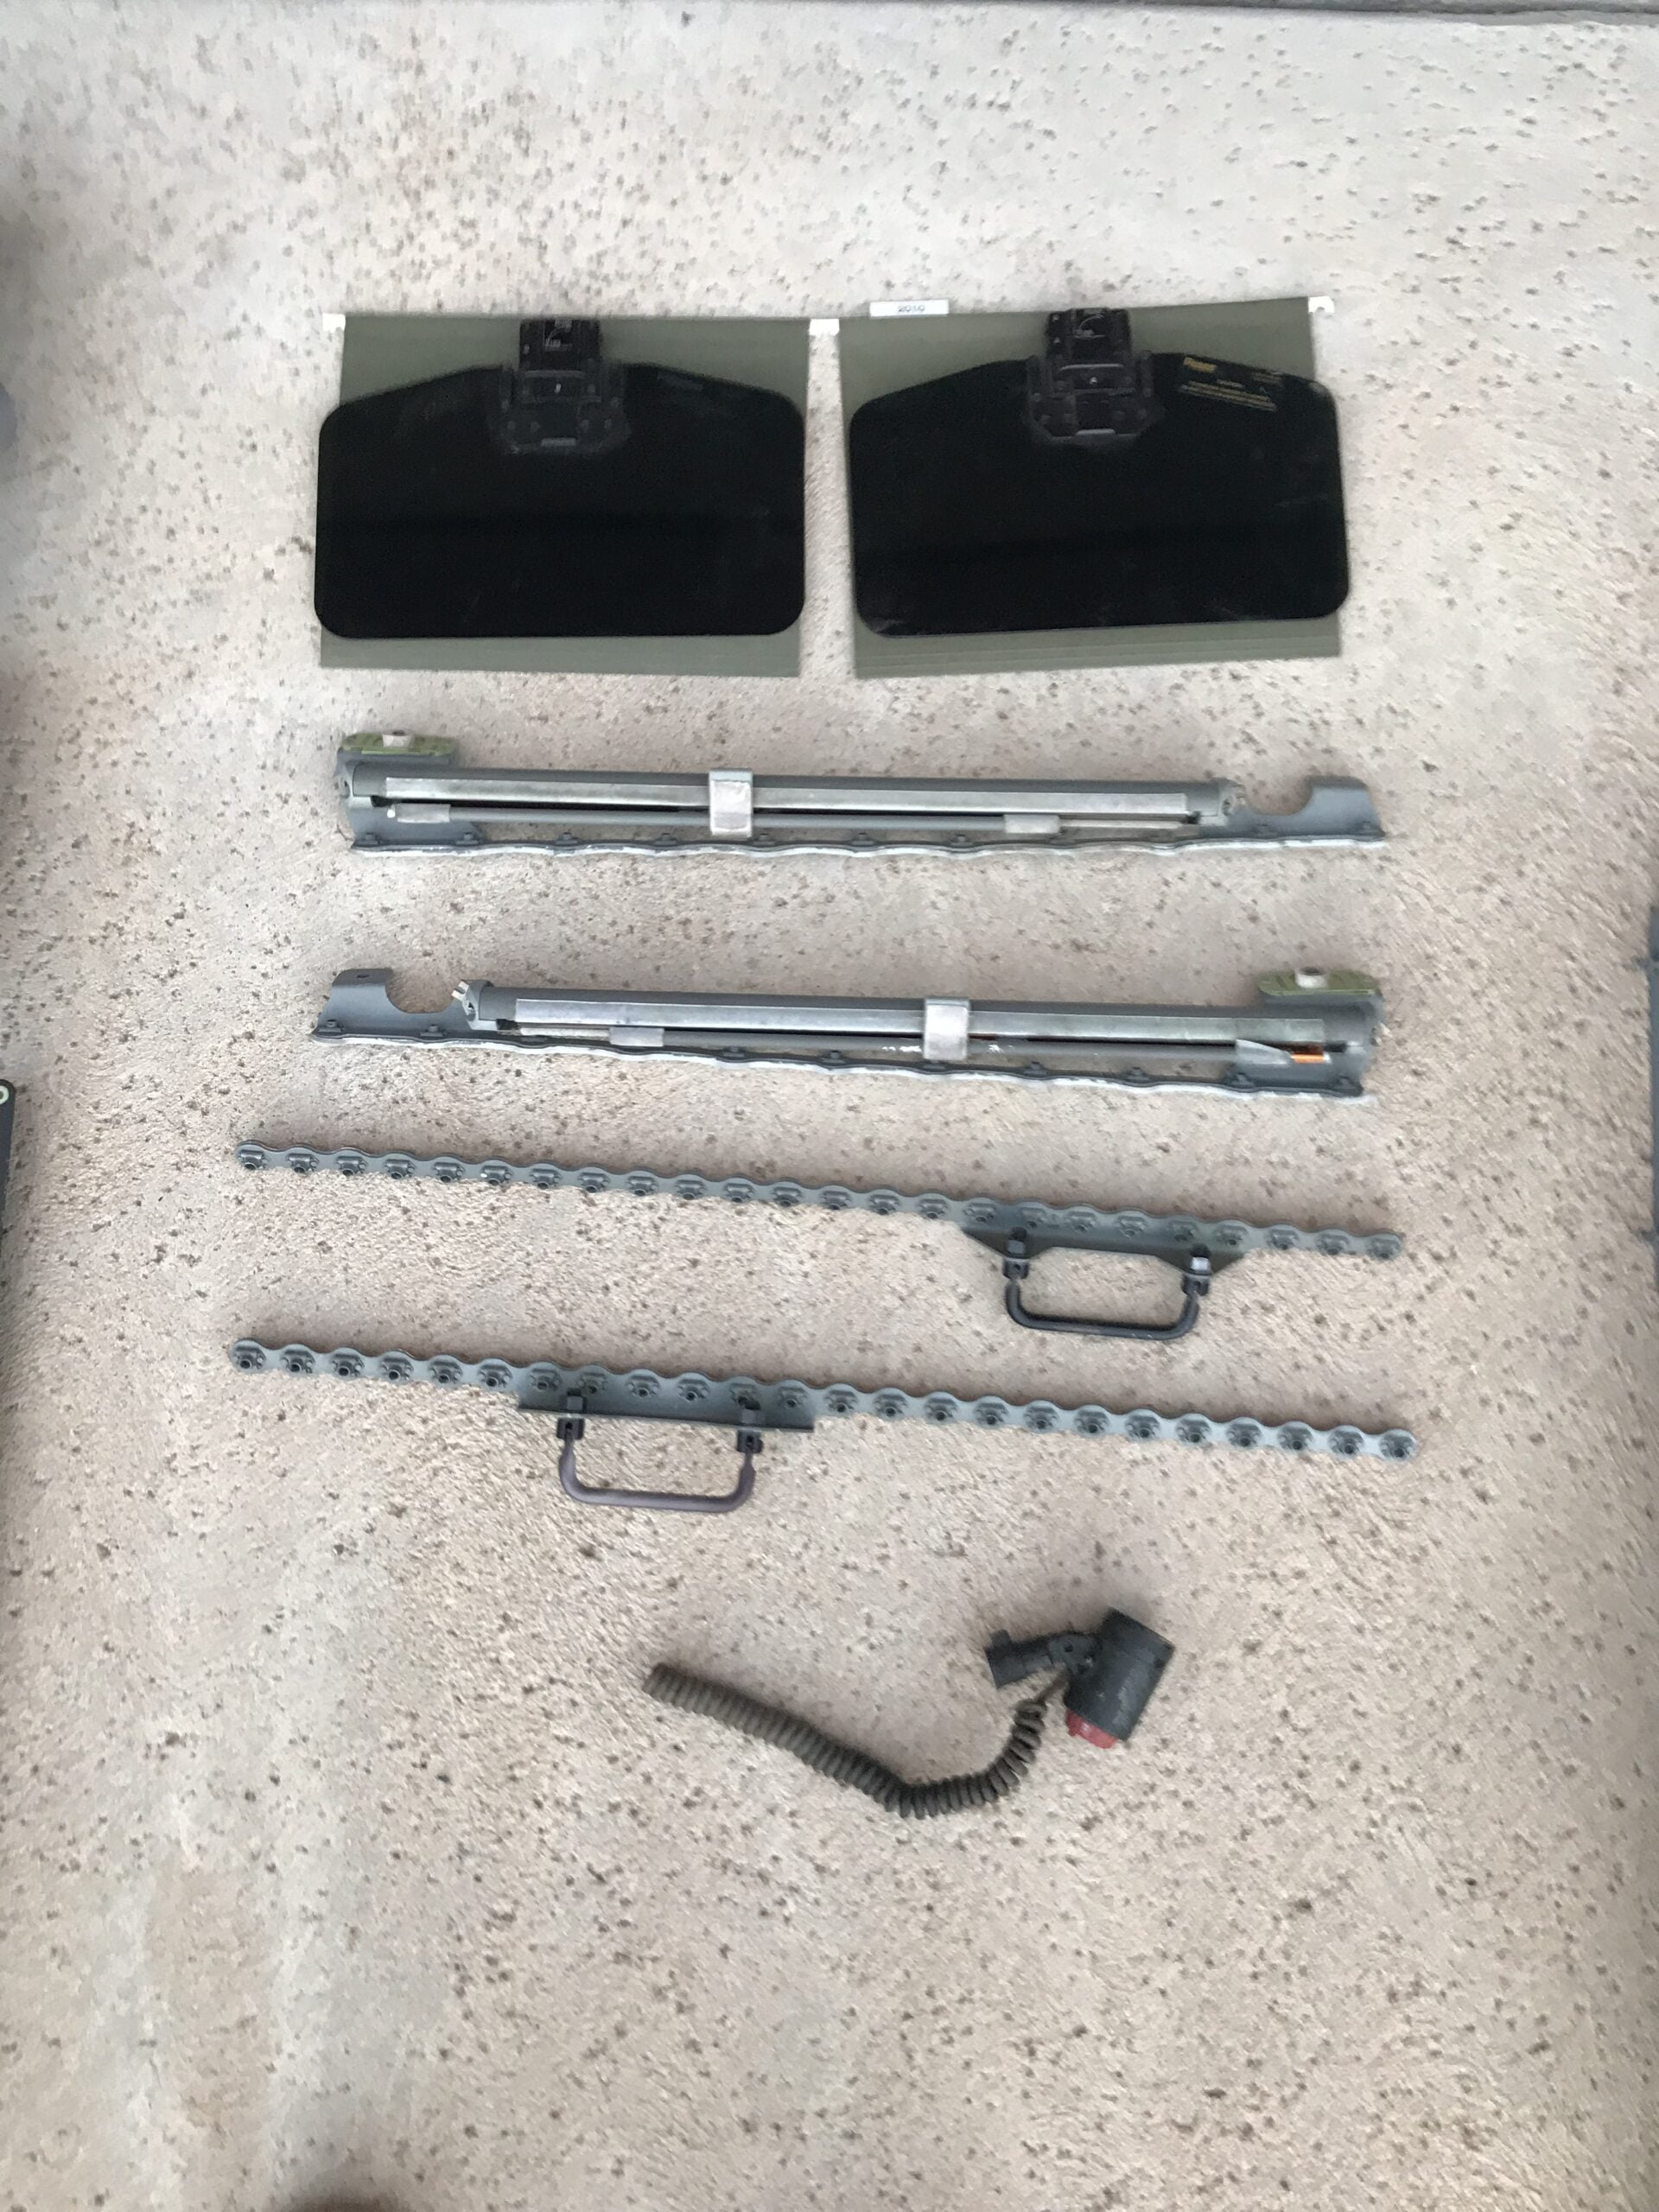
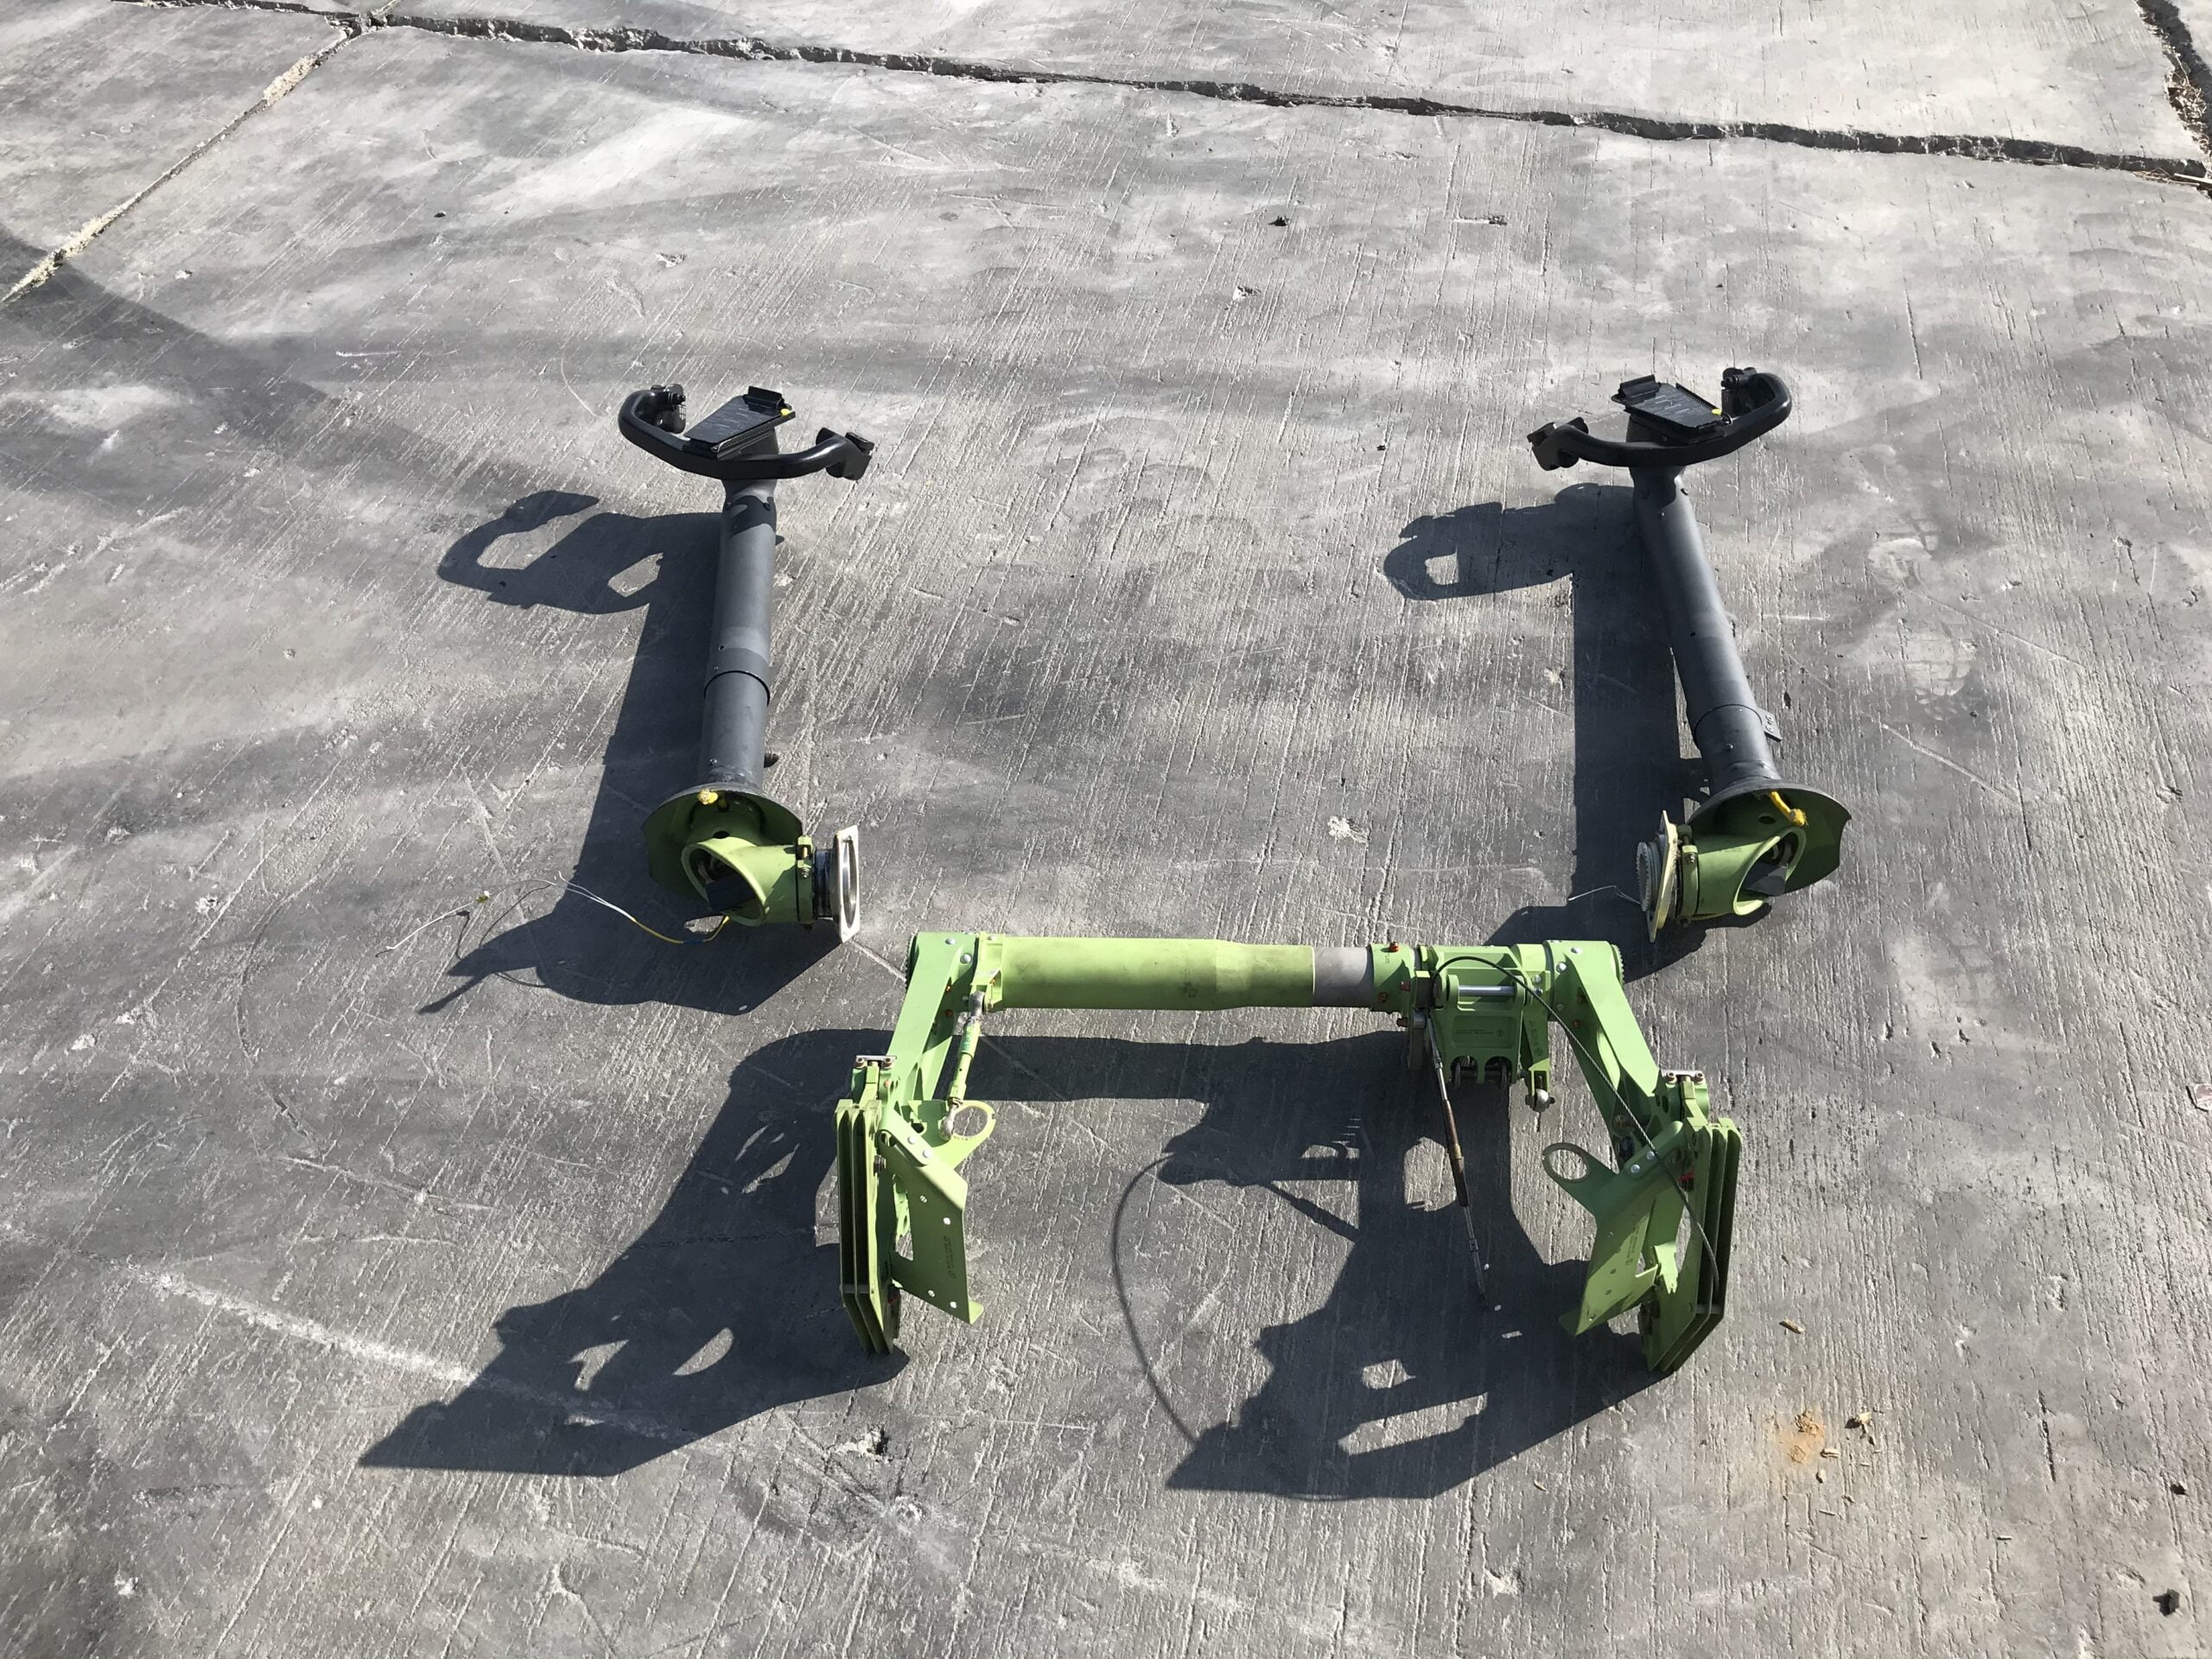
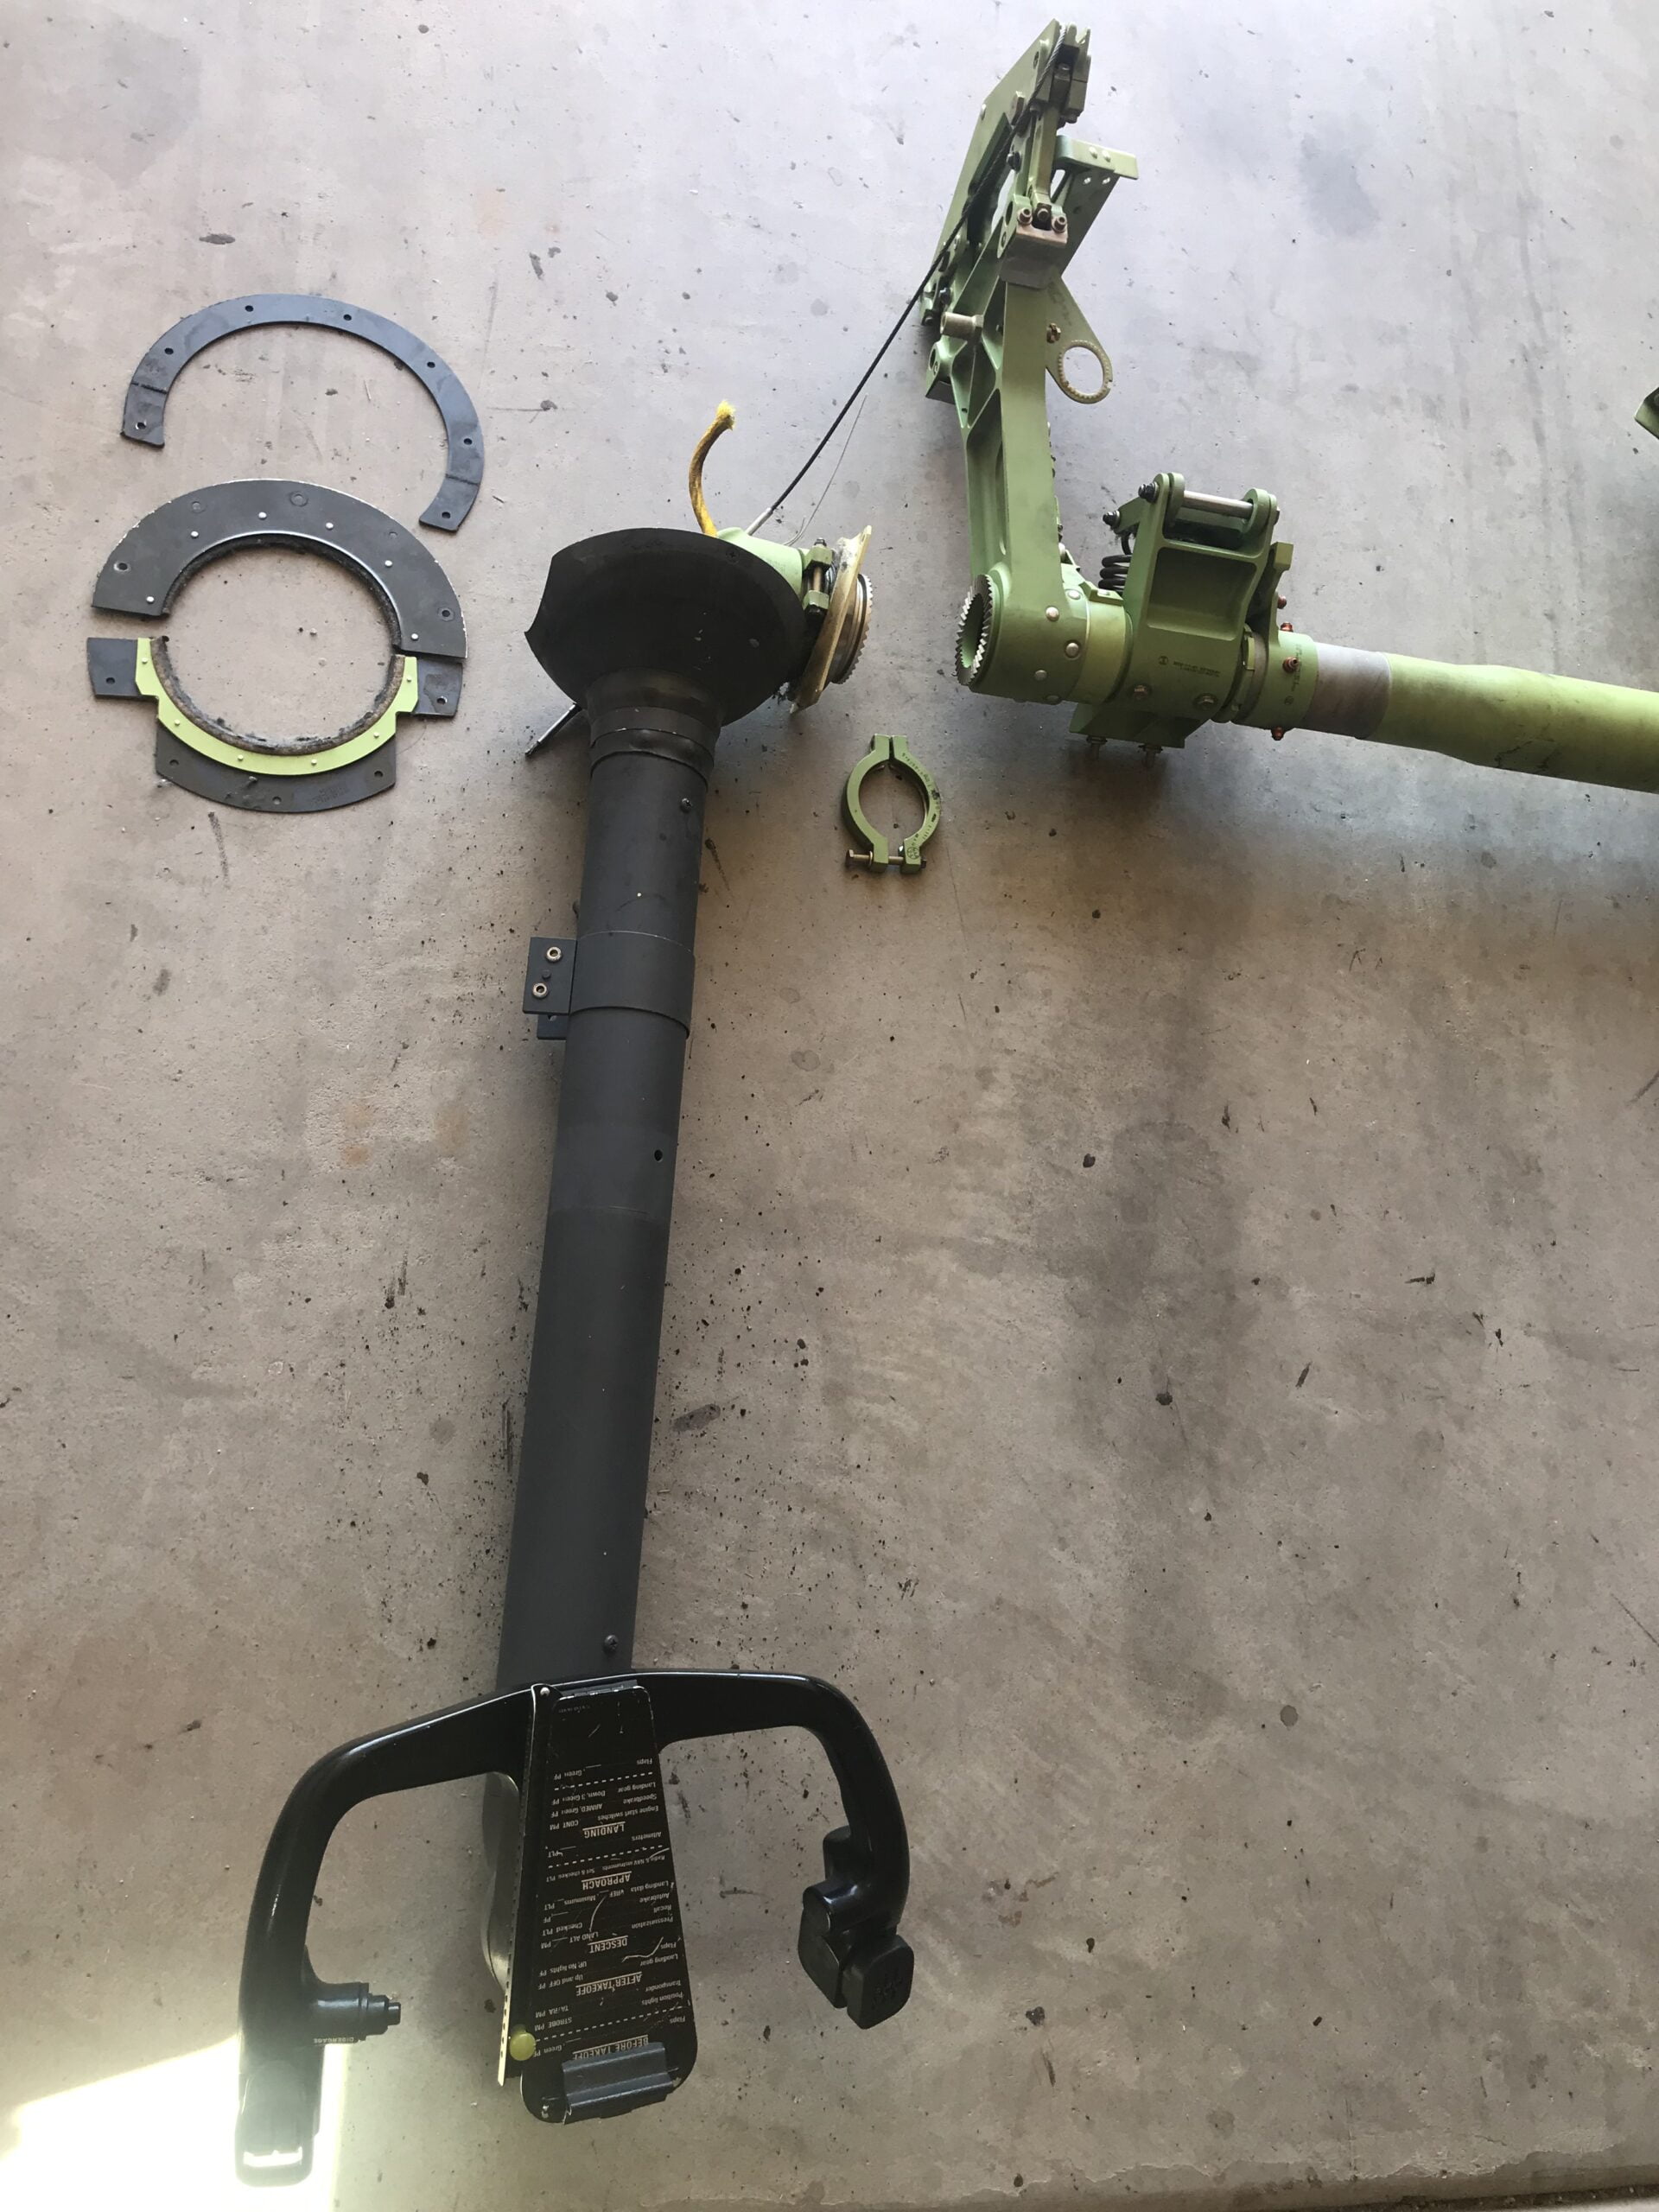
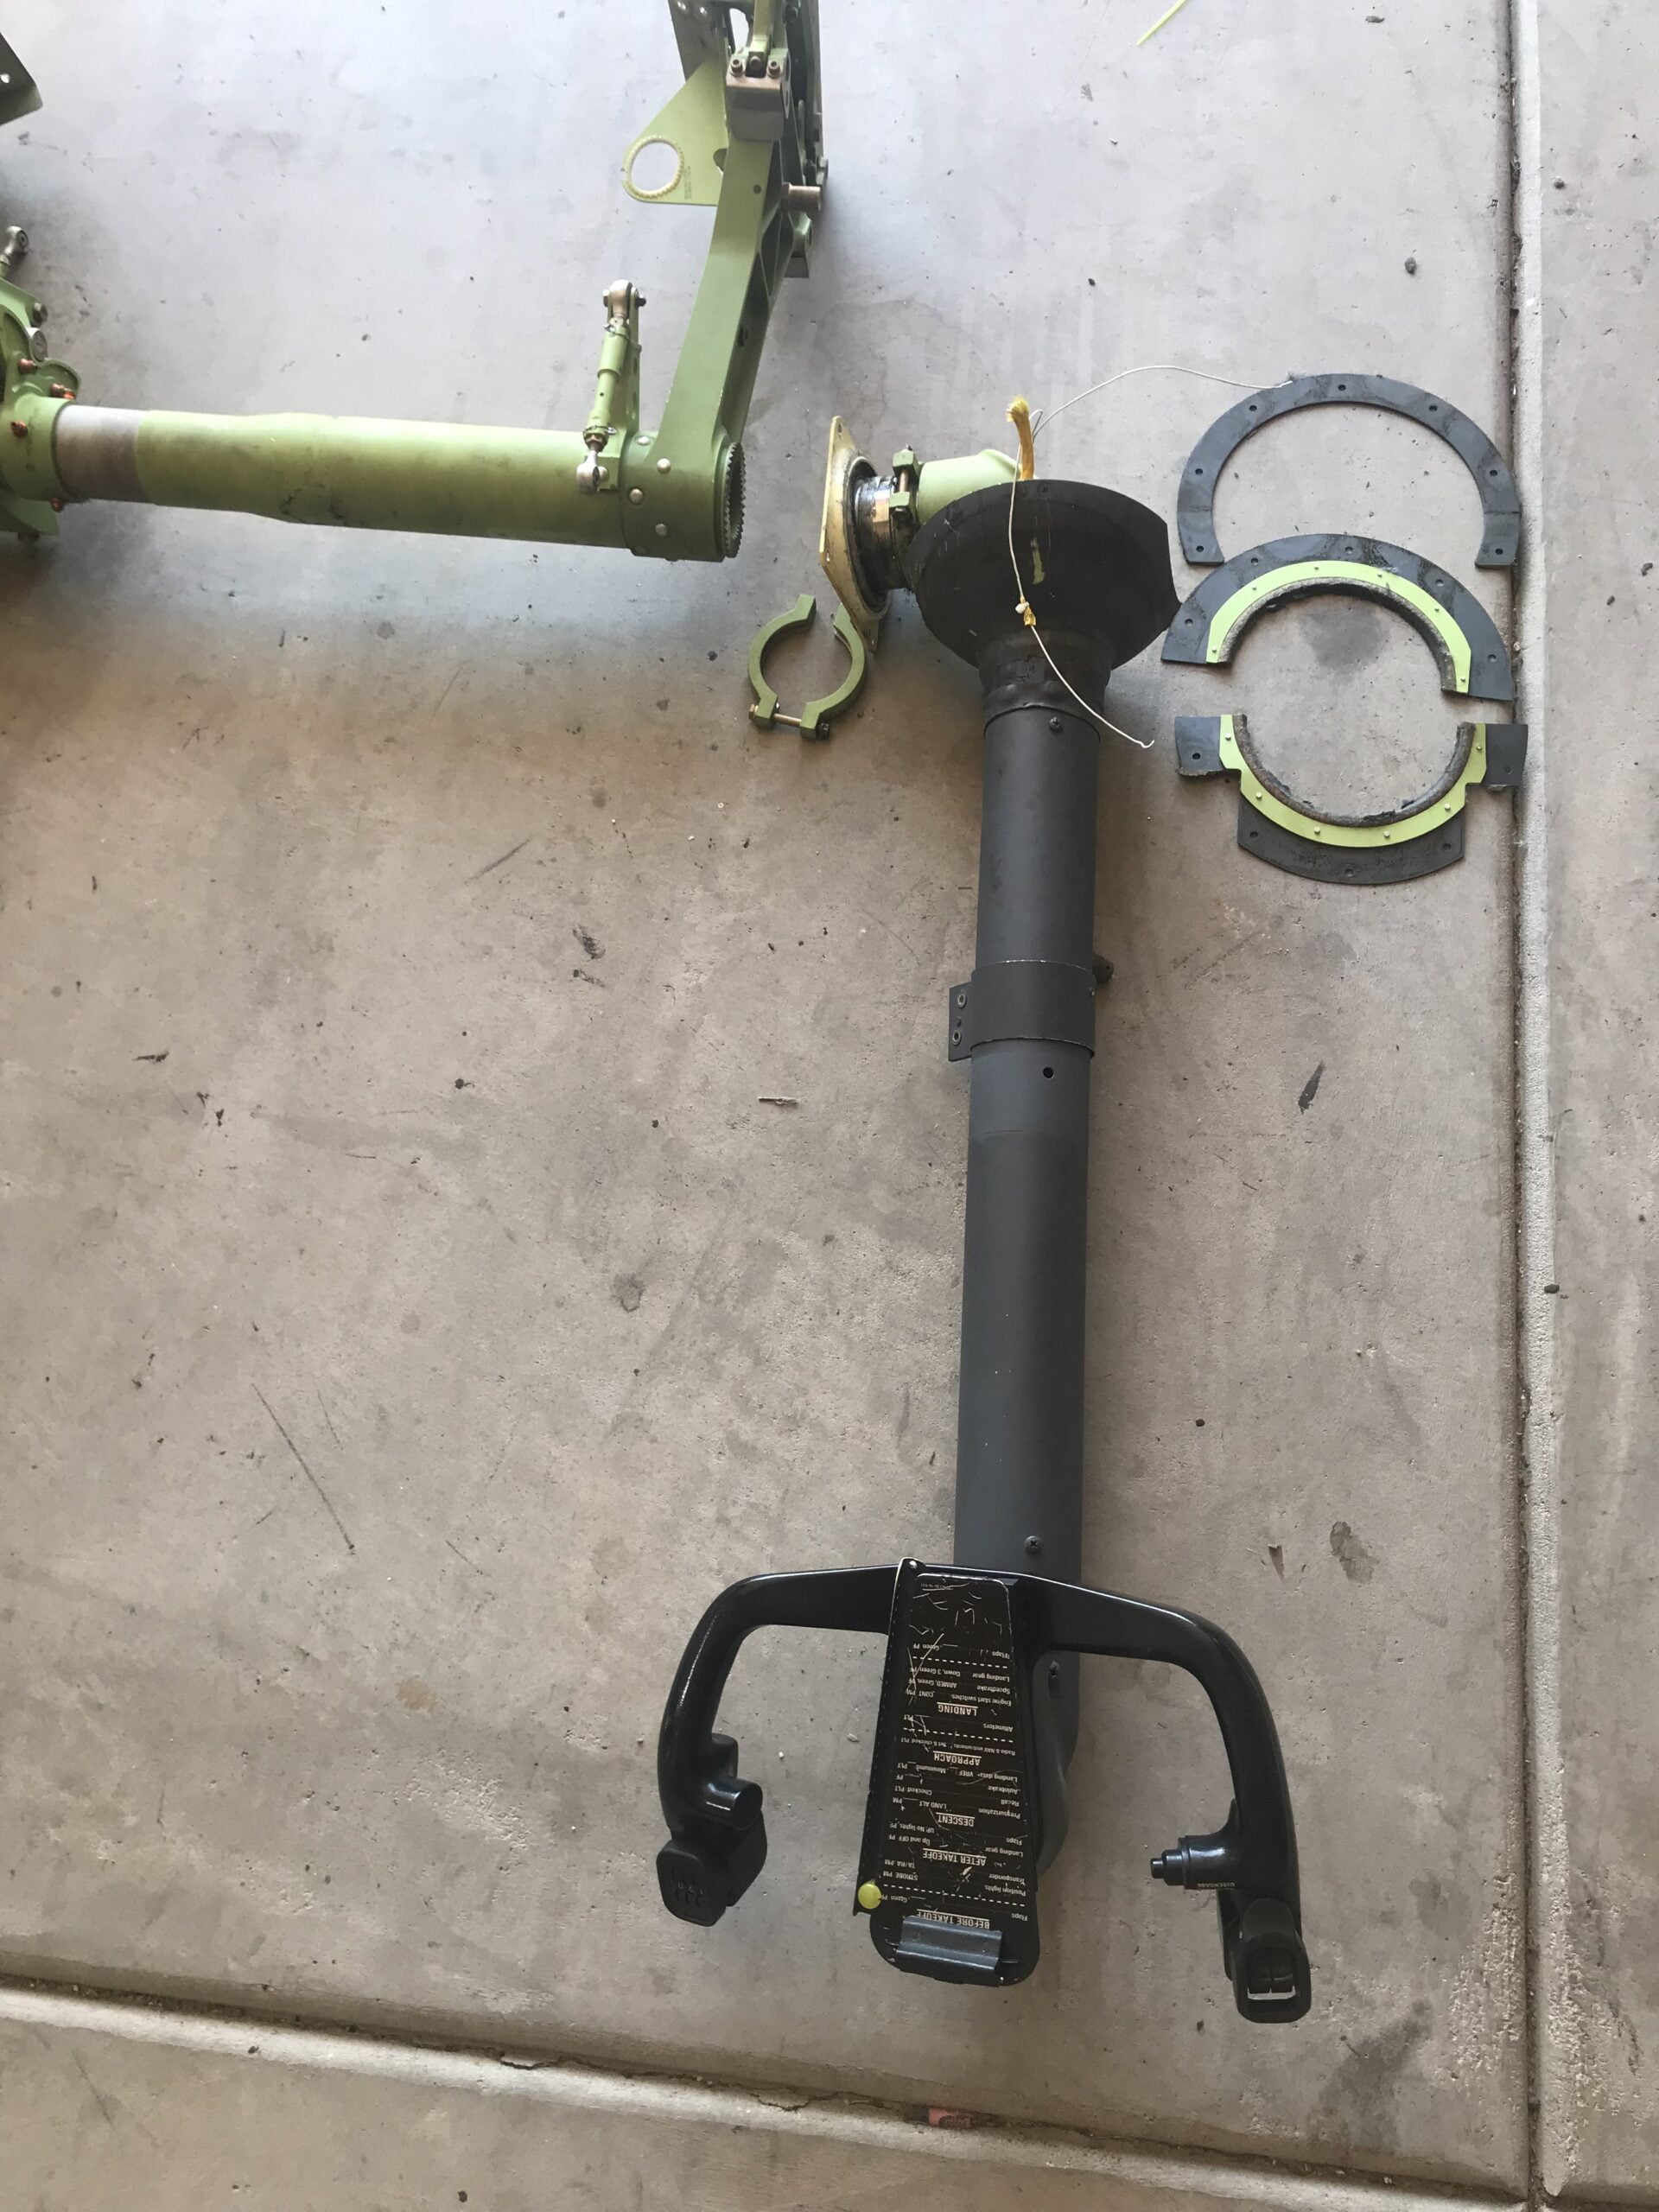
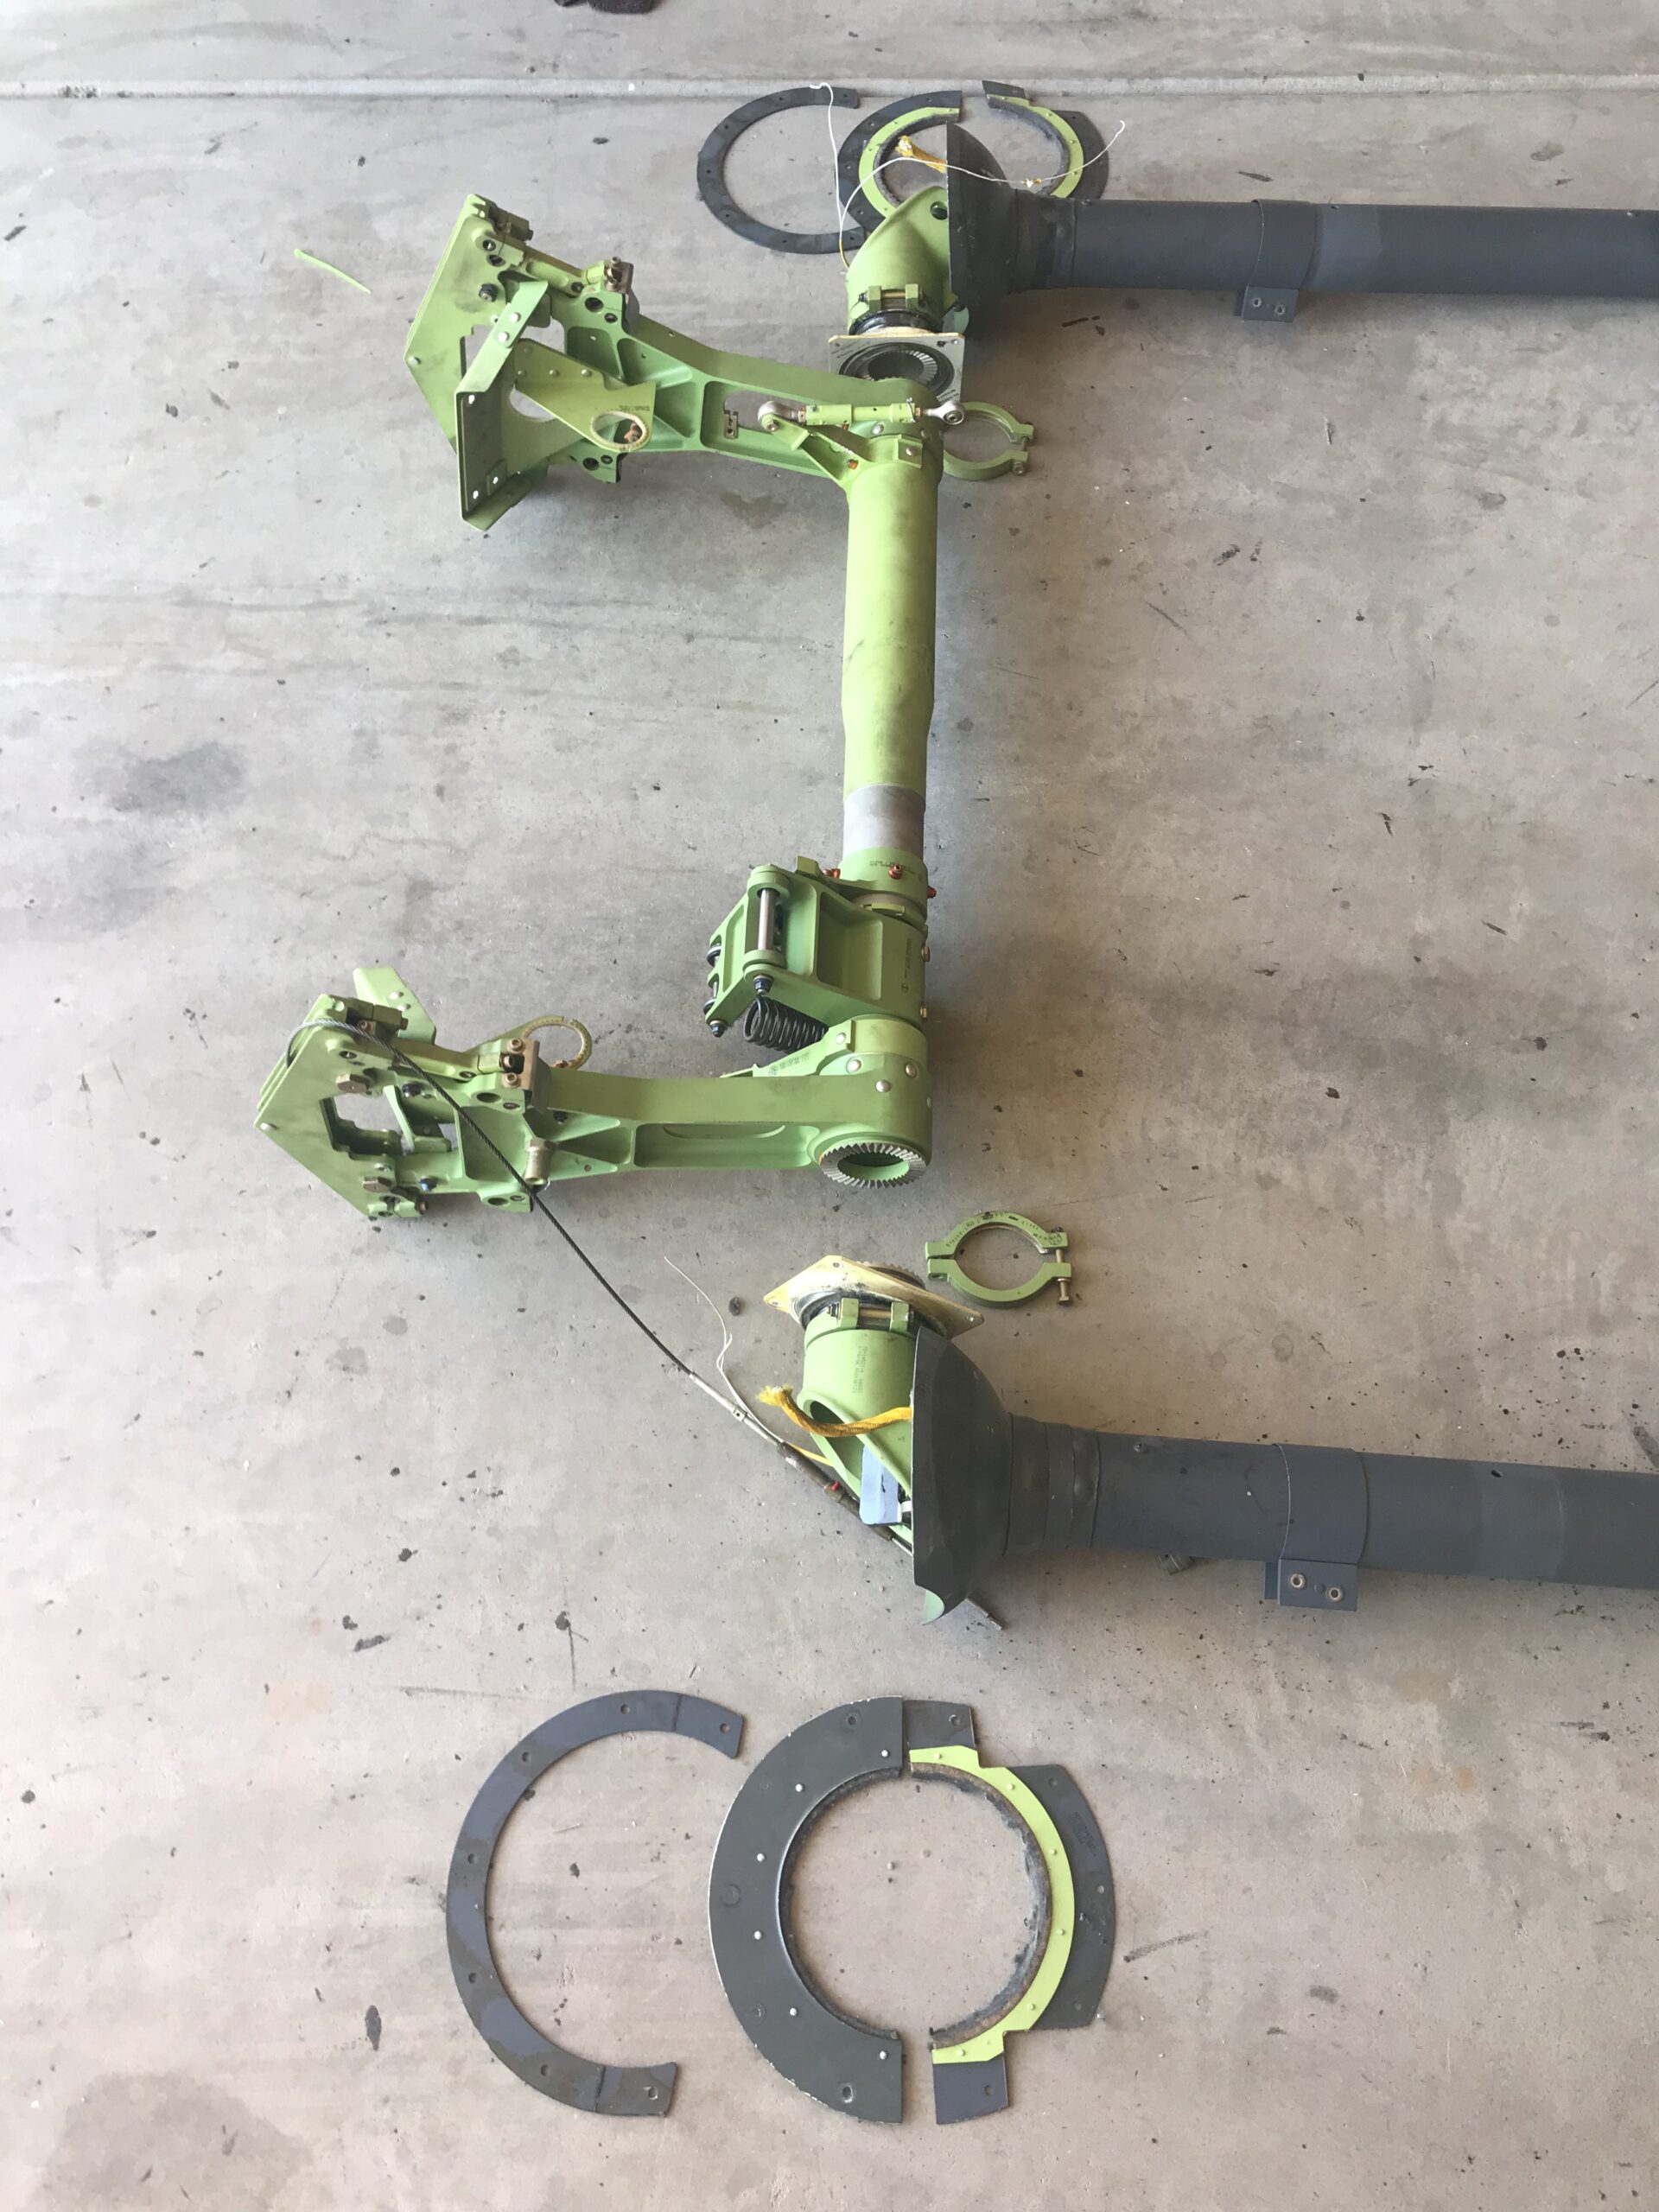
So, the same person, as luck would have it, was able to do me a solid and grab both control columns, the cross-bar, and related hardware out of that 737-700, also all in fantastic shape. I have been wanting to replace my standalone ACE yokes with a dual yoke setup and had been looking at SimuJabs as one affordable option. However, I was get these real columns, essentially complete, for significantly less.
Even better, these also have the elevator axis bearings, the bottom covers, and the stick shaker brackets which are impossible to find. No stick shakers, but I happen to have a couple sitting around waiting to go on.
The downside is I will have to now figure out the frame work and mechanics to support these, but I’m up to the challenge. Nothing a little welding and some potentiometers can’t resolve. Stay tuned!


3 comments
Absolutely gorgeous. Great work, keep them up
Looks like you spent a lot of effort on this. How much would you say you spent on the whole 737 Home Cockpit?
Author
It certainly has been a labor of love and a lot of effort, but over a long period of time so it’s more bearable.
I’ll direct you to my How Much Does It Cost FAQ for more info on the costs involved. I generally don’t discuss what I spent, but the FAQ should give you a pretty good idea. A fully built-out 737 sim (without a motion platform) will likely run you between $50K – $100K USD. You can certainly do it for less if you make everything yourself, and it can cost a lot more if you go all out.