
Last Updated on December 12, 2023
Adding little details to your home-based flight simulator cockpit can really enhance the realism and enjoyment of the experience.
These last weeks I’ve been keeping busy by adding some little cockpit details to add some realism, and tying up some of those nagging loose ends. I’ll talk about some of the simple, yet useful enhancements I’ve added to my sim, and hopefully spark some ideas for your build.
Cockpit Seat Handles
Since I added car seat rails to allow my Weber seats to move forward/back and side to side (a cheap J-rail alternative), I noticed it was difficult to reach the two grab handles to activate the seat movement, even though I had bent the rail handles almost 90 degrees upward. The height of the seat plus the tight space just made it hard to lean over far enough to reach them.
To make the grab handles easier to reach I decided I’d add a knob attached to a rod, connected to the car seat grab handles with a clevis and pin. The clevis fits tight enough around the rubberized rail handles that the rod and knob stay in place pretty well.
The downside is that the knob/rod tends does tend to creep from vertical and sometimes you have to blindly search for the knob as you’re leaning over. That got me thinking that I needed some sort of bracket to keep the knob/rod in place.
The solution, at least for the side-to-side movement, was fairly easy. I created a simple bracket out of aluminum to keep the rod in place. Basically just some 1/8″ thick x 1.5″ wide aluminum flat bar from the local Home Depot, cut to size with a metal cutting hacksaw and bent to shape with a “brake”. Nothing fancy but it works. I didn’t even bother painting it, at least for now.
The front lever, unfortunately, isn’t as easy a solution because of the way I have the car seat rails configured (one on top of the other, 90 degrees from each other). When the seat platform moves from side to side the front handle stays in place and doesn’t move with the platform. It DOES, however, move front to back with the fwd/aft rail. This means any bracket I mount to the seat platform will cause the knob/rod to tilt left or right as the seat moves from left to right. Not a big deal. It just means I have to make a bracket with an elongated hole that will allow the handle to tilt in the hole. It’s hard to explain in words, but when have pictures I’ll post them and it will make more sense.
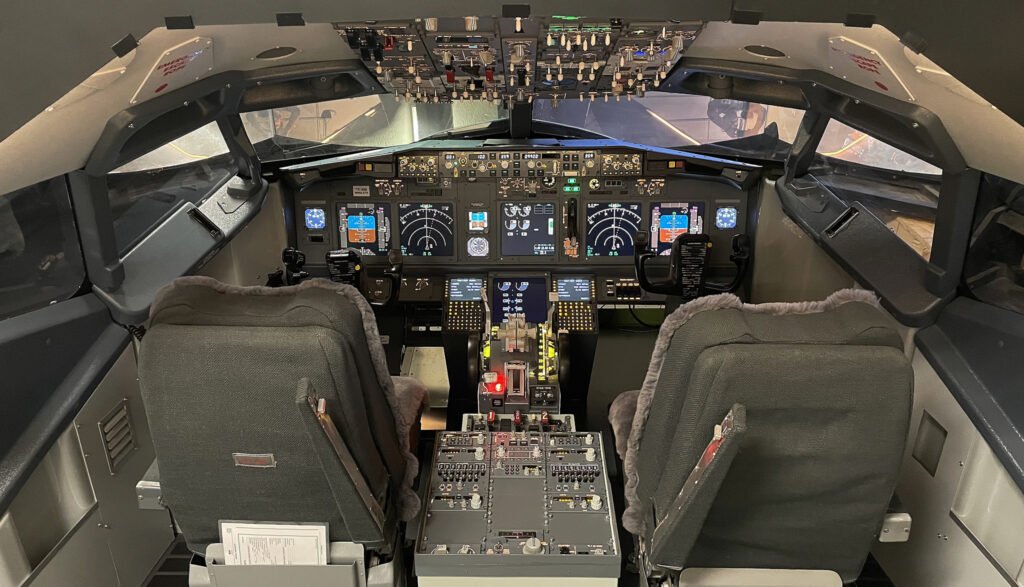
In case you’re wondering, the two large holes in the seat platform are to allow for the Weber seat vertical supports which stick down a little below the seat bottom, and also allow the wires for the buttkickers to connect to the seats.
In case you’re interested, I got the handle knob and shaft from MSC Direct and the clevis rod end at the bottom from McMaster-Carr.
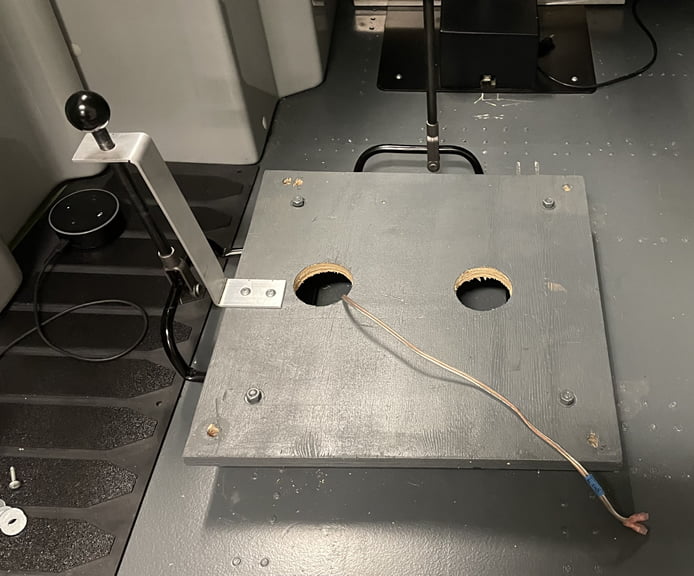
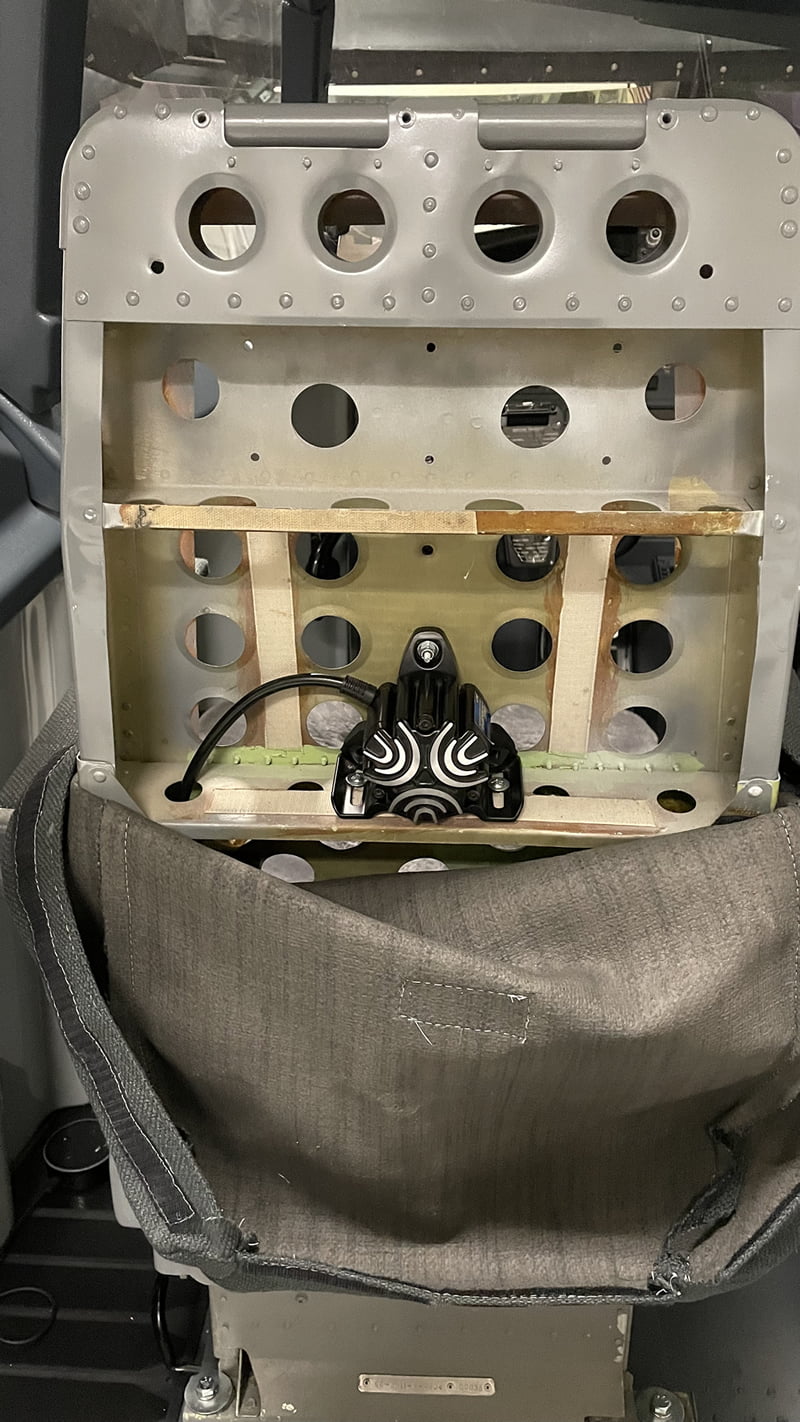
Seat Vibration with Buttkickers
A great way to add detail through a sense of immersion to your home flight simulator cockpit is to add some tactile transducers. If you don’t know what these are, they’re designed to translate low frequency sound into vibration through whatever they’re attached to. They’re not speakers, in that they do not put out audio, but rather contain a small piston magnetically suspended inside that vibrates up and down during low frequency sound. That vibration translates to whatever it’s mounted to.
You’ll often see them added to home theater seats to add some “punch” to the subwoofers which makes you feel the sound effects of movies more.
For a simulator, it can help emphasize the rumble of the turbines, the bumps in a taxiway, turbulence effects, and even spoiler effects. If you’ve ever been on a commercial jet and they deploy the spoilers you can feel the shake of the plane.
The Buttkicker MiniLFE’s I used are small enough that they fit nicely into the back and bottom of my simulator cockpit seats as you can see below.
I connected the transucers to a 50 Watt, 4 Ohm per channel automotive amplifier running off a 12V industrial power supply. I just connect the speaker output of my PC to the inputs on the amp and the MiniLFE’s to the outputs. Easy peasy.
Map Lights
I’m also working on adding some Grimes map lights a friend gave me. These match the ones used throughout the 737 cockpit. The part number is 34265-8. They’re 28V but you can replace the bulbs to get it down to a more reasonable 12V. You can find them come up on eBay from time to time. While they’re not wired up yet, they will be eventually.

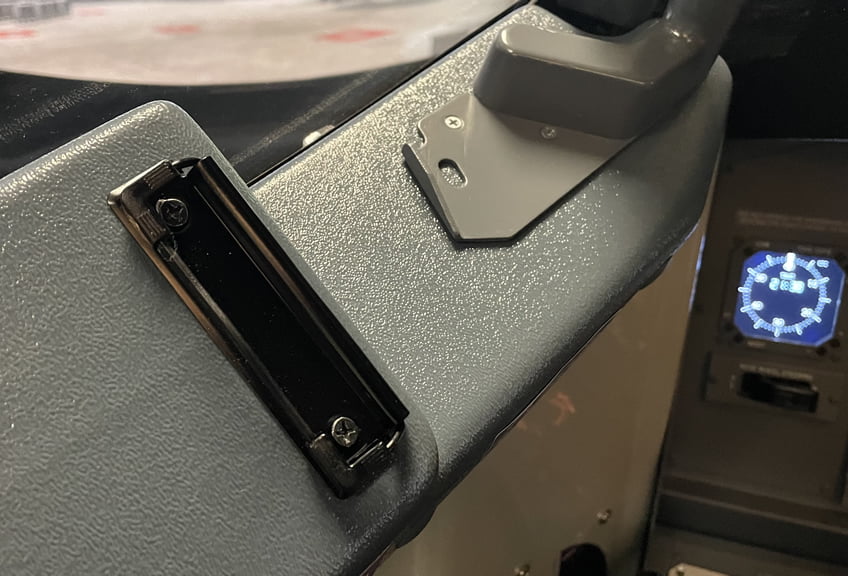
Map Clips
I purchased these PSCCO 10CM binder clips on Amazon that closely match the side window panel clips found on the 737, just behind the window handle. I painted them with some Rustoleum semi-gloss black and they came out quite good.
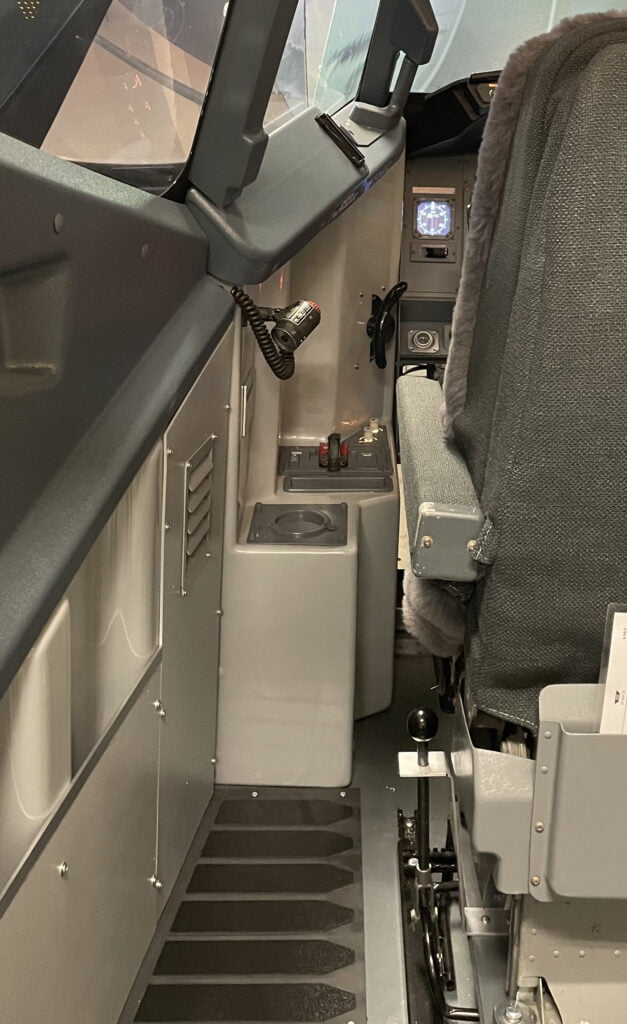
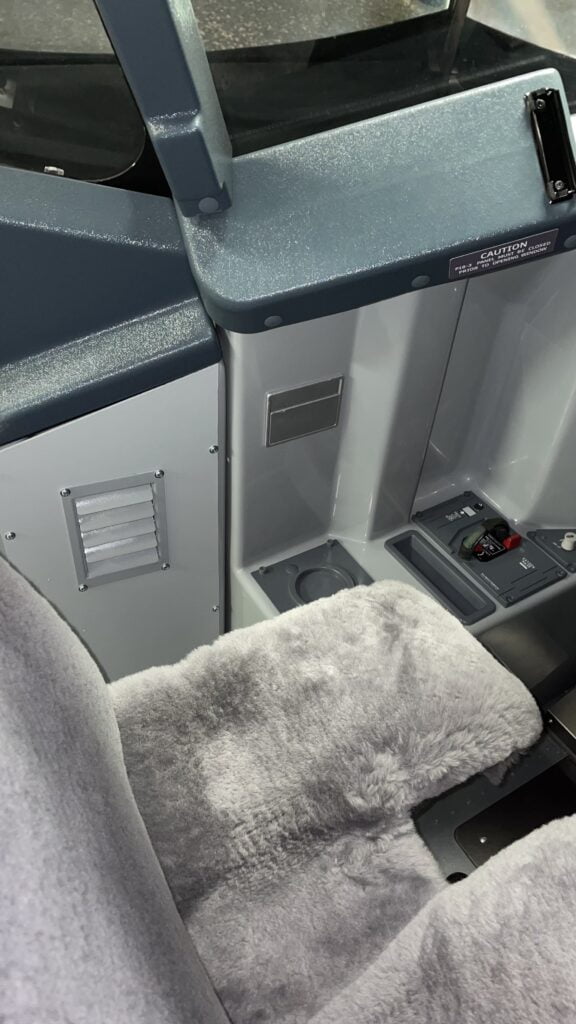
Side Panels, Side Vents and a Fake Ashtray
I wanted to add a little more detail to the interior sidewalls of my home flight simulator cockpit, just to add to the immersion a bit. The Flightdeck Solutions cockpit shell interior liner kit I’m using included some side panel cover pieces that I hadn’t gotten around to installing so I figured it was time.
While the interior kit included a fake vent louver, it was flat and not realistic looking. That’s understandable since it’s not a critical piece of the cockpit that you spend a lot of time looking at, but for the fun of it I decided to make my own 3D printed louvers in Fusion360 so they look more similar to the real aircraft. They are even linked, so moving one moves the rest in sync.
I also added a fake ashtray I made in Fusion360 and 3D printed because I just couldn’t find any real ashtrays that matched the 737-800 ones. Maybe one day I’ll get my hands on the real shiny chrome ones but for now this will do.

Cockpit Ambient Lighting
A project I had been thinking about for a long time was how to brighten up the cockpit interior when flying the sim, relative to the outside view. In the real world, on a sunny day normally a cockpit is bright inside, but at night it’s dark. How can you recreate that in the sim?
Recently I came across some guys who were experimenting with Philips Hue color LED strips that can color change depending on what appears on the screen. Here’s the link. It’s quite interesting.
So I decided to give it a try, with just one LED strip mounted in the back of the cockpit which you can see below.
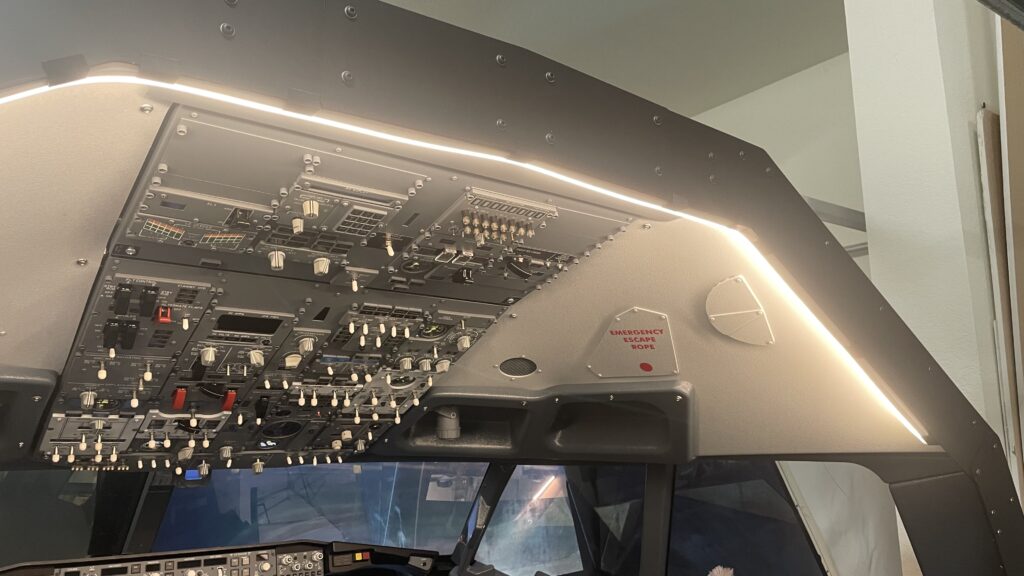
Basically you install a Windows app on the PC you’re wanting to use as your source for the ambient lighting color and brightness, and then the software communicates the colors and brightness to the LED strip. It’s a pretty cool idea.
My testing is ongoing but I’ll post more later on my findings and results.
Summary
These are just a few simple ways I added some detail to my home flight simulator cockpit to improve my experience and enjoyment of my simulator. I hope this gets you thinking about ways to add enjoyment to your own sim!
What’s Left to do?
I still have a lot of things I’d like to get around to eventually. Like…
- Wiring the map lights
- Adding a swing-out rear bulkhead with faux circuit breaker panel on the inside and bookshelf on the outside
- Add working Grimes Circuit Breaker sidewall lights
- Add a linked yoke setup
- Add linked F/O rudder pedals
- Add force-feedback to the flight controls
- Replace the TQ
- Pretty up the outside of the sim so it looks more professional and enclosed
- Always tweak the sim software and how it operates from a central instructor station
- And lots more, no doubt! All it takes it time and money, usually lots of both!


2 comments
Give credit to the builders you researched from. Obviously when you started you were as blank eye as the rest of us to started this hobby back in the late 80’s. That’s all. Very nice project and I look forward to seeing more as your this develops. Enjoyed reading your “About info”. Congratulations. And please keep posting updates.
Author
Hello Michael, thank you for the kind words! I always try to give credit where credit is due, but if I missed someone I should have credited please let me know. I absolutely believe that those who help you should be acknowledged.
And you’re right…I’d be remiss if I didn’t give respect to the pioneers in this hobby who had no roadmap and built everything, including the electronics and programming, from scratch. We certainly have it much easier today thanks to their efforts. I am truly grateful!