
Last Updated on September 27, 2019
I am nearing completion of my plywood cockpit floor/base (sort of, more on that later). I had the brilliant idea that I wanted to make my cockpit floor look real by adding simulated rivets, helping increase the overall immersion. Sounds great, right? Well, I knew it would be a big task, and it was, but you’ll probably agree it looks pretty good so far:
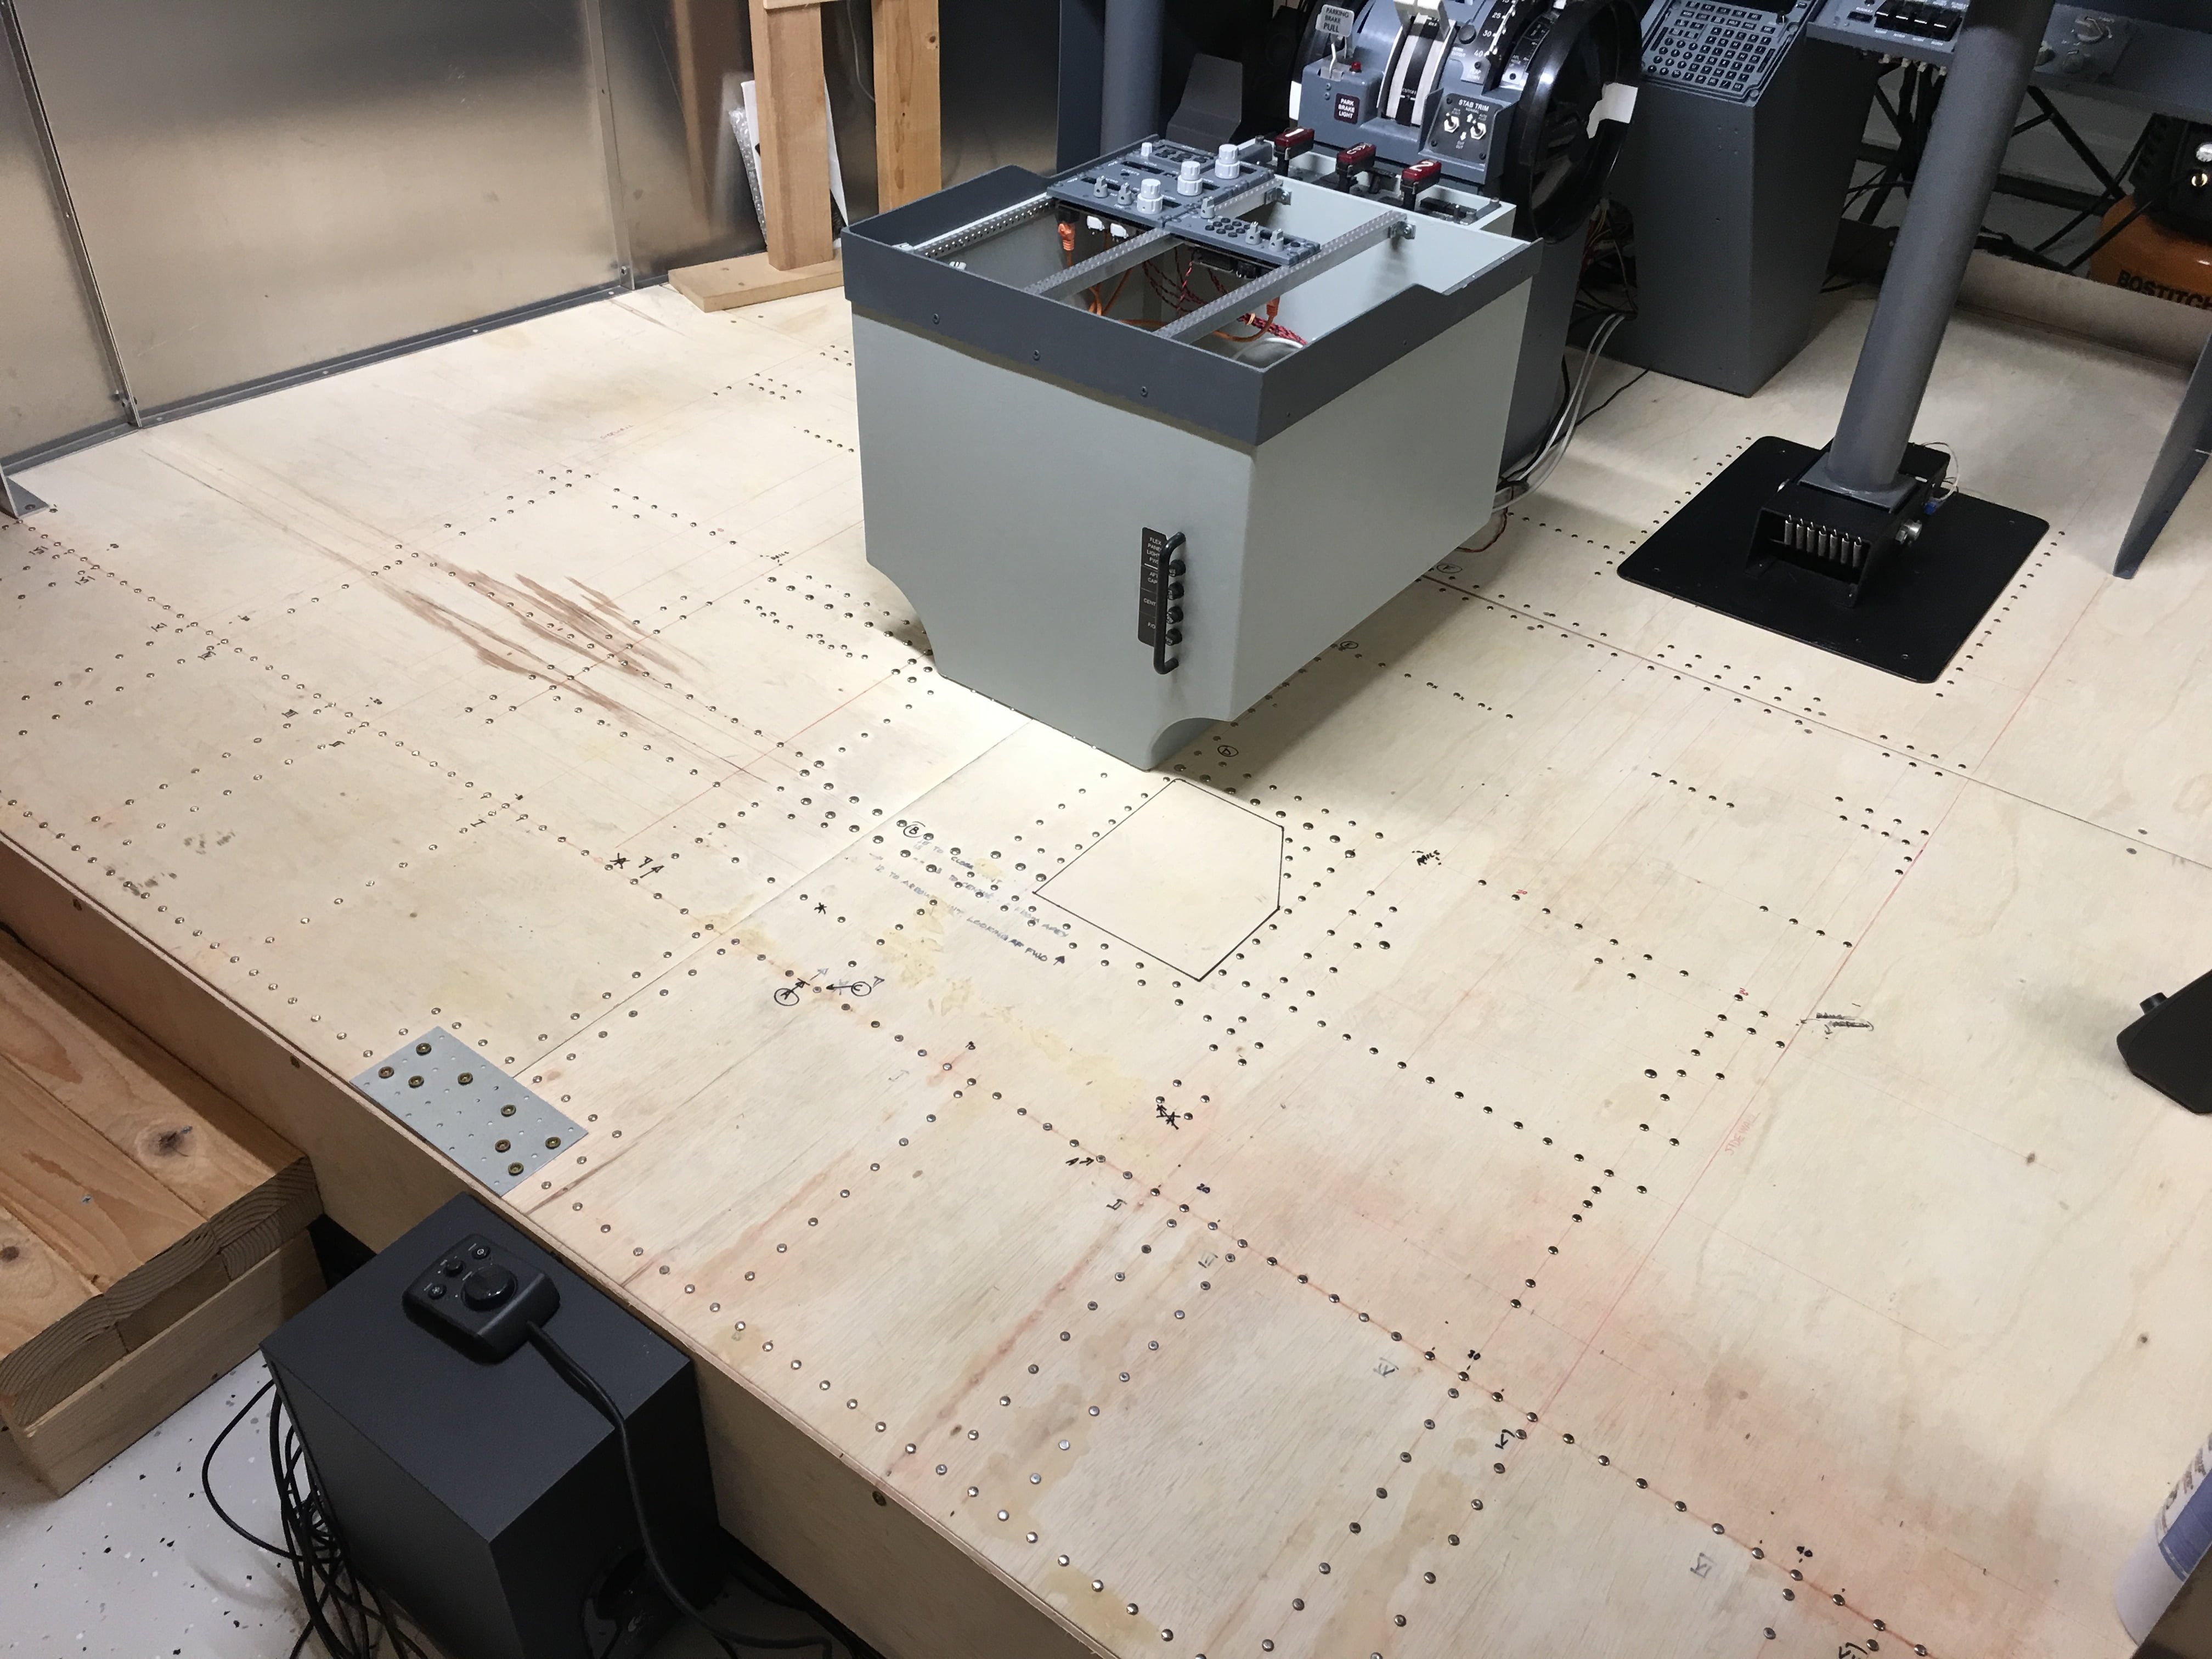
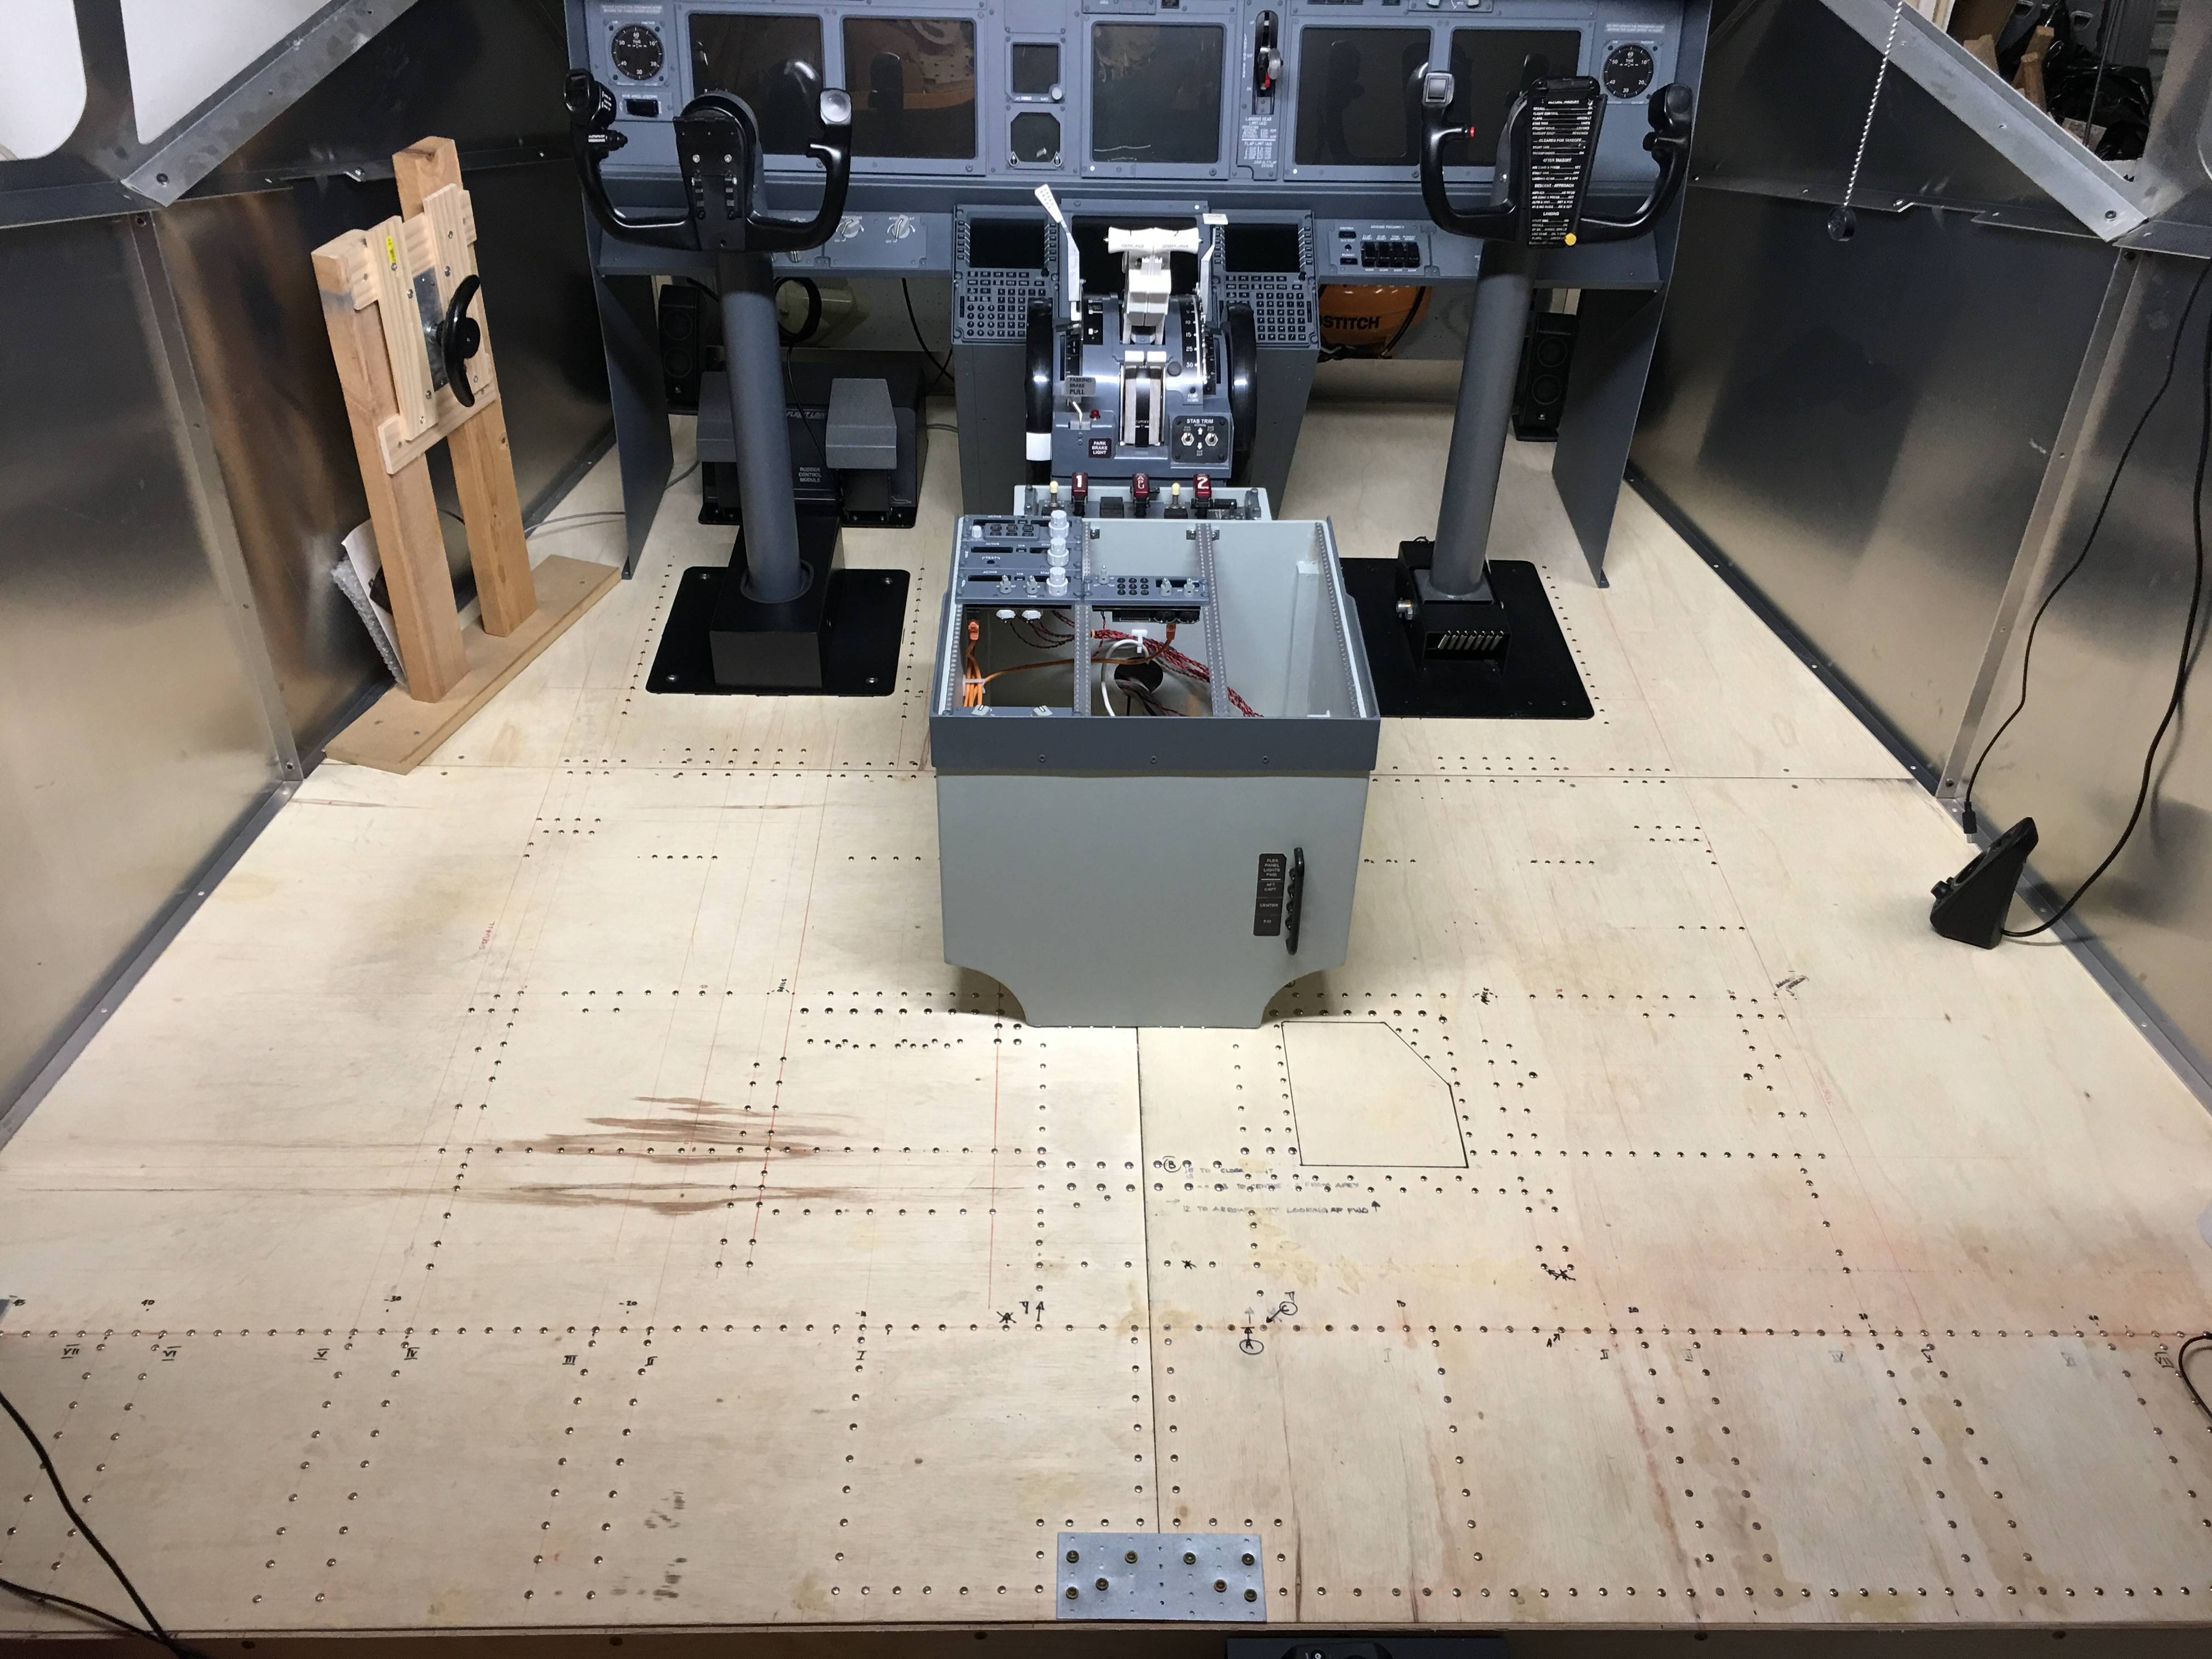
Note that I did not rivet all the way to the side walls of the shell because that is where the interior liner pieces will be fitted and no sense wasting effort on something you’re going to just cover up.
Determining the Pattern
The big challenge was figuring out how to closely recreate the rivet pattern since no one is doing this and there weren’t any good reference materials I could find. Doing some Google searching, I was able to locate a picture of the aircraft floor standing vertically to use as a reference (thanks to the excellent resources at http://www.fly737ng.com).
I tried to make the rivet pattern match as close as possible to the reference pictures which meant a lot of guesswork about placement and measurements to ensure everything was about where it should be. I also did a lot of double-checking my measurements to make sure everything was square and straight. I did the F/O side first, then basically mirrored it on the Capt side which went a lot faster since the difficult measurements were already done on the F/O side. Just make sure you have a large T-Square ruler so you can ensure all your angles are exactly perpendicular. Draw it all out on the floor first before you drill anything because if you are off even by a little bit it’s harder to go back and fix after you drill (filler and sand paper will do the trick).
The Rivets
So, what did I use for the simulated rivet heads? I found two-piece button caps on Amazon in 7mm and 10mm sizes that were approximately the right size based on estimates of the real rivet heads I was able to determine from some pictures I took of a real cockpit and the above mentioned cockpit floor picture reference:
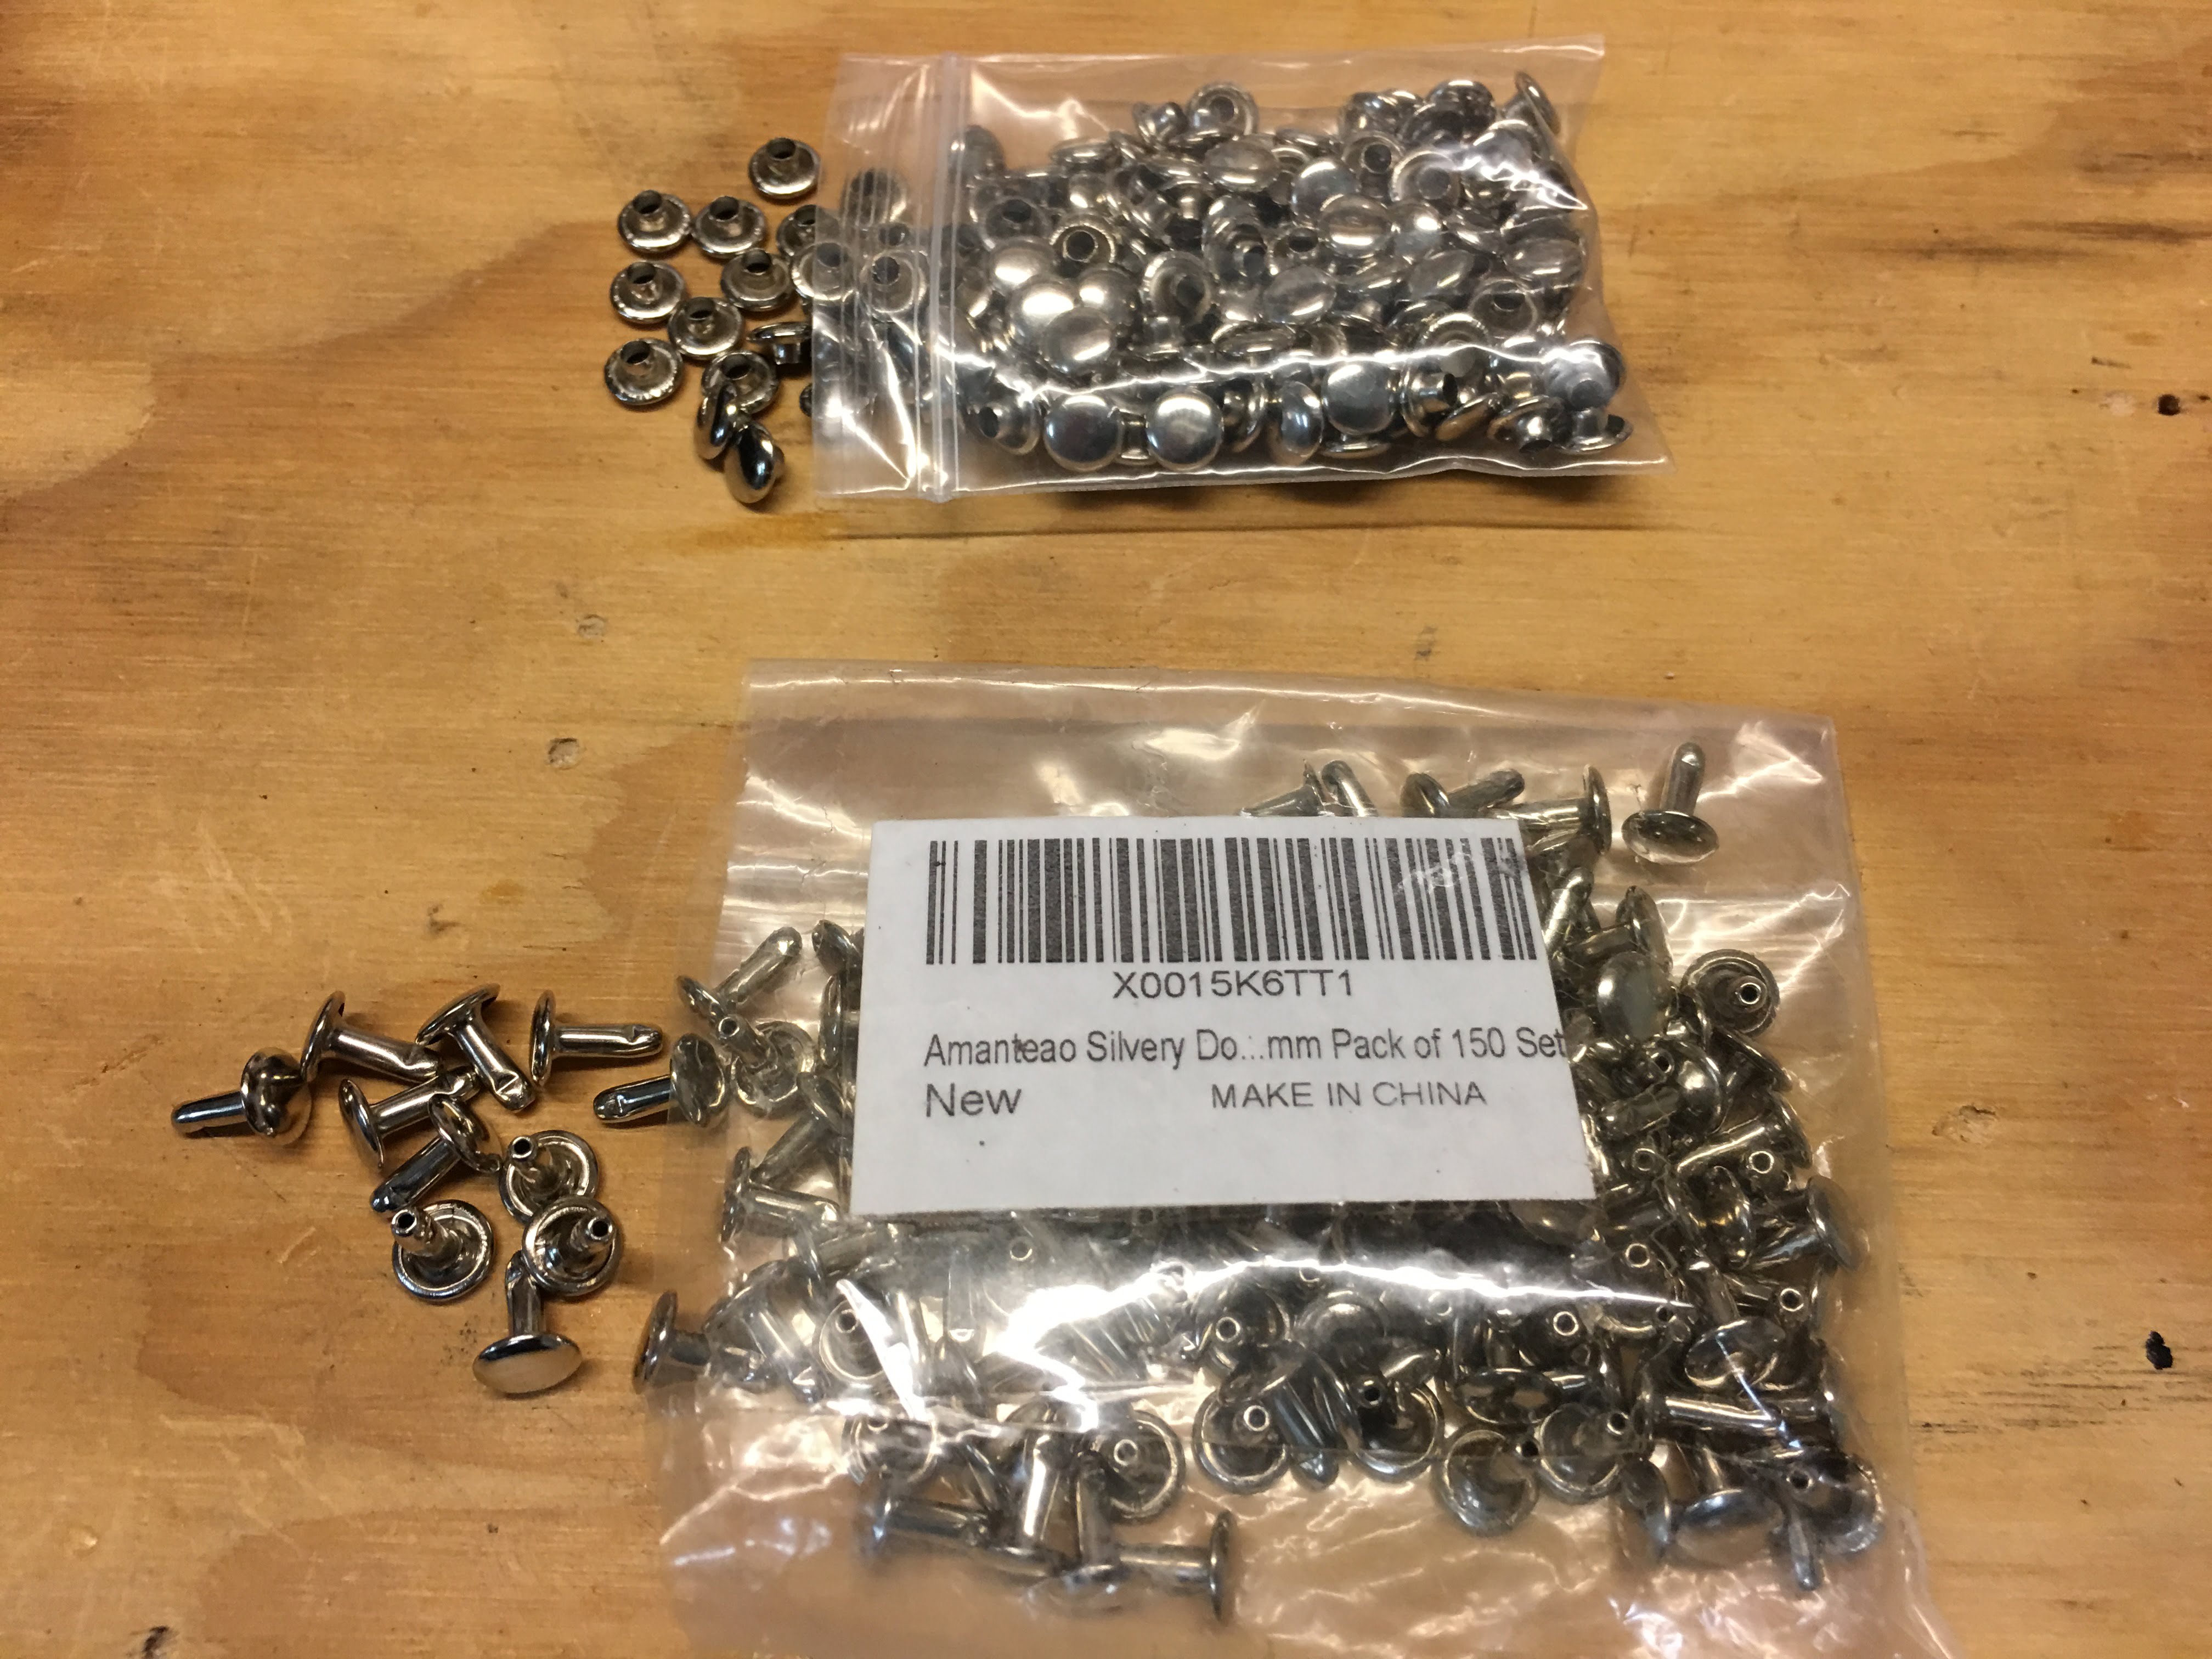
The specific products on Amazon are:
- Amanteao Silvery Double Cap Rivets Plane Cap 7mm and Post 8mm Pack of 150 Sets
- Amanteao Silvery Double Cap Rivets Plane Cap 10mm and Post 10mm Pack of 100 Sets
Rivet Installation
What I did, once I marked out the rivet positions, was drilled a 5/64 hole for the 7mm rivets, and a 7/64 hole for the 10mm rivets (sorry for the mixed measurements…why the U.S. never went to metric is beyond me). Then I press -fit the “T” piece of the rivet into the floor. No glue necessary. It was a tight fit and shouldn’t come out once painted over.
The downside to these rivet caps is the head squashes with too much pressure, creating a sort of bowl shape. So you have to be careful when putting them in. Again, once painted they should look fine.
What’s Next?
The next step will be to paint the floor. My thought is to put a sealant coating first, then paint it silver to mimic the aluminum flooring, then the Boeing green anti-rust coating, and then a final coat of RAL7011 gray. This way as the floor wears over time it’ll have that real look to it. In theory anyway. I’ll add a new article when I get to that point.
I mentioned at the beginning of this article that I am “sort of” nearing completion of the floor. I say that because I am now learning how to weld metal (it’s not hard and I highly recommend you think about it if you’re going to be building your own base). So I am seriously considering making a new welded steel tube base that will be structurally stronger and allow me to more easily create mount points for an under-floor yoke mechanism, among other things. Not sure I’m ready to tackle that just yet, but now would be the best time so I don’t have to disassemble and reassemble everything later. We’ll see 🙂
Conclusion
I have no idea how many rivets I installed. 500-600+. All I can say is my thumbs were very sore after each session! It took quite some time doing a little measuring here, some installation there. So be forewarned that this is a time-consuming and tedious task but the end result is worth it!


Hi, if you mean the two rails that run from front to rear and the cross strut, yes those came…