
Last Updated on September 27, 2019
After I finally finished the faux riveting of my sim base it was time to start painting everything.
FYI, for this iteration of base I decided not to go with under-floor yokes for simplicity sake. I’ll be building a base v2.0 out of metal in the not-too-distant future and it will be designed for real aircraft yokes mounted under the floor AND control loading. I can’t wait!
Anyway, now the base was ready to permanently start mounting things. But before I could do that, I needed to paint the base and while I had everything disassembled, I might as well paint the FlightDeck Solutions (FDS) shell pieces as well.
Let me start by saying this. Hindsight is a very painful reality in this hobby. I say that because had I been smarter I would have spent the extra $500 USD or so and purchased the black powder-coated shell from FDS instead of the bare aluminum one that saved me some money. Why? Well, in my attempt to save a few dollars it ended up costing me lots of time and a LOT of effort later only to save what probably amounted to a few pennies in the end. So word to the wise…
“If you buy a FDS shell, make sure you get the powder coated black version! It’s well worth the extra cost!”
– Silly old me
Yes, it’s well worth it. Otherwise, good luck finding someone who a) wants to powder coat all those parts and b) will do it for the $500 USD or so FDS charges (which by the way Peter at FDS tells me they make little, if any money off and I believe it). You don’t want to paint it unless you have a lot of room, time, and patience!
Ok, now that that’s out of the way…
Painting The Base
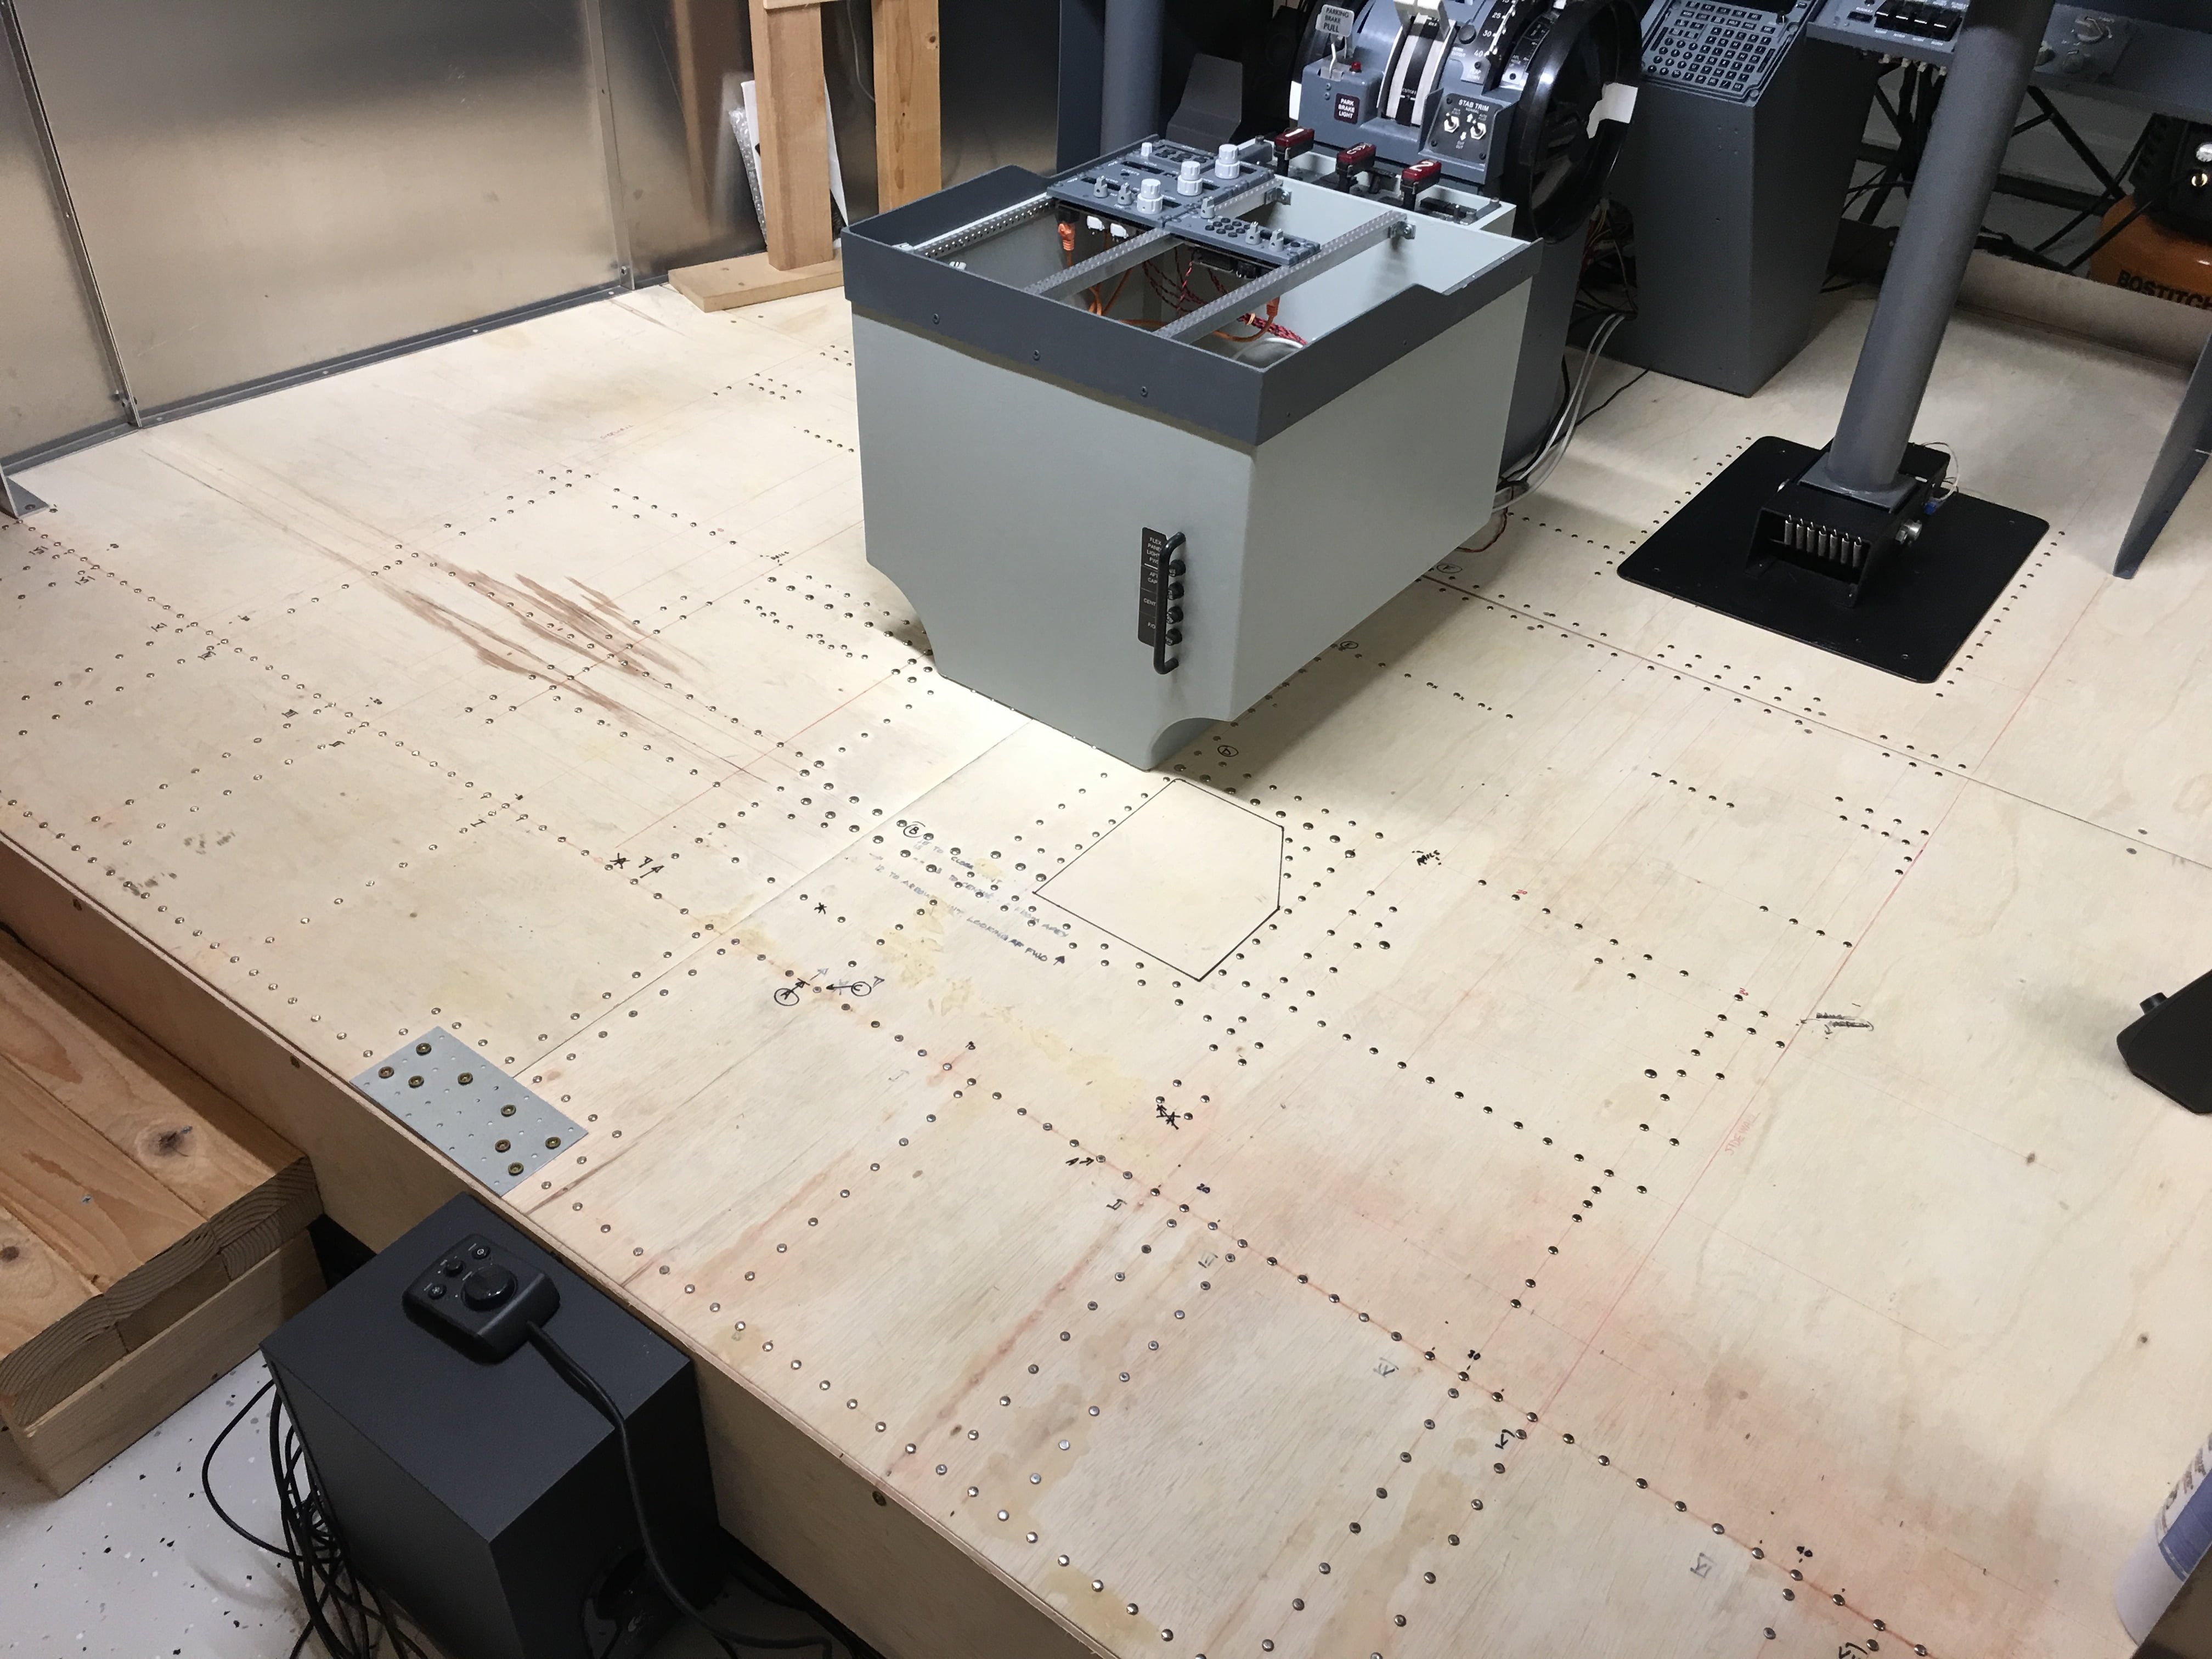
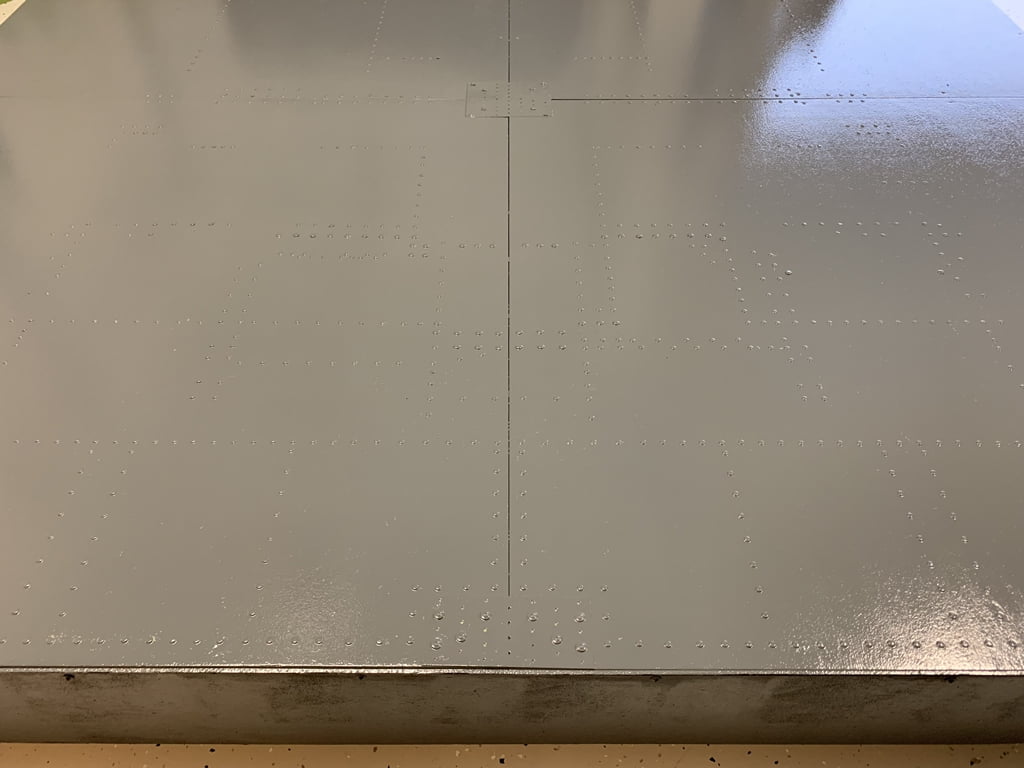
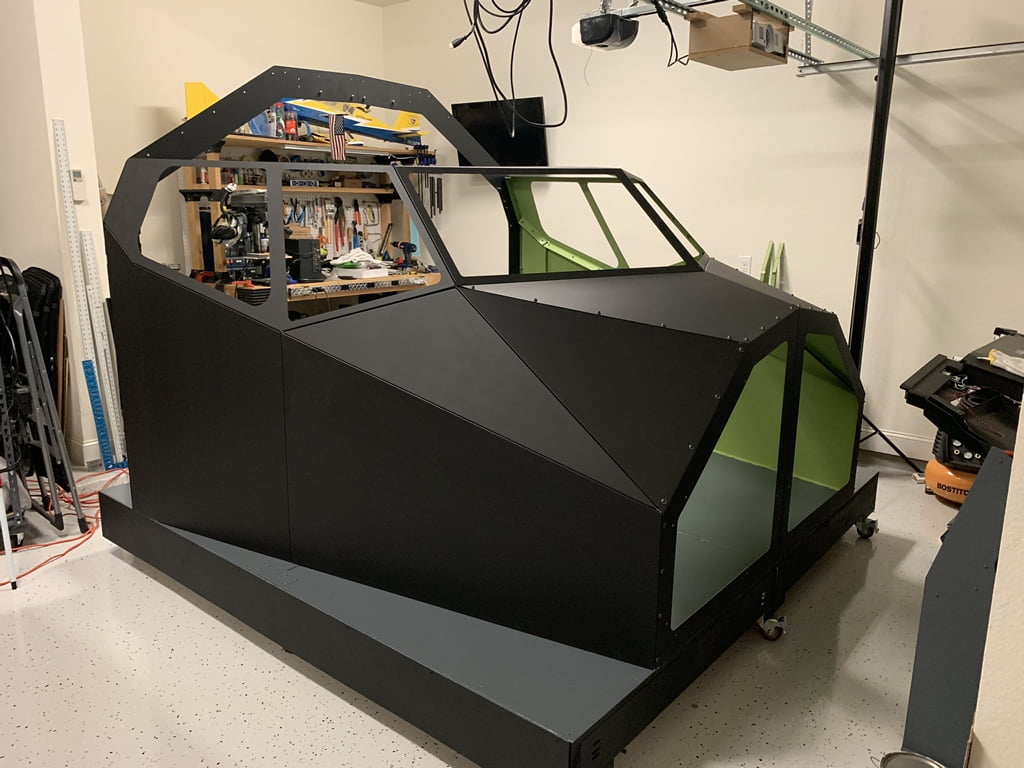
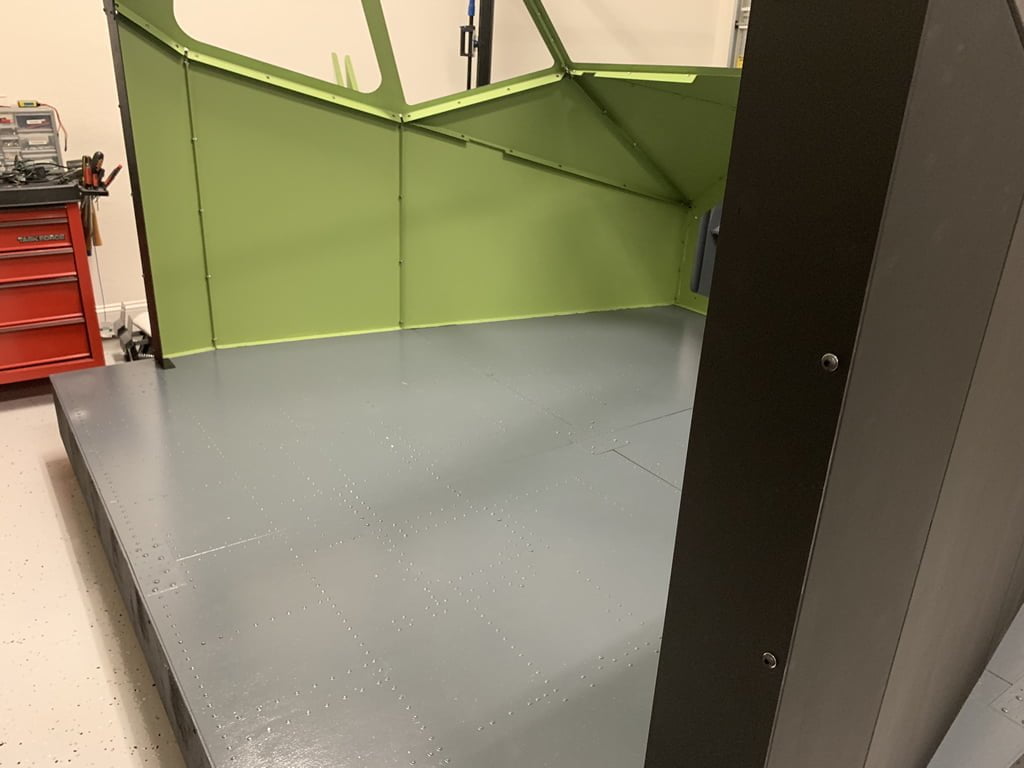
I obviously had a lot to paint. The base, which I built of plywood now needed to be primed, painted with a green undercoat to simulate the Boeing metal coating, and then the final gray overcoat. I figured this way as the base wears over time the aluminum rivets will show through and the green undercoat will begin to appear giving a nice authentic look.
First thing was to sand and clean the plywood surface, which had picked up some dirt during my regular use.
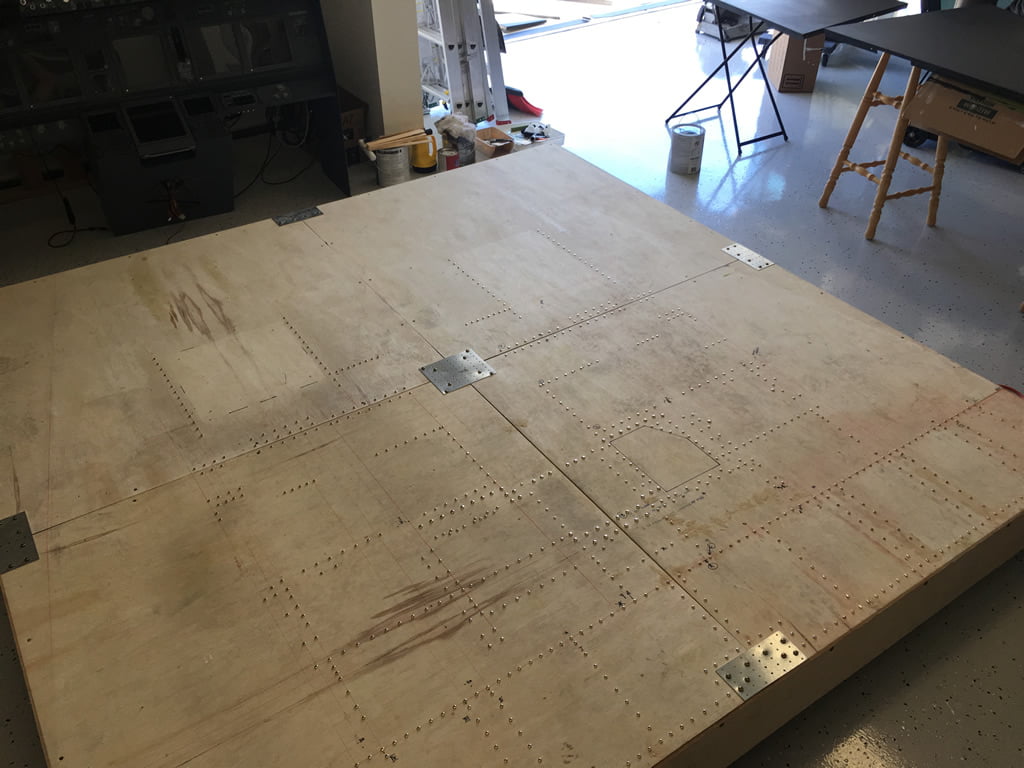
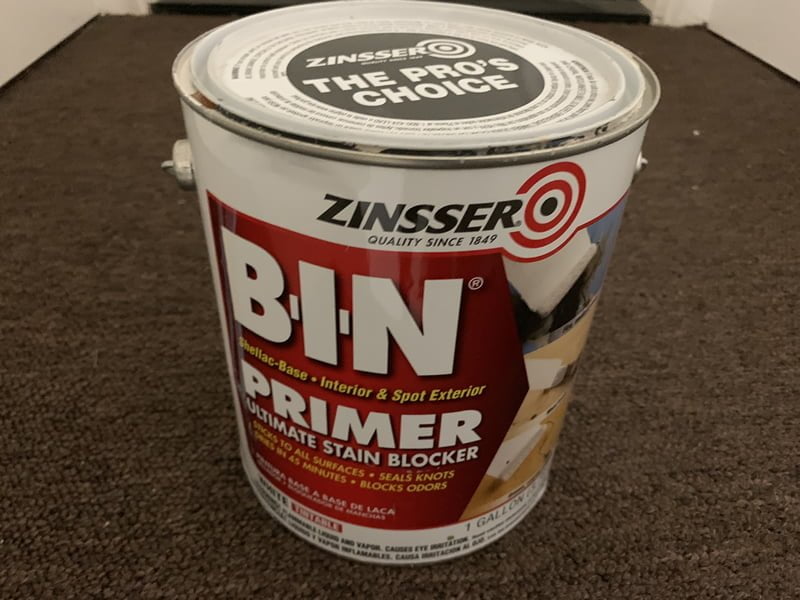
Next I applied a couple of primer coats with a roller brush using Zinser Bin white primer.
This primer is one of the best I have found during my research, which also happens to work on a lot of other surfaces as well.
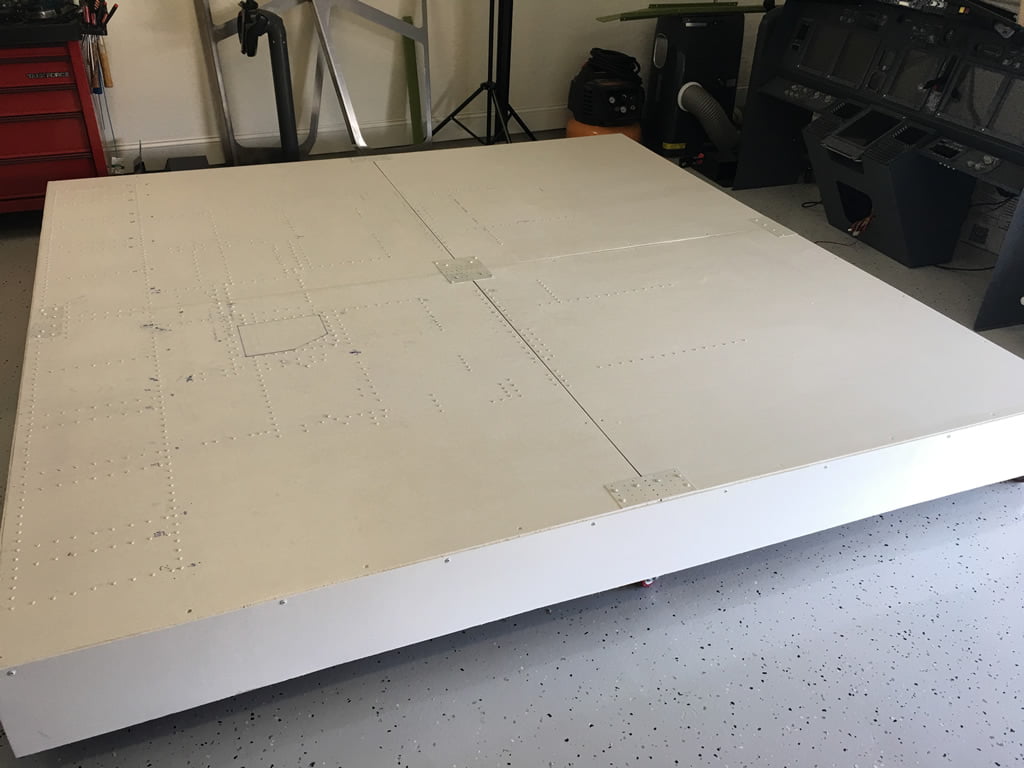
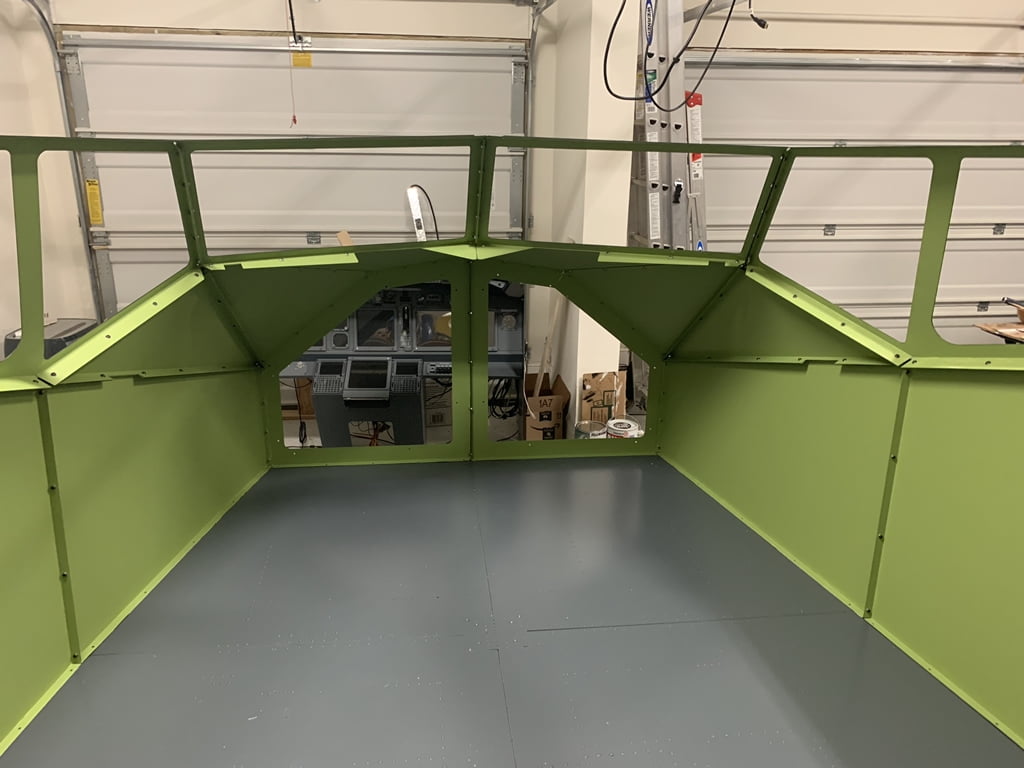
Then I added some flat green undercoat over the primer to mimic the protective Boeing green you see on most real internal parts.
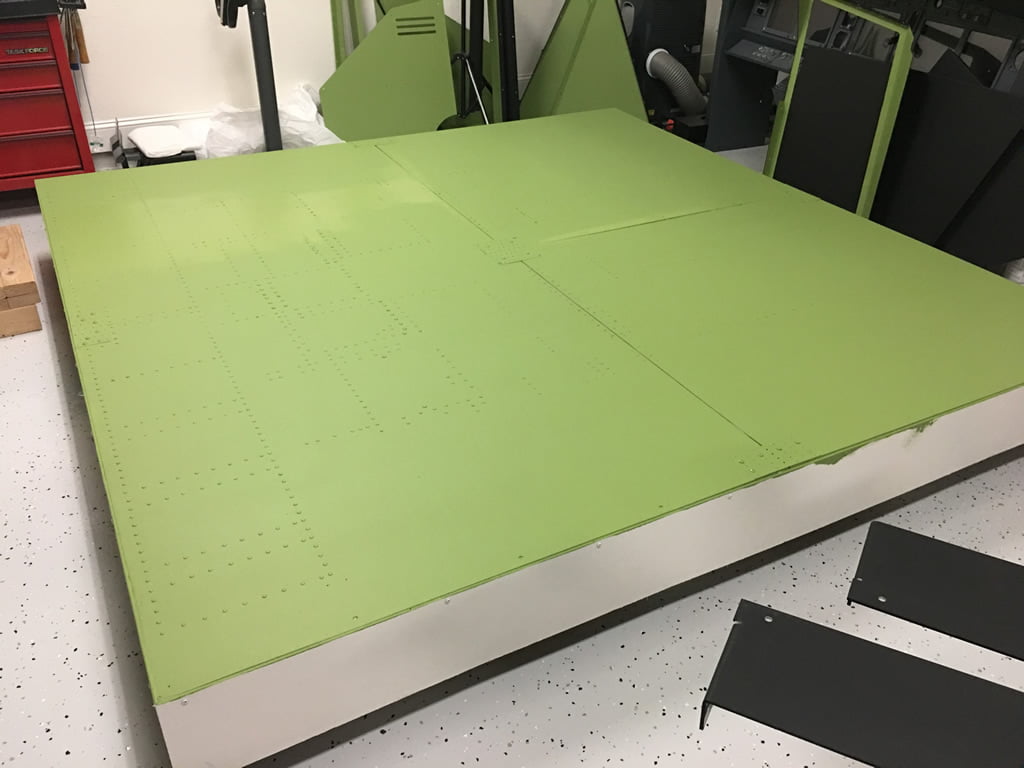
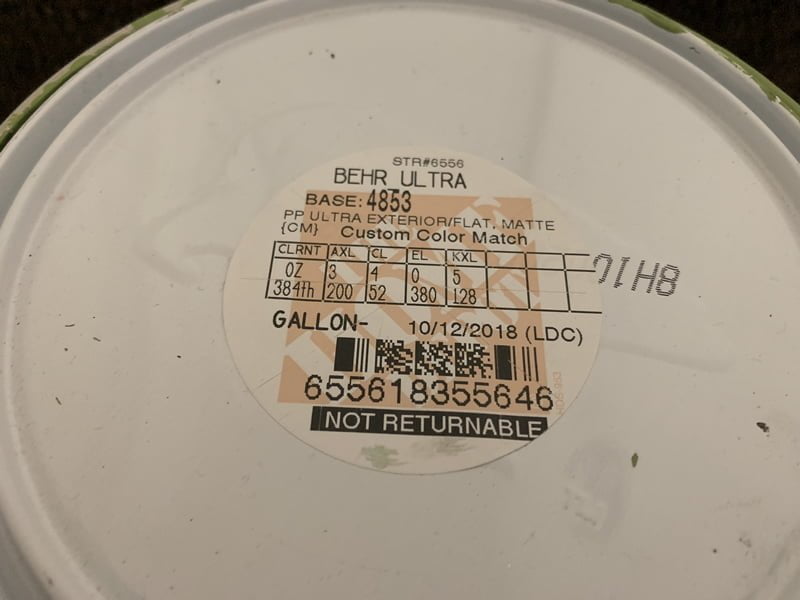
I picked up the green custom-mixed BEHR exterior paint from my local Home Depot. Very happy with the way this paint looked and laid down. In case you’re interested, here’s the label:
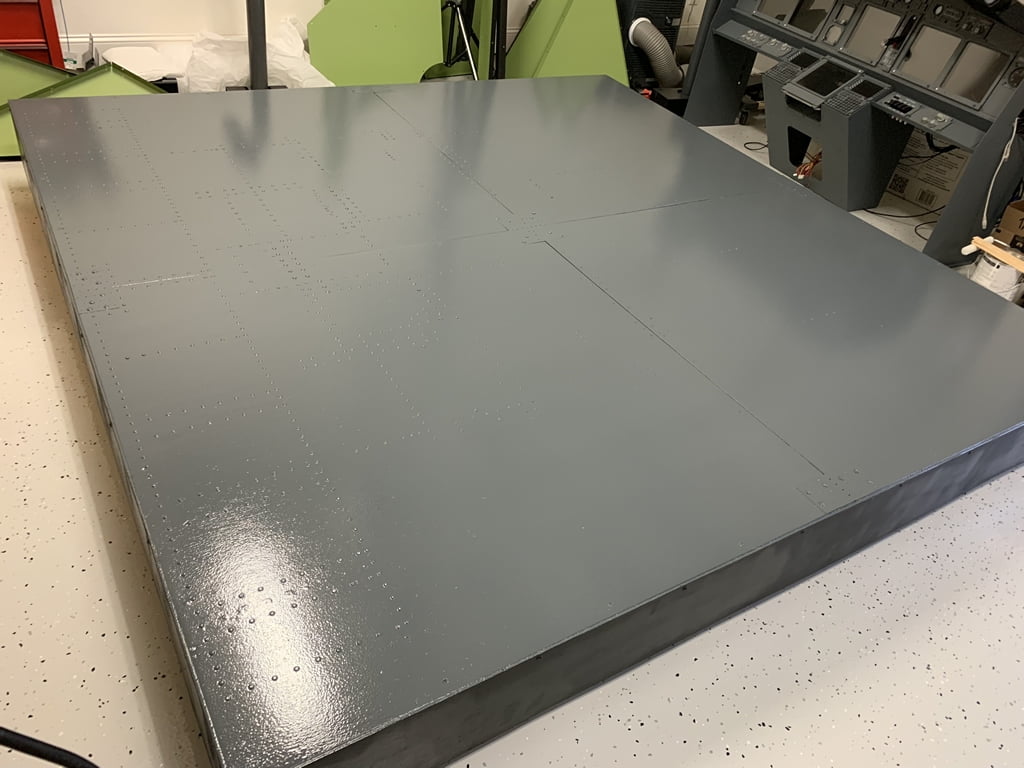
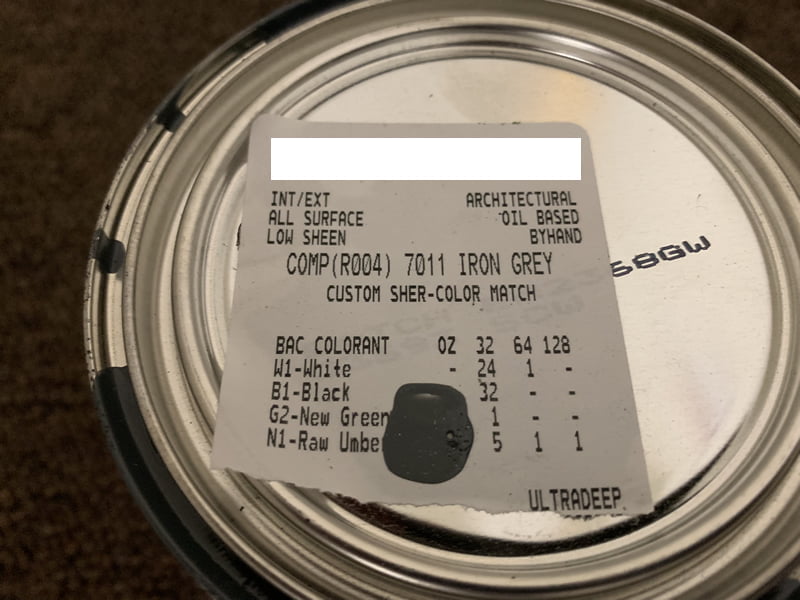
And lastly a couple of coats of Iron Gray from my local Sherwin Williams paint store which closely matches the RAL 7011 dark grey that Boeing uses. It is a low sheen oil-based latex which I applied with a roller brush.
Here is the label from the Sherwin Williams Iron Grey in case you want to go out and try some.
The semi-gloss might be a bit too shiny, and I’m not 100% happy with the smoothness the roller brush created but overall it’s not bad. I would have much preferred spray painting but I didn’t want to get paint spray all over my garage so I stuck with the roller brush. Maybe a tighter nap would have made a smoother surface because it’s a little thick and tends to scratch pretty easily, so you might want to experiment with different sheen samples and application techniques.
The rivets came out looking nice though, didn’t they?!
Painting the Flightdeck Solutions 737 Cockpit Shell
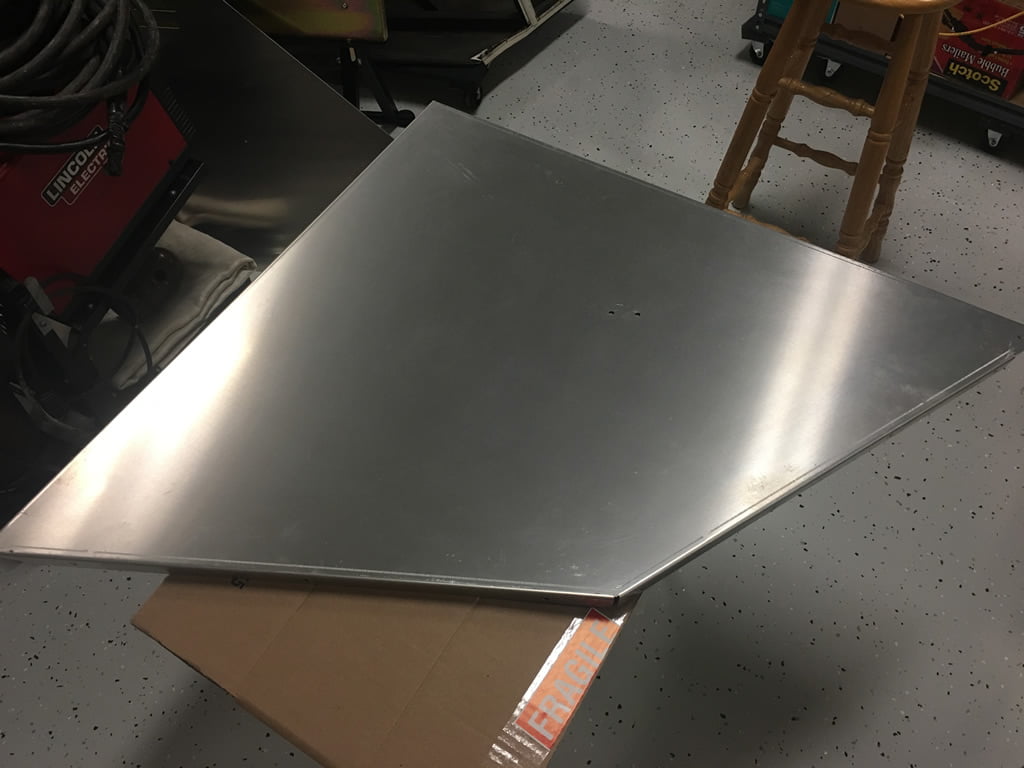
As I mentioned, in hindsight I should have powder coated from FDS as it was a much more expensive proposition to bring the 50 or so bare aluminum shell panel pieces to someone to coat. So what I should have done was apply a vinyl film instead. The cost would have been reasonable and the final look would have been stellar. But I honestly forgot about that approach so I ended up painting. The look is still nice, but it was a lot of work and won’t be as durable as powder or vinyl. Too late now.
Anyway, I chose to paint the insides of the panels in the Boeing green I used above, and the outsides in flat black. You want to use a dark color on the outside to prevent annoying reflections that could end up on your screens or monitors. But depending on your arrangement, other colors might work fine as well. You just have to weight your environment and make the choice.
Since I had loosely put together the shell previously, I had to tear it down to the individual pieces to paint. Fortunately it’s relatively easy to do as the shell comes apart and goes together relatively painlessly.
Each piece of bare aluminum is shiny and smooth making paint adhesion difficult, so they each had to be sanded, cleaned, primed with multiple coats, then painted with multiple coats.
So the first step I performed was to clean the panels with a good de-greaser so that any fingerprints and stains were removed as much as possible.
Next, I sanded the parts to roughen up the surface for the paint to stick to. I used an orbital sander with 100-120 grit sandpaper, then cleaned the surface again with a good automotive de-greaser to ensure the panel was nice and clean for paint.

Next I applied several coats of Sherwin Williams water-based metal primer with a roller brush. Not the best primer as it scratches pretty easy, but the paint adheres to it pretty well otherwise. Zinc Chromate primer is usually the preferred choice but the stuff is hazardous so I opted for a more eco-friendly primer.
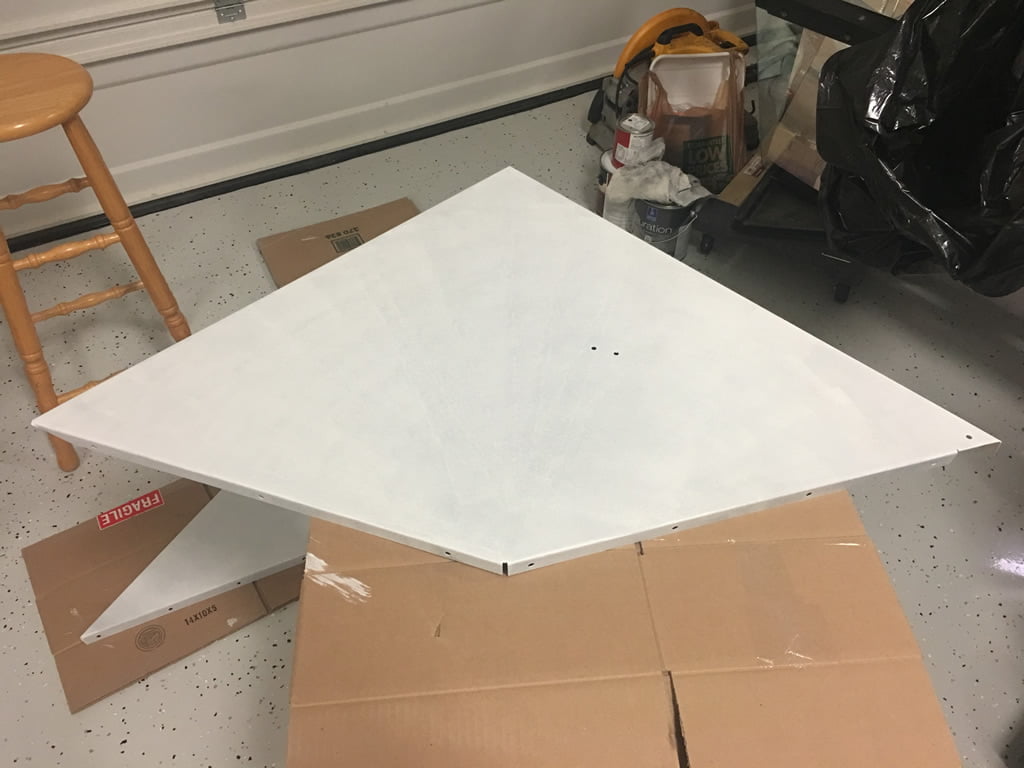
Lastly I applied the paint colors with a roller brush. This required three coats of latex based paint on each side. Flat black on the outside and flat green on the inside.
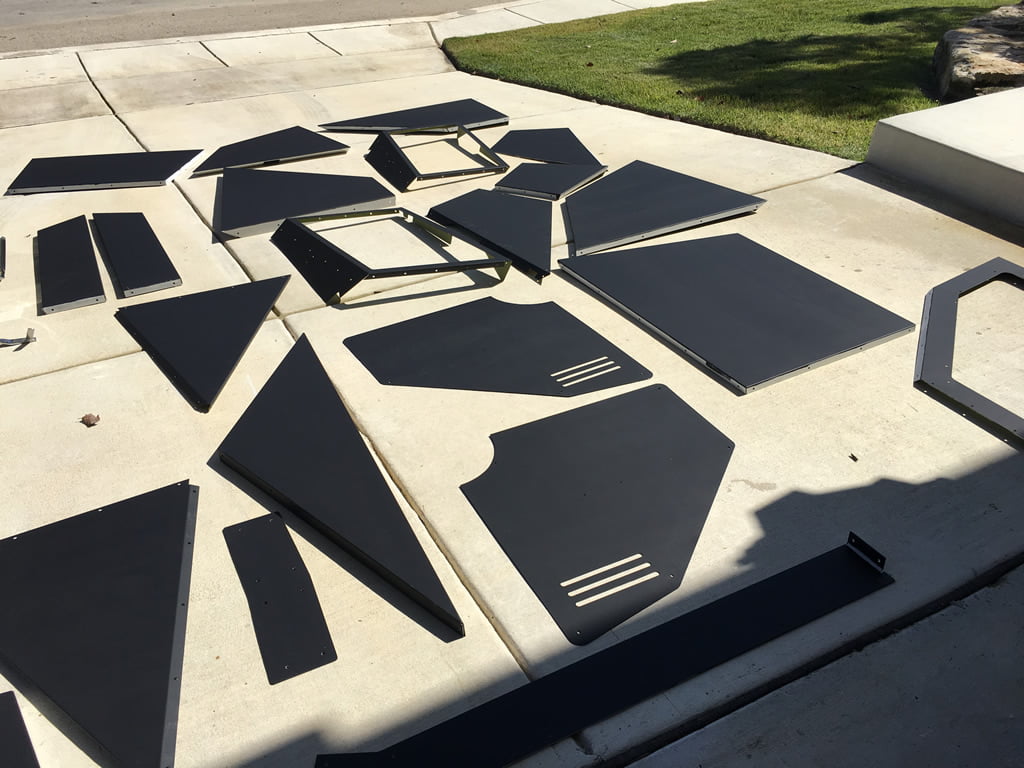
And the final result, as it is coming together, looks pretty good. I think I’m happy with it (for now…but we’re always seeking ways to improve at a later time, aren’t we?).
Conclusion
Painting a cockpit base/shell is quite time consuming so be prepared for that. I would estimate this project took me a couple of weeks worth of work to finish. It’s not hard, just tedious and boring.
Painting wood is fairly painless. Prepping and priming are a piece of cake, and painting is a no-brainer.
Metal is a different story, however. The slick nature of metal prevents good paint adhesion so you need to go through more steps to ensure the paint doesn’t chip or flake off.
Therefore, with metals I would highly recommend powder coating where possible, and if that’s not possible, vinyl coating as a second option. I would choose painting last because of the amount of time, effort, mess, cleanup, and reduced durability compared to the other solutions. It may be the cheapest method, but in the long run it won’t wear as well and if not done right, could end up being the biggest headache to maintain.


2 comments
Can you share, if you haven’t already and I missed it, the paint code that Home Depot used for the RAL 7011?
Author
I updated the article to include the paint labels. I corrected where I purchased the paint. The Iron Grey was from Sherwin Williams and the green from Home Depot. Hope that helps some.