
Last Updated on August 12, 2020
Visuals are one of the most important aspects of a flight simulator. Some would argue THE most important. When done right, visuals can immerse you to the point you actually “feel” movement where there physically is none. Add realistic force feedback to the controls, proper audio placement, and where possible, a high fidelity motion platform, and you start to really blur the lines between what is real and unreal (Matrix flashback, anyone?). So it’s no wonder we all want the best visual system we can get.
My Ultimate Goal (or so I thought!)
If you’ve ever used virtual reality goggles you know how incredibly immersive it is. Unfortunately, wrapping a set of VR goggles around my cockpit shell probably isn’t going to happen (or is it?…more later).
So to reach a visually immersive experience AFFORDABLY I knew I had to build a 180-220 degree wraparound projection screen with multiple projectors. This would allow me to look out any window in the sim and see the outside world around me, creating a high level of realism.
Then, something fell into my lap that I never thought could happen and I couldn’t refuse.
Where it all started
I have been through quite a few iterations of visual displays since I started way back in the late 1990’s. When I got into this hobby I had just a desktop computer and a single monitor like most of us. Over time it evolved to three 27″ monitors, and later three 27″ monitors with a head movement tracker.
Then things started to really accelerate in 2008 when I added a Boeing 737 instrument panel from FlightDeck Solutions and combined that with my three screens.
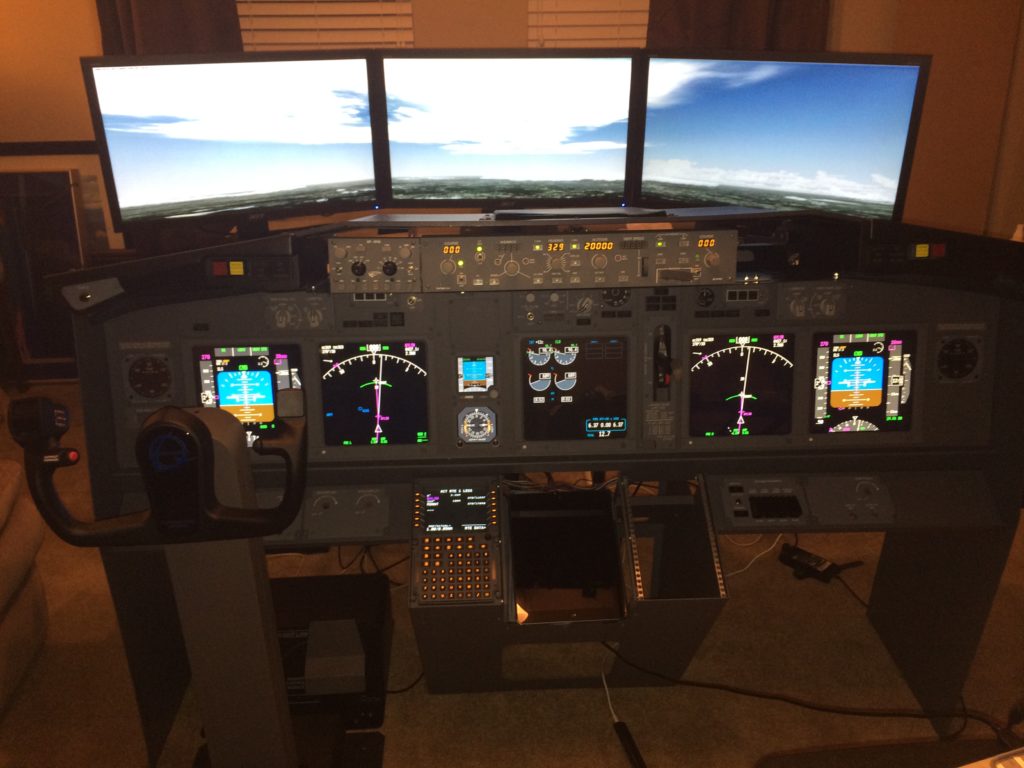
This worked quite well but as time went on I felt like three LCD’s just wasn’t immersive enough for the full-sized sim I was building and I was lacking a feeling of “presence”. So I decided to try two 55″ 4K curved TV’s. Adding a few more pieces like the throttle, rudder pedals, and center pedestal, it was starting to make a big difference in the immersion factor.
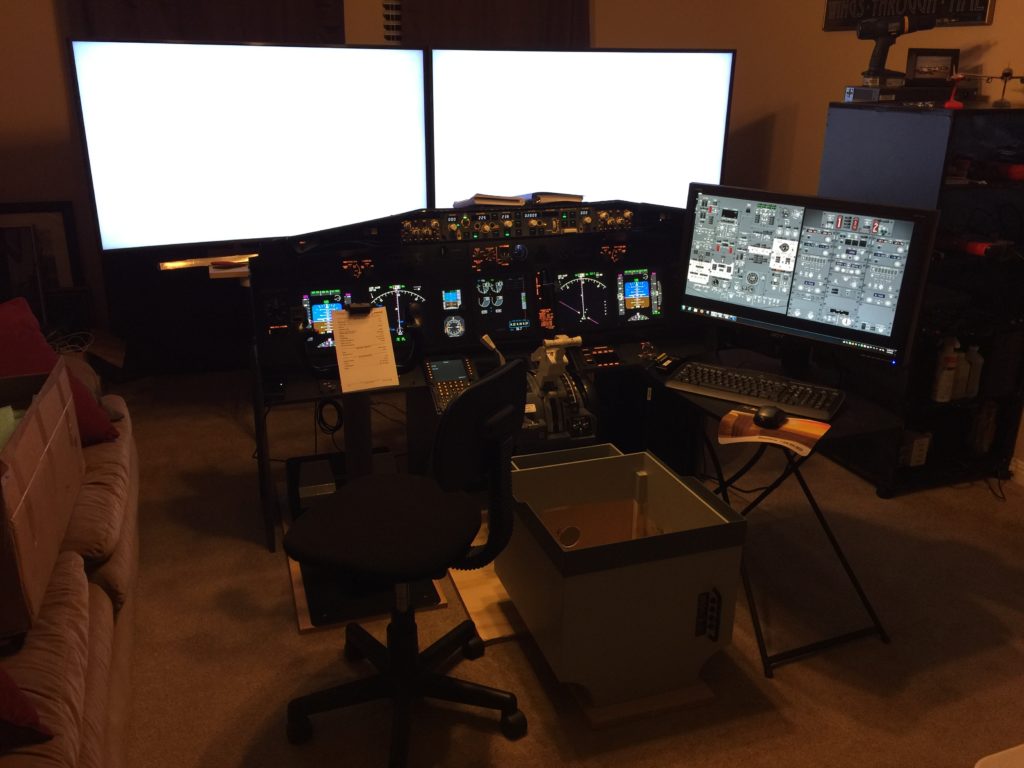
At that point I moved to a bigger house (and no, not “just” for the sim!) so now I had room to expand. So I added a full-sized cockpit shell and a single projection screen as I started planning how I was going to build the wraparound visuals.

The Wraparound Projection Screen
My ultimate goal, as I said, was to build a 180-220 degree wraparound projection screen something like what I envisioned in my CAD drawing below.
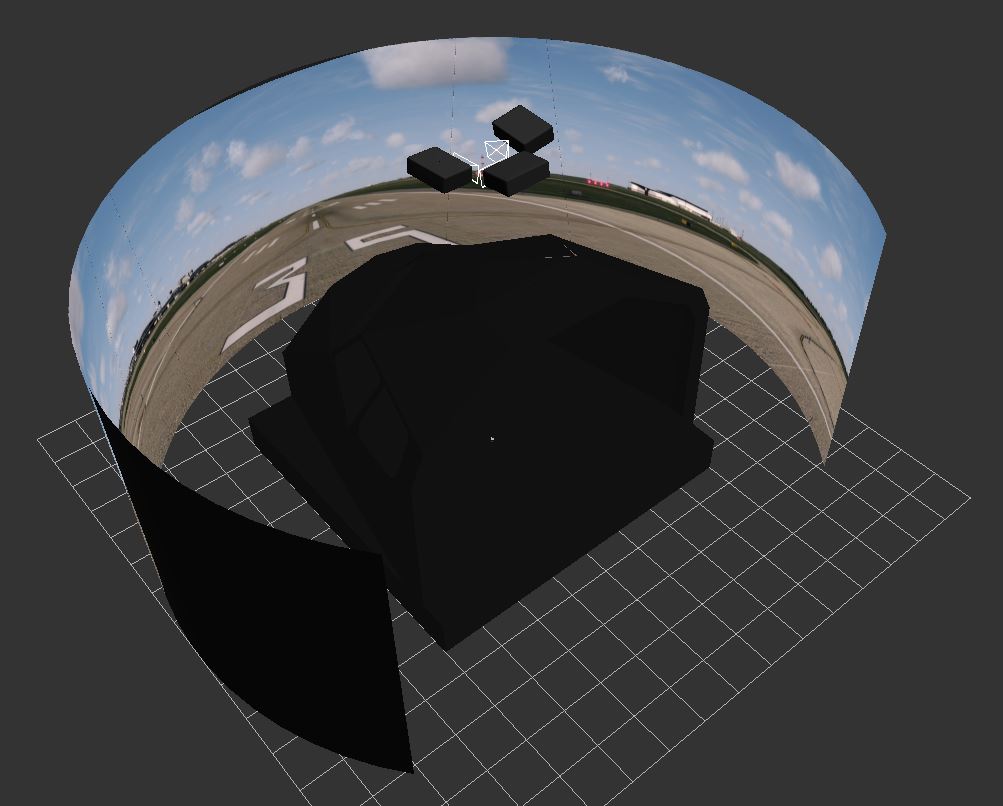
That kind of setup gives you a seamless out the window view. And with high resolution projectors having come down quite a bit in price these days, it looks really good and is quite affordable. It’s also quite immersive since everywhere you look out the window you see the outside world and without reference to the real world, it’s enough to give you the sensation of realism and movement.
There are a couple of drawbacks to note.
Depth Perception
As good as this kind of setup is, a standard projection screen provides the viewer with no sense of depth. The projection screen always looks close not matter what you’re seeing on the screen, so it’s difficult to suspend your belief that what is show as far away far is really far away.
Parallax
According to Wikipedia, “Parallax is a displacement or difference in the apparent position of an object viewed along two different lines of sight, and is measured by the angle or semi-angle of inclination between those two lines.”
Credit: https://commons.wikimedia.org/wiki/File:Collimation_1_-_short_focus.svg by Wikipedia. Licensed under Public domain
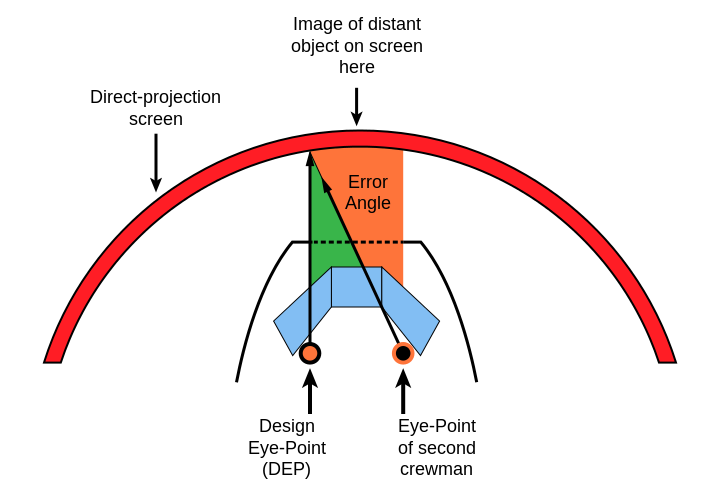
So with our projection screen, what this means is that if the outside view is adjusted correctly for the Captain’s design eye-point (in other words, the out the window view is such that the captain is sitting slightly left of the runway center-line and everything looks right), the First Officer will actually see a view that is offset at an angle as much as 15-20 degrees and thus it feels like the aircraft is crabbing. It’s enough to make the view nearly useless for judging takeoffs and landings if you’re trying to fly the plane from the right seat.
Enter Collimators
The only current way to create depth perception is by using Collimated views, which uses a glass/mirror system to straighten incoming light rays and effectively tricks your eyes/brain into thinking things are near or far.
Single Eye-Point Collimators
Older collimated displays were called single eye-point displays. This comprised a spherical mirror at the back of the collimator, a one-way piece of glass/mirror called a beamsplitter in front, and a projector/monitor at the top facing downward. It had a distinct focal point.
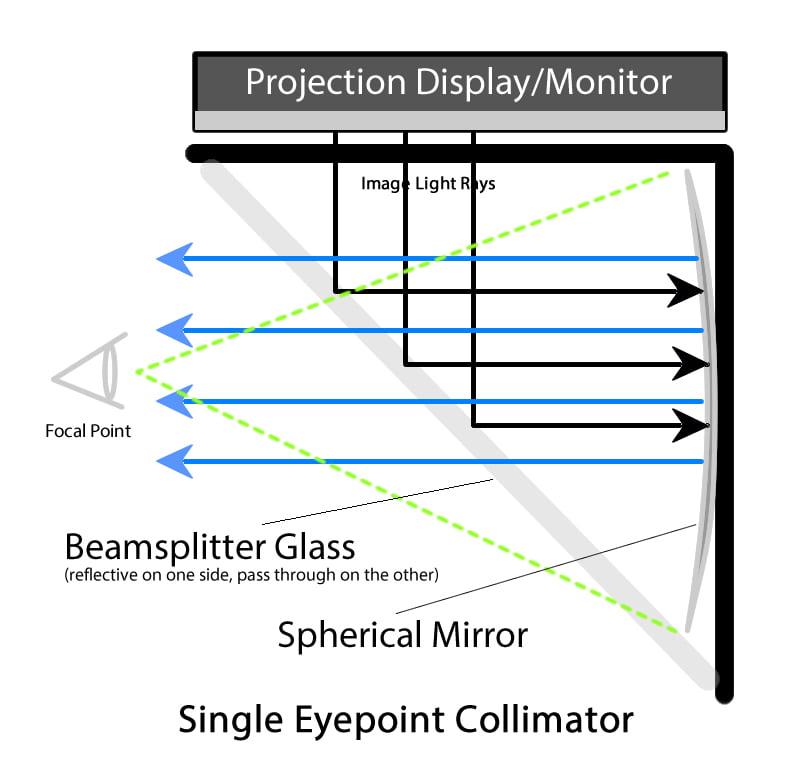
This meant that for one to see things being displayed on the mirror correctly the viewers eye-point had be at the exact focal point or the image distorts, grows, gets blurry, etc.
To get a “wraparound” view, you had to use multiple single eye point collimators, typically one straight ahead, one at 45 degrees and one at 90 degrees such that each collimator was positioned so the location of your head is the focal point of each collimator. You then just turn your head to look into each collimator and the view would be correct. But lean in any direction and the views go out of alignment.
Another drawback is that the captain can’t look over at the first officer’s collimators and see the correct view because his or her head would not be at the right eye-point so they’d just see an enlarged, distorted, blurry image.
Cross-Collimated Displays
Modern airline sims now use cross-collimated systems, which are wrap around spherical mirrors that focus the light in parallel rays from all angles such that the out the window view is correct no matter which seat you’re in or how you move your head. The Captain can look out the First Officers windows and vice versa and still see a proper view.
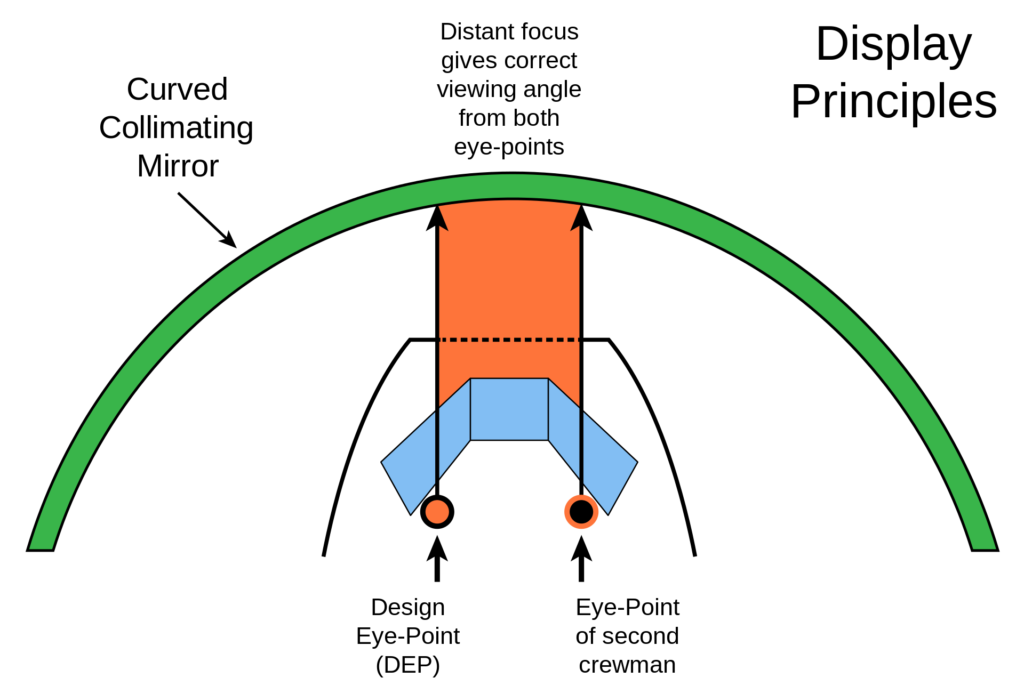
Long focus can be achieved in a flight simulator by using a curved mirror instead of a display screen by Wikipedia. Licensed under Public domain
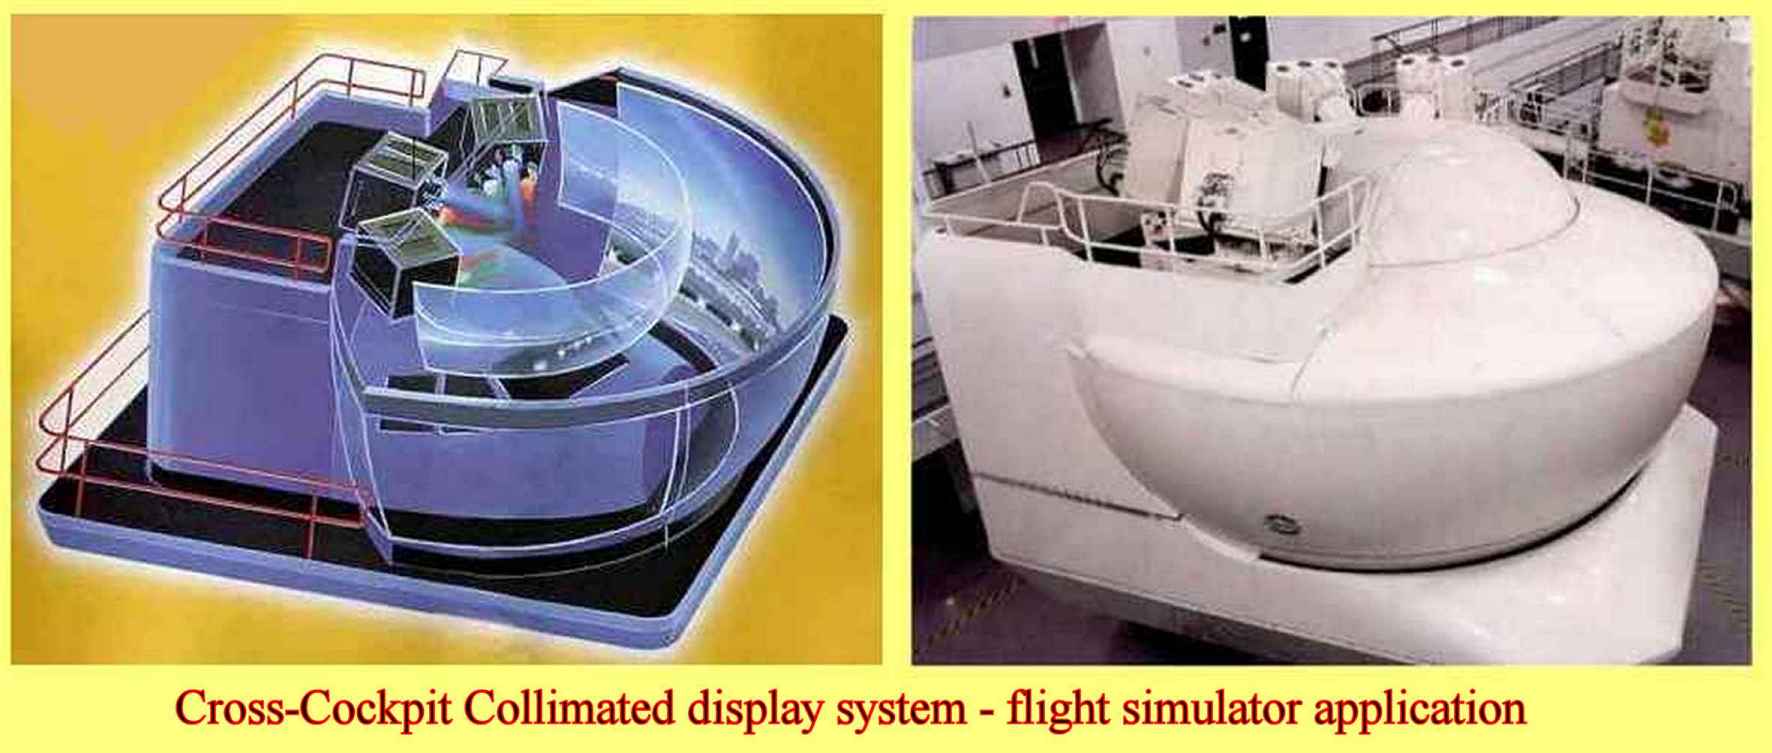
Cross-Cockpit Collimated Display System – Flight Simulator diagram and real example by Wikipedia. Licensed under Public domain
To create a perfectly spherical mirror of the size needed would be VERY heavy and difficult, if not impossible, to make in one piece. When mounting on a full motion platform, it becomes prohibitive. Instead, to get around the weight and size limitations, Full Flight Simulators use a thin mirrored mylar film stretched tight around the spherical frame, then sucked against the backing to create a perfectly smooth spherical surface. Combined with a curved overhead back-projection screen, the image reflects off the mylar similar to the single eye-point mirror and creates perfect collimation.
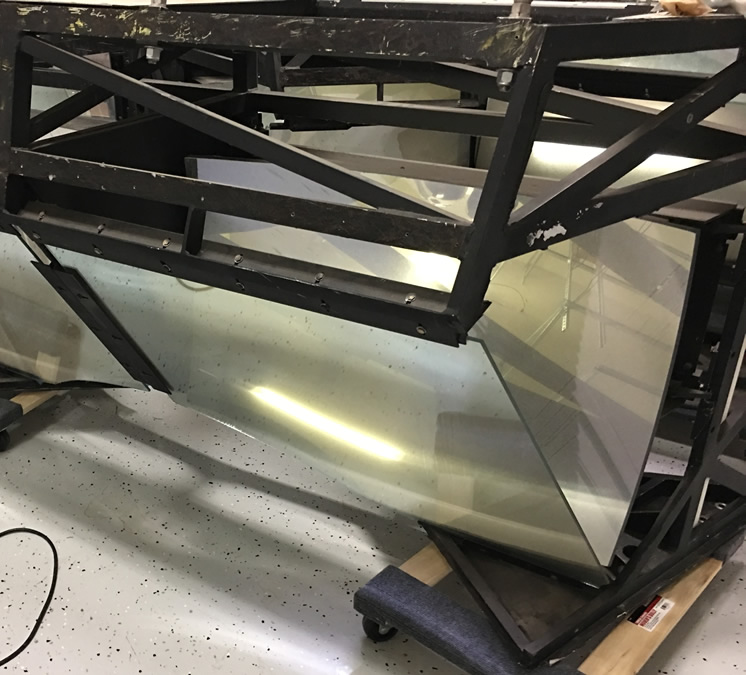
Mirror, Mirror on the Sim…My Visuals
And so we come to my current visual system. I’ll give you a sneak peak…can you guess what type it is? Hint: this section’s title should give it away 🙂


Hi, if you mean the two rails that run from front to rear and the cross strut, yes those came…